 Following are notes from our class on growing tomatoes. Hopefully, these notes provide enough detail to help you turn your own space into a beautiful garden.
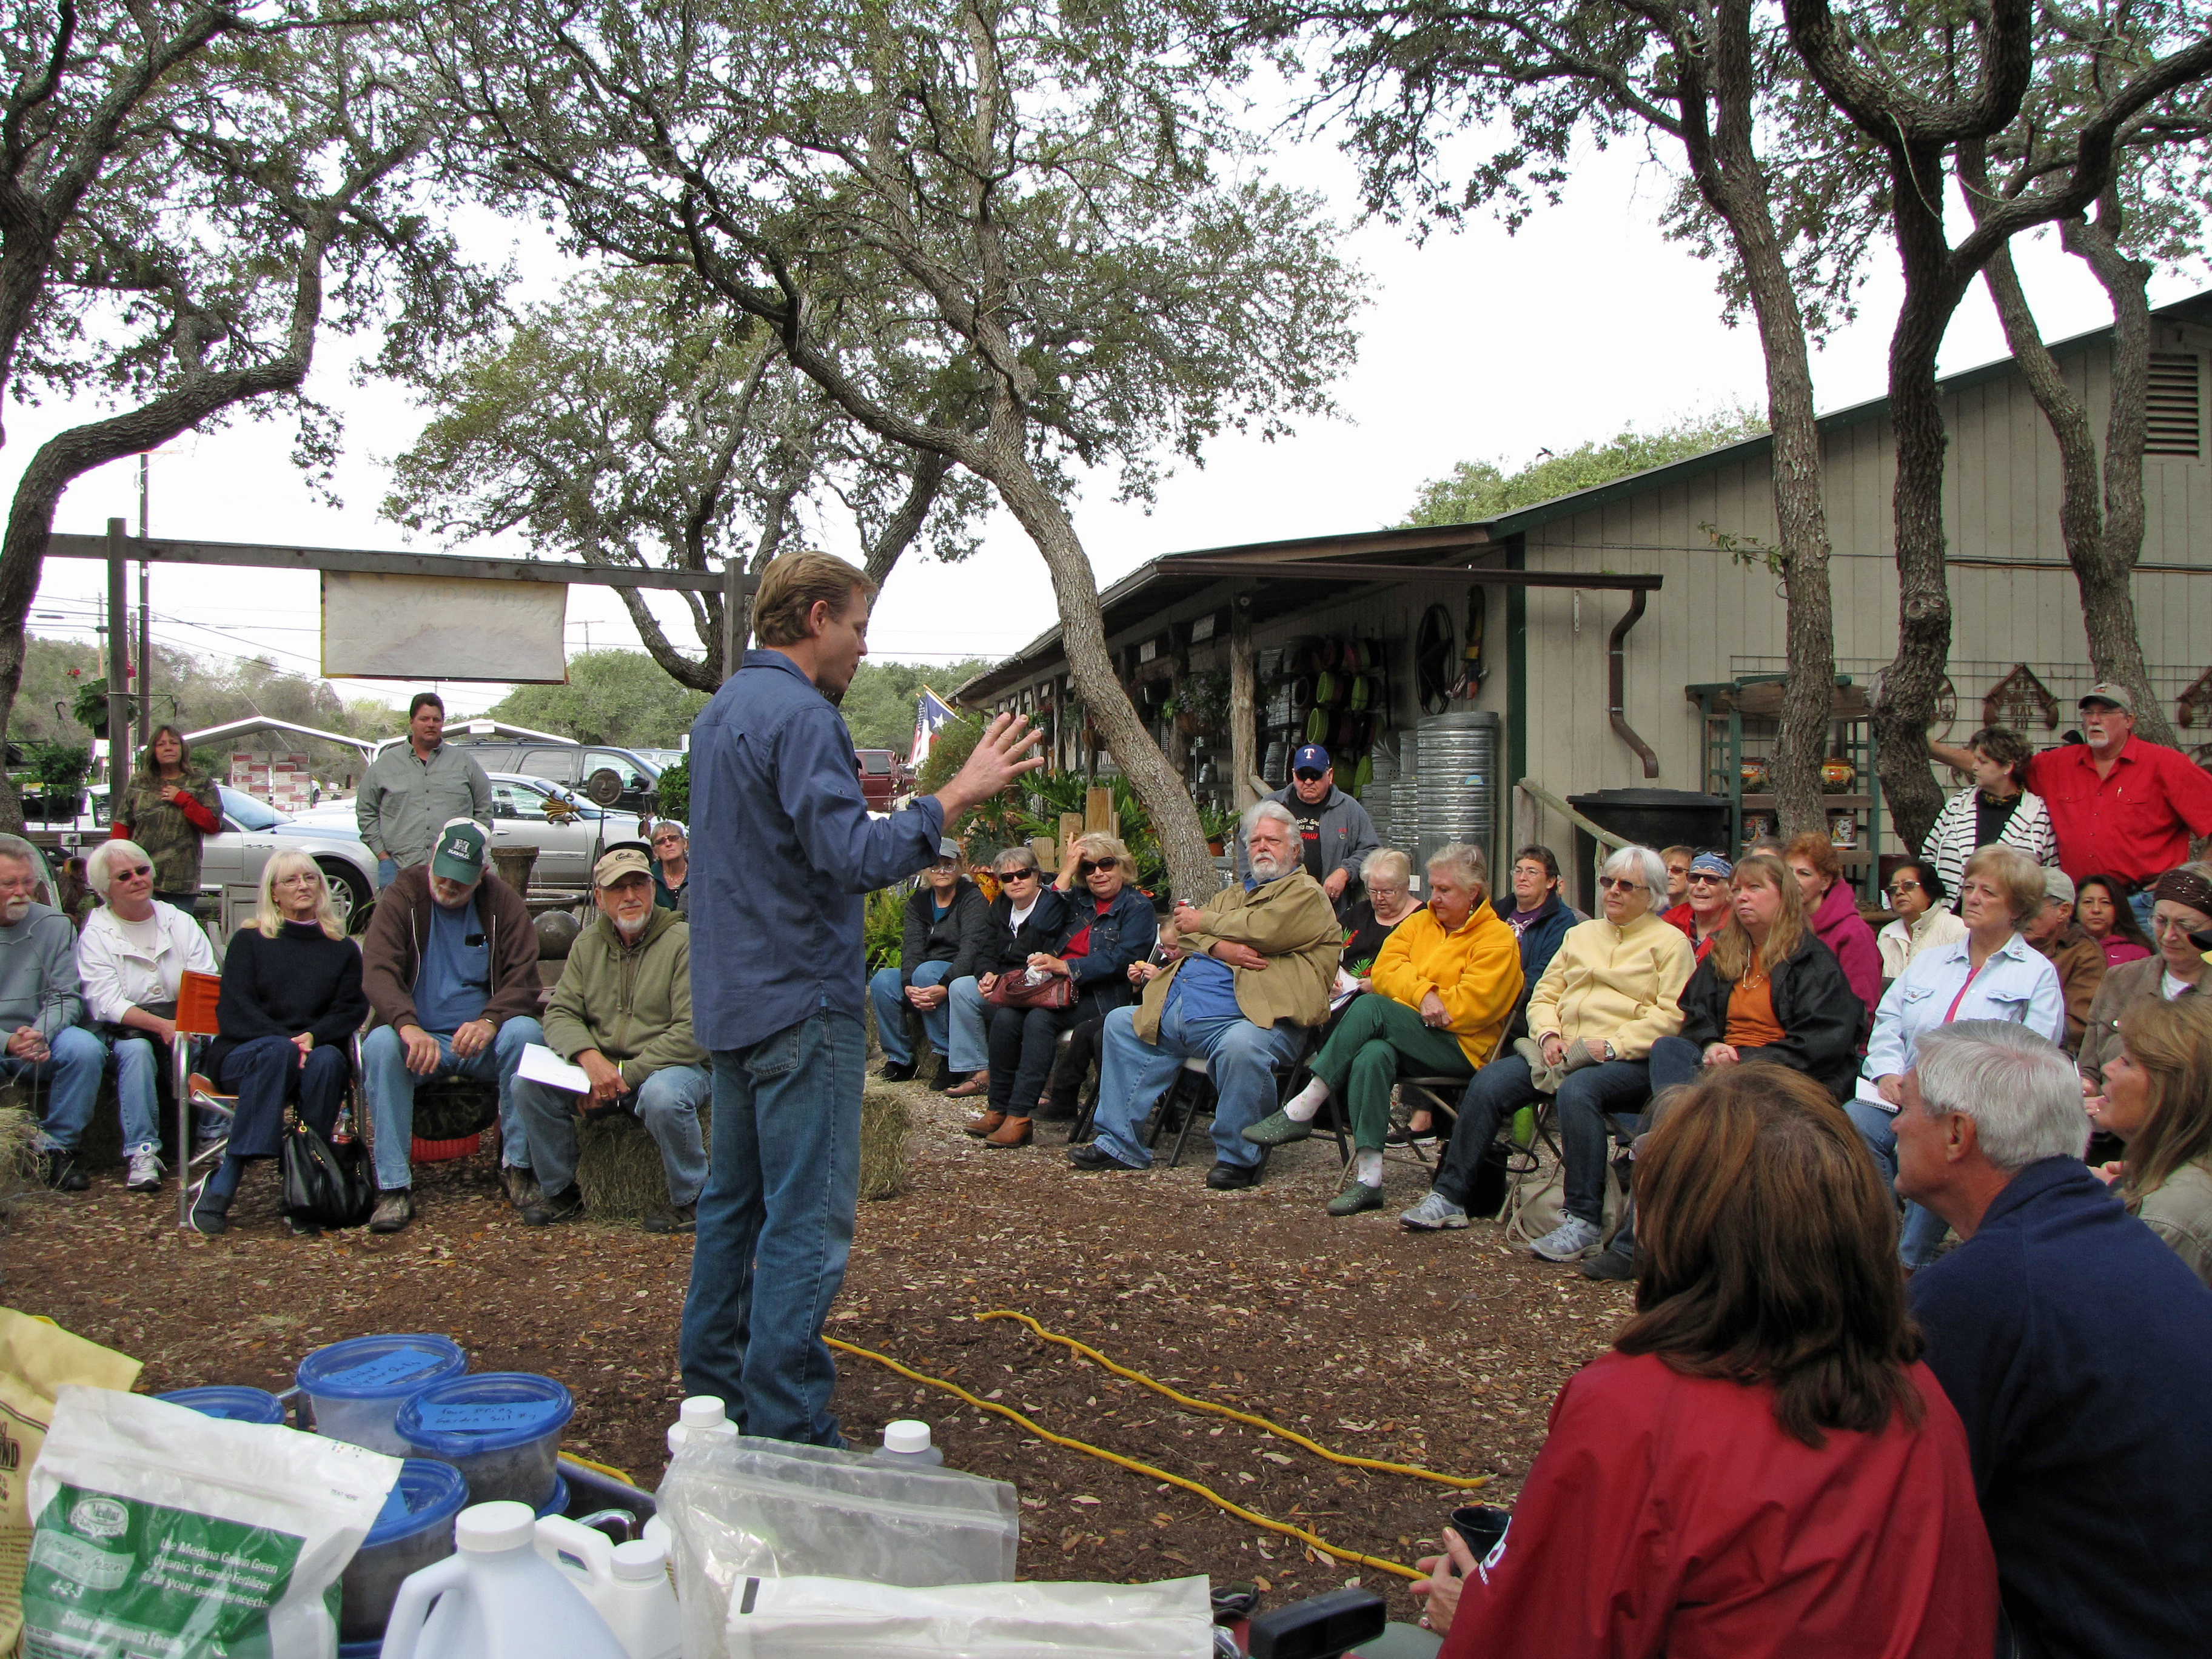
Thank you so much to everyone who attended. We started out with 20 chairs, but then had a total of 91 folks in attendance! Thanks for making the hay bales and creative seating work, and for the great engagement and questions. I believe this enthusiasm only further indicates how many of us want to know more about heritage methods for growing our own food.
Take Before/After Pictures of your Garden!
 I highly encourage you to take pictures of your space before you plant. Then, take another picture when your garden is full and lush. For everyone who attended the class, I will post before and after pictures of their garden this summer. I think it will be a great inspiration for new gardeners to see your success, and it will be so rewarding for you to remember how far your garden has come.
Ask Questions in the “Comments” Section
At the end of this post, there is space for comments. Please ask all tomato questions there, so we can all see the answers in one space. Please feel free to share all questions and comments, as many others will benefit from the discussion as well. You can also subscribe to this blog, and new posts will be e-mailed to you. We will regularly update the gardening posts this spring with new information.
If you live in Rockport, now is the time to get those tomatoes in the ground. Happy planting!
Tomato Gardening Class Notes, February 23
Goal: To grow prolific, delicious, healthy tomatoes with the least amount of work, money, and time.
- Prolific: measurable, quantifiable; 5lbs to 20lbs of tomatoes per plant is normal; our goal is to achieve 50lbs per plant or more
- Delicious: sweet, intense flavor that is unique to the garden; color, shape, texture
- Healthy: peak of vitamins, minerals, alpha- and beta-carotene, lycopene (the redness of the tomato), antioxidants; no synthetic chemicals; grown in as closed a system as possible (closed system means few or no inputs from outside of the farm)
Principles of our System
- We employ a system of growing food, based on: soil health, successive intensive companion planting, natural pest control, mulching, smart irrigation, composting, and fertilizing
- If you remove one element from the system, the entire program breaks down; likewise, employing only one element of this system into a different program may not show the same results
- The system is based on inter-connected relationships: seed to soil, plants to animals, pest to predator, gardener to the garden
- When the gardener achieves balance in the system, she grows the greatest amount of healthiest produce with the very least work; when harmony of the system is disturbed, the gardener’s job is simply to bring it back to balance (ex, infestation of pests)
- No synthetic chemicals: Round-Up (glyphosate), Ortho, Sevin, or any type of Scotts Miracle-Gro products. These chemicals are extremely inefficient and expensive in a backyard garden, and do much more harm than good. There are more effective methods that require less time, money, labor, and also produce healthier and better-tasting food.
- We will share proven and tested methods that were developed in the real-world laboratory of building a farm business; however, I am not an expert. Thomas Jefferson had been farming 70 years when said he was a “new gardener”, only learning how much he doesn’t know–and he was the greatest farmer in American history. We try to stay curious, open-minded, constantly looking for new ideas and methods to improve our gardening.
Healthy Soil
- The tomato garden MUST HAVE 8 hours of full sun.
- The first and continuous focus of the gardener should be on creating healthy soil. With good soil, gardening is easy and a lot of fun; with poor soil, it is extremely hard, or impossible to grow food. The gardener must grow her own soil: this takes time, and is worth it. (Show samples, native sand, and Four String garden soil)
- Healthy soil has the optimum amount of vitamins, minerals, and nutrition for the plant, in the ideal availability for the plant to absorb it; efficient feeding.
- Healthy soil requires less water; watering can be cut by up to 80%. Healthy soil “holds” the water better in a form easiest for the plants to uptake the water.
- The best pesticide is healthy soil. Why? Because healthy plants are very resistant to disease and bug damage. Weak soil -> weak plants-> most bugs. Healthy soil is also the best fertilizer. Ex: In a 2,000 sq ft garden we planted in Dec, we have not fertilized it since planting, are now in second season of crops.
- 90% of the beneficial bacteria and micro-organisms, the “life” of the soil, is found in the top 4 inches. This top layer MUST be protected at all times through mulch and intensive plantings; it dries out the fastest and receives the most abuse. Plant roots take nutrients from deep in the soil to the top.
- When Thomas Jefferson’s daughter wrote him a letter complaining that bugs were eating their crops, he said the problem was the weakened state of their soil, and they needed to get cover crops and manure on the gardens, and the bugs would go away.
Preparing the Soil to Plant Tomatoes
- We use animals cycling on mature gardens to prepare soil.
- Our goal is to translate our program to a backyard garden. Animals = manure, urea, micronutrients, pest control. Urea (or urine) is extremely high in nitrogen; 2/3rds of the nitrogen and 4/5ths of the phosphorus expelled from an animal is in the urine. Also, urine is highly soluble, the form easiest for soil and plants to utilize. (For this reason, we recommend only pastured poultry manure for backyard garden, where the urine is in the manure, rather than cow or horse manure–also commercial cow manure usually comes from feed lots, and you DO NOT want that in your garden.) Further, when animals are on our gardens, they are feeding on mature crops, the green material and left-over produce; so, they are recycling extremely healthy and chemical-free feed into extremely high-quality fertilizer.
- Chickens till top 2” to 4″ of soil, the pigs 10″ to 12” deep. This thorough tilling is extremely important to aerate the soil. You cannot get same effect with a commercial tiller in your backyard garden–you have to dig up the soil, as explained in “Bio-Intensive Dig” in the next section. Pigs also eat out the root system and turn the roots into pure fertilizer. Even when placing pigs on a bare garden, they begin to feed on roots and it smells like a freshly mown lawn for about a week. As much green material as was growing on top of the garden, there is that much in roots beneath the soil. Chickens eat the green material on the surface and clean up a lot of pest insects. We spray molasses tea on garden after removing animals to breakdown manure, then let it sit 2 wks, then plant next garden.
- 90% of nutrition and beneficial bacteria are in the top 4″. This top living layer of soil must be protected.
- Our garden soil is entirely made up of: 1) oak leaves broken down into the soil, 2) animal manure, and 3) the trampled green material from plants. You can make your own soil in the same way; however, instead of putting animals on your garden, pull up all your green material and compost it with oak leaves, and when the compost is ready put it back on the garden. It will take you a little longer, but you will eventually build extremely rich soil that is completely unique to your garden.

Bio-Intensive Dig Method, First Trench


- Second Trench, Throw dirt into First Trench, and so on

- We recommend the BIO-Intensive Dig Method. This method breaks up all weeds from the surface and small roots and clumps from the soil. It allows compost to be mixed deeply into soil. It tills the soil. It aerates the soil. Any new garden bed that can’t be prepared with animals, should be prepared with this method:
- 1) clear the row as much as possible of brush, grass and debris. No herbicide is necessary, as the weeds will be dug up.
- 2) apply ½” layer of compost (Ladybug Revitalizer); apply a thin ¼ inch layer of “Texas Greensand” by Gardenville
- 3) Dig first trench and fill buckets. The folks at Bio-Intensive highly recommend you stand on a board or plywood sheet while working to keep from stepping on soil–that shows how sensitive the soil is. (Note: the dirt in the buckets will be left over at the end. Put this dirt in a pile of oak leaves to start your compost pile. Then put all your organic household waste in the compost, along with all left-over green material in your garden at the end of the season.)
- 4) Dig next trench and throw dirt into first trench, then third trench fills second, and so on, to end of garden row
- 5) DO NOT walk on row after digging. The soil will be “fluffy” and highly aerated; stepping on it will hurt the structure.
- 6) Add another ½” layer, or more, Ladybug compost, and another thin layer of Texas Greensand.
- You can’t add too much compost, but a half-inch or inch over the finished row is plenty. The next time you need compost after this planting, you will have made your own!
- The row is ready for planting.
- The BIO-Intensive Dig Method only needs to be done on the first new garden, and then maybe every 3 or so years after the first planting. The second dig will be very easy and fascinating, as you see the difference in the soil you created.
Companion for Tomatoes
- Intensive successive companions: Try to always think “intensive companions” every time you plant anything, so you always plant 2 or 3 mutually beneficial plants at a time. Every plant in nature grows better if it is grown with the right companion–plus, you will better utilize every square inch of your garden and increase bio-diversity. The more diversity in the garden, the stronger it is.
- The BEST companion for tomatoes is collard greens. Ideally, you will intensively plant collard transplants with your tomato transplants–or, plant collard seeds 4 weeks prior to tomato transplants. Plant collards 6 inches off center of the row, 12 inches apart down the row. The leaves will grow together to form a canopy over the soil, shading and protecting tomatoes. Tomatoes will vine over the collards. Collards are a “bug trap”, and will protect tomatoes from many enemies; additionally, the scent of collards confuses or repels many tomato pests. Plus, you can harvest and eat the collards all through the season.

Collards Growing at the Feet of Tomatoes
- Marigolds are an excellent companion; use as many different varieties as you can find, to increase bio-diversity. The flowers attract beneficial predators and bees. The roots prevent nematodes; the entire plant emits an odor that repels or confuses predators. Plant them very thick as a living mulch 6 inches away from base of tomato and all around plant, and they are really beautiful.
- Hairy vetch is a good companion, but must be planted 90 days before tomato transplants, then cut over row to form mulch.
- Plant dill and sweet basil on the “sun side” of the tomatoes, frequently through the tomato bed. Both herbs will grow spindly and tall; let them go to seed. You can take from the leaves, and the flowers repel and confuse pests, and are beautiful and edible.
- The “heat curve” in Rockport is extremely steep; we go from frost to burning heat in a very short time. We must plant some varieties that are very fast to mature (Early Girl, Juliette) and other varieties that produce fruit with high night-time soil temperature (Solar Fire, Juliette) to get the most fruit for the longest time.
- Tomatoes require moderate heat to produce fruit (daytime temps from 60’s to 100’s). However, tomatoes DO NOT like hot weather at night. Night time soil temperature is a major problem for tomatoes in our area. When the nighttime soil temp rises above 70 degrees, the tomato stops producing fruit. The vines may live, but they will not make tomatoes. Thick mulching in June-Sept is critical to producing tomatoes through the summer.

Tomato Varieties:
- Use only indeterminate (vining) varieties. Heirloom varieties are extremely difficult to grow in Rockport, and at very best, produce small yields that are very susceptible to heat and pests. (After good soil is established, you may try Roma, San Marino, Purple Cherokee, and Homestead, mixed in with recommended varieties.)
- Early Girl: 50 days to maturity, great producers of good med sized tomatoes
- Juliette: best of all; roma grape; produce in 50 days or less and through very high heat; prolific and very delicious tomatoes
- Solar Fire and Heatmaster: Produce in very high heat, when night-time soil temp is up to 75 or higher
- Cherry, Sweet and 100: These cherry tomatoes produce early, late, prolific, and are best tasting
- Celebrity and Better Boy: Most popular, good varieties, Better Boy are larger slicing tomatoes
- If you plant five plants, try one of each; you will have plenty of tomatoes of all sizes, and will have tomatoes from April (or sooner) through July (or later)
- With 24″ spacing on a hog panel trellis, as we recommend, you can fit five tomato plants in a 12 to 14 feet row. That row will also include a lot of collards or marigolds, with a basil or dill for each tomato plant. Further, you can plant a cucumber at the base of each t-post, and let them vine up with the tomatoes. Each plant will grow better in this companion group, than if they were all planted on their own or in a mono-culture.
Planting the Tomatoes
- To plant the tomato, dig a hole according to size in the center of the row. Bury about 2/3rds of the tomato plant (trim branches on lower part of stem if necessary). The deeper the root system, the more prolific the tomato plant will be.
- Add a handful of crushed oyster shells (calcium) and a handful of wood ash (potassium); use ONLY live oak wood ash that you make—nothing else
- NOTE: potassium is essential for the sweetness and flavor of tomatoes; the sugars of the tomato need potassium to activate, and wood ash from live oak trees is the best possible source to create extremely flavorful tomatoes; you WILL taste the difference!

Crushed Oyster Shells and Wood Ash (from live oak trees only!) should touch roots
- You can as also add a handful of Gardenville Rocket Fuel on this first garden, which may help native Rockport soil to develop
- Plant tomatoes with the roots touching soil amendments
- Fill hole with dirt without packing down too tightly. Packing the dirt too tightly makes root growth more difficult.
- Add another handful of crushed oyster shells and wood ash on the soil around the base of the plant
- Lightly sprinkle stone-ground corn meal on and around plant, to prevent “black spot” and “early blight”
- Move 24 inches down the row, and plant next tomato (24” spacing with hog fence trellis; 36” with inferior round trellises)
- NOTE: potassium is essential for the sweetness and flavor of tomatoes; the sugars of the tomato need potassium to activate, and wood ash from live oak trees is the best possible source to create extremely flavorful tomatoes; you WILL taste the difference!

Tomato Trellises
- Commercial tomato cages with concentric rings are the most commonly used, but least effective, trellis. If your plants grow very healthy, as they should, the cages will collapse, or lean, and the wire rings will break. You will definitely need a stake in the ground to hold up the trellis, and will need to tie strings to some of the vines to hold them up.

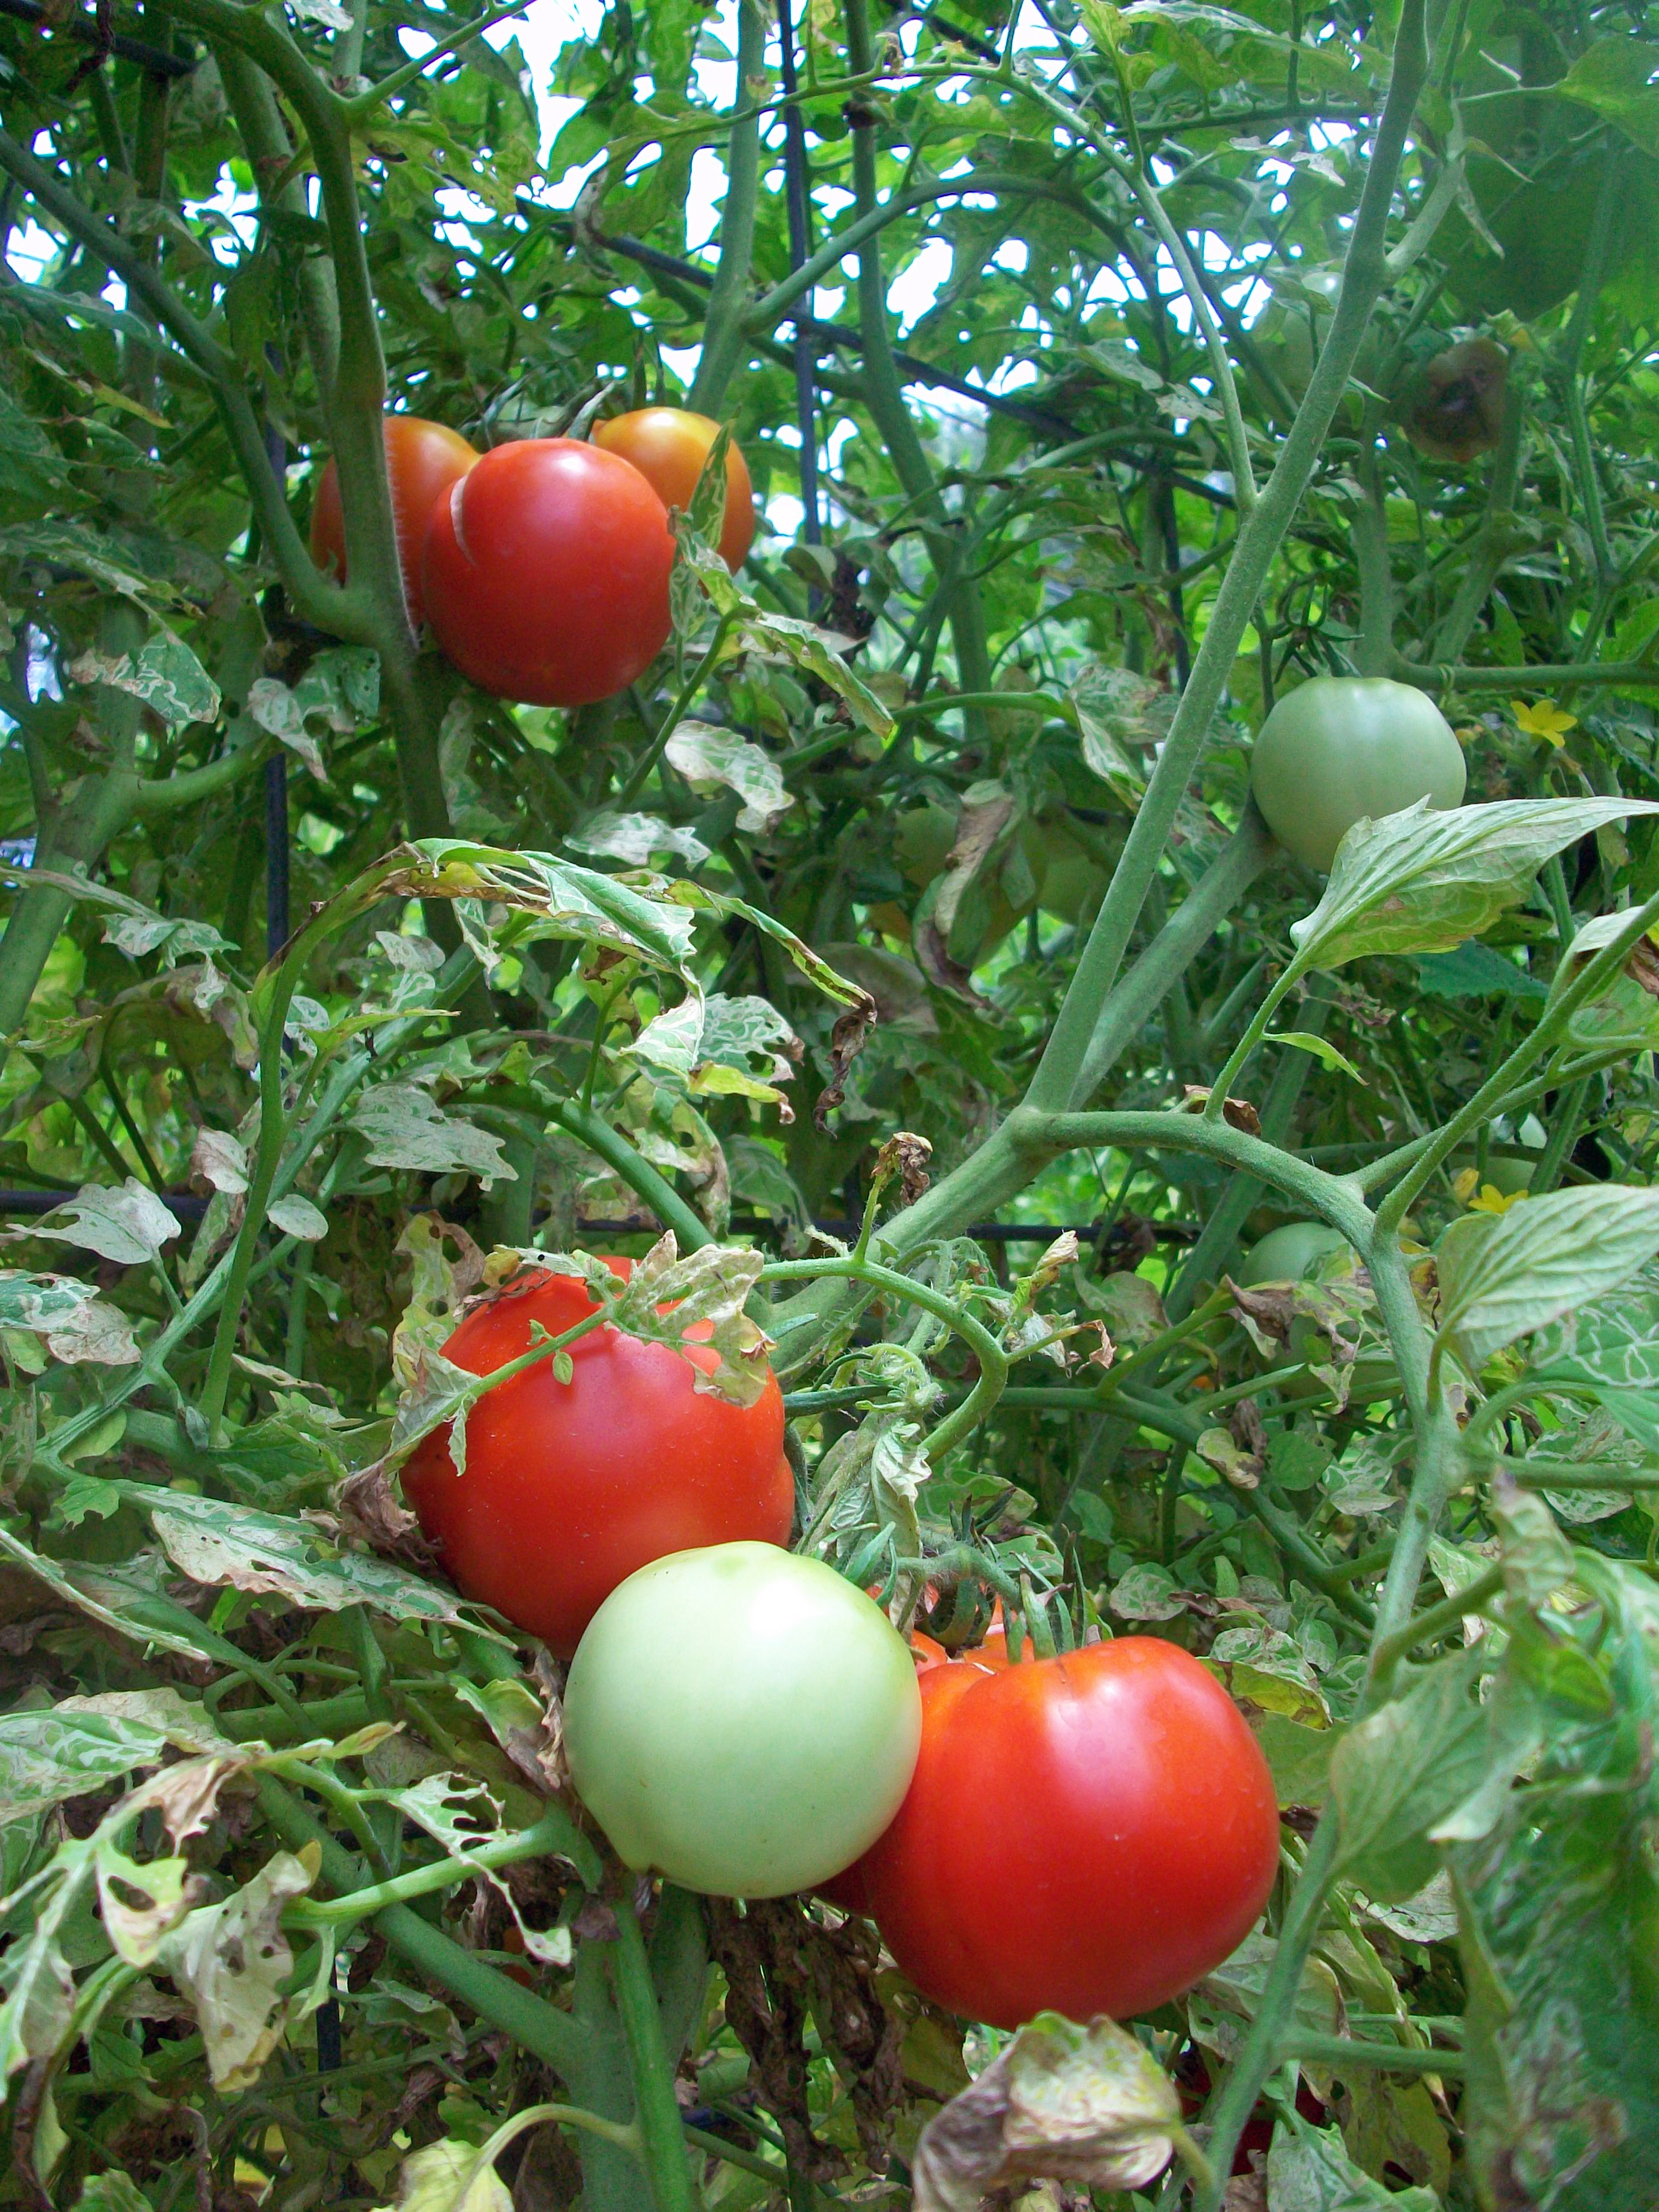
Early Girl Tomatoes Growing on Trellis of Hog Panel Fencing
- The ideal trellis is hog panels or 4”X4” square fencing tied up to metal t-posts. Weave the vines in and out of the squares in a fan shape up to the top. When the vines reach the top, left them grow back down on the shade side (opposite sun side) of the trellis. Your trellis will give plenty of space for the tomatoes to grow.
- As a backyard gardener, I highly recommend you figure out how to make this trellis, or have someone help you. Once you cut the right length of fence and have the posts, you can use this over and over for 20 years. It hides easily when you don’t want it. You can grow tens of thousands of tomatoes on this before it wears out, and they are the easiest to install, take down, and, especially, to harvest from.
Mulching the Garden
-

Adding Live Oak Leaf Mulch
Mulch is essential to protect the soil; to regulate soil temperature and moisture through insulation; to prevent weeds; to provide a sanctuary and hiding place for beneficial predators; and to provide organic material to eventually mix into the soil.
- Live oak leaves are the BEST possible mulch for our gardens, and the ONLY type of mulch that I recommend. Live oak leaves are the secret weapon for a Rockport gardener.

- The rumor about there being an acid or chemical in our oak leaves is false.
- We have HEAVILY mulched our gardens with live oak leaves for years with magnificent results.
- In fact, our compost it 60% oak leaves; leaves are the bedding for our chickens; and much of our wonderful garden soil is oak leaves that have broken down into the soil.
- The best mulch is always the most native. There are tremendous piles available everywhere, for free. Red cedar mulch, pine mulch, anything not from a native tree is undesirable, as it “shocks” the garden with a foreign presence that is alien to the natural cycle. At best, this foreign mulch simply doesn’t hurt the soil. But once breaking down in the soil, it is a foreign agent that our natural ecology does not like.
- Never leave the soil uncovered; mulch as soon as tomatoes are planted.
- How much mulch, and when to add mulch? Thickness depends on the heat; the hotter it gets, the thicker the mulch needs to be. Too thick? Never. If your transplant is one inch tall, put 1” mulch and let a couple of green leaves stick out for photosynthesis. Keep adding mulch as the plant grows until you have 10 to 12 inches of mulch at the base of the plants. The only problem the mulch may cause is difficulty walking in between rows, but this is not too difficult and you will not mind while you are picking incredible tomatoes from your plants in the hottest weather.
Watering the Garden
-

Drip Tape with Connection
Drip irrigation beneath a mulch bed is the ideal watering method. (show sample)
- You can order the product from 1-800-SAY-RAIN. This is commercial drip line, NOT soaker hoses. The drip irrigation line goes under the mulch exactly where you want the water, down the center of collards/tomatoes row.
- Water plants infrequently and deep (lower than the lowest level of root). Wait until the soil is almost dry, but not completely dried out, to water again. This allows the roots to “reach” down into the soil to find water, which causes the plant to grow. The stronger the tomato root system, the more tomatoes will be produced.
- The soil will dry from the top down, especially in the relentless wind of Rockport. With correct mulching and intensive planting, you will typically water 1 time per week in April/May, 2 times per week in June/July, August may require 3 times per week. NOTE: after first planting the tomato transplant, you may have to water more frequently, until the plant is established, because the roots are in the shallow soil that dries out faster.
-

Running Drip Tape Irrigation is Fast and Easy
A “sunflower hedge row” or some other type of wind break may be helpful for the garden, to keep it from drying out so quickly, but only if it does not shade the garden.
- Water in the evening, or at night. Plants dedicate more energy into growing in the morning, and up-taking water in the evening. Watering in the evening allows for maximum water absorption, minimizes loss of water through evaporation, and helps cool the soil for the important night-time soil temperature, which must stay below 70 degrees. You should only have to water for a couple hours to achieve maximum effectiveness, then you are probably wasting water.
- As your soil health improves, you will see a corresponding decrease in water needs in the garden. In year five of your garden, you will be stunned at how little water you need.
- To know when to water, find a place in the row, and dig your finger down about 6″ to 8″ into the soil, and check soil moisture. If soil is wet or soggy, let it dry out more. If the soil is dry, water the garden.
- Also, you can let the plants tell you when to water. Watch the leaves–when they begin to sag, water the garden. Don’t let the plant wilt, just notice the leaves. You will be able to tell pretty quickly what sagging leaves look like. Within 20 minutes of watering, the leaves will begin to perk up and turn a darker shade of green. Check the soil with your finger when the leaves sag, and you will quickly be able to figure out the relationship between soil moisture and the plants in your garden. Letting the garden tell you when to water is a wonderful part of your relationship to the garden, and your role in maintaining balance.


Fertilizer
- Notes: nematodes = poor soil. Crushed oyster shells = calcium, which prevents blossom end rot. Wood ash, from live oak trees ONLY = potassium, which creates sweetness in flavor. Fertilizer = liquid seaweed + fish emulsion + molasses, and a good recipe is Garrett Juice.
- 30 days after planting, lightly side dress with pastured poultry manure (2 handfuls/plant).
- Lady Bug fertilizer, spray leaves until dripping, every two weeks
- Garrett Juice, sprayed until leaves are dripping, every two weeks
Tomatoes in Containers
- Tomatoes can be difficult to grow in containers in Rockport. Tomatoes require a night-time soil temperature between 55 to 70 degrees to set fruit. Containers, even ceramic pots, heat up and cool down very quickly, compared to soil. By the month of May, heat fluctuations are hard on the root system, and the night temperature is usually 70 degrees or more, prohibiting the plant from setting fruit.
- Also, the relentless wind of Rockport tends to dry out the soil in pots very quickly. The wind and heat, beginning in April, can dry out pots continually, no matter how many times per day they are watered. Pots can’t be mulched the way a garden bed can, so it is very hard to stop this drying out effect.
- One way to get the most out of tomatoes in containers is to bury them in the soil, up to the lip of the pot, when temperatures heat up in April. The soil of the ground will insulate the pot. Then, heavily mulch the plant with live oak leaves, up to 10-12 inches. By doing this, your container tomato will have the advantage of heating up and growing very quickly early in the season, and then stay cool at night later in the season.
- Companion plant marigolds around the tomato in the container, just as in our class. Thickly planted oregano is also a good companion for tomatoes in pots.
- If you live in apartment, or for some other reason, are not able to bury your plants in the soil, you may have luck with the “Patio” variety of tomato. In containers, some of the determinate, or “bush”, varieties, will produce good results. Determinate tomatoes produce only a fixed amount of tomatoes, then stop producing. The Patio variety will produce all of its tomatoes in about 60 to 80 days, so you can get all your tomatoes in before it gets too hot for them to set fruit. When the night tempurate hits 70 degrees, you can remove the tomato from the pot, and replace it with peppers or okra.
Natural Pest Control
- Most of our pest control comes from beneficial predators.
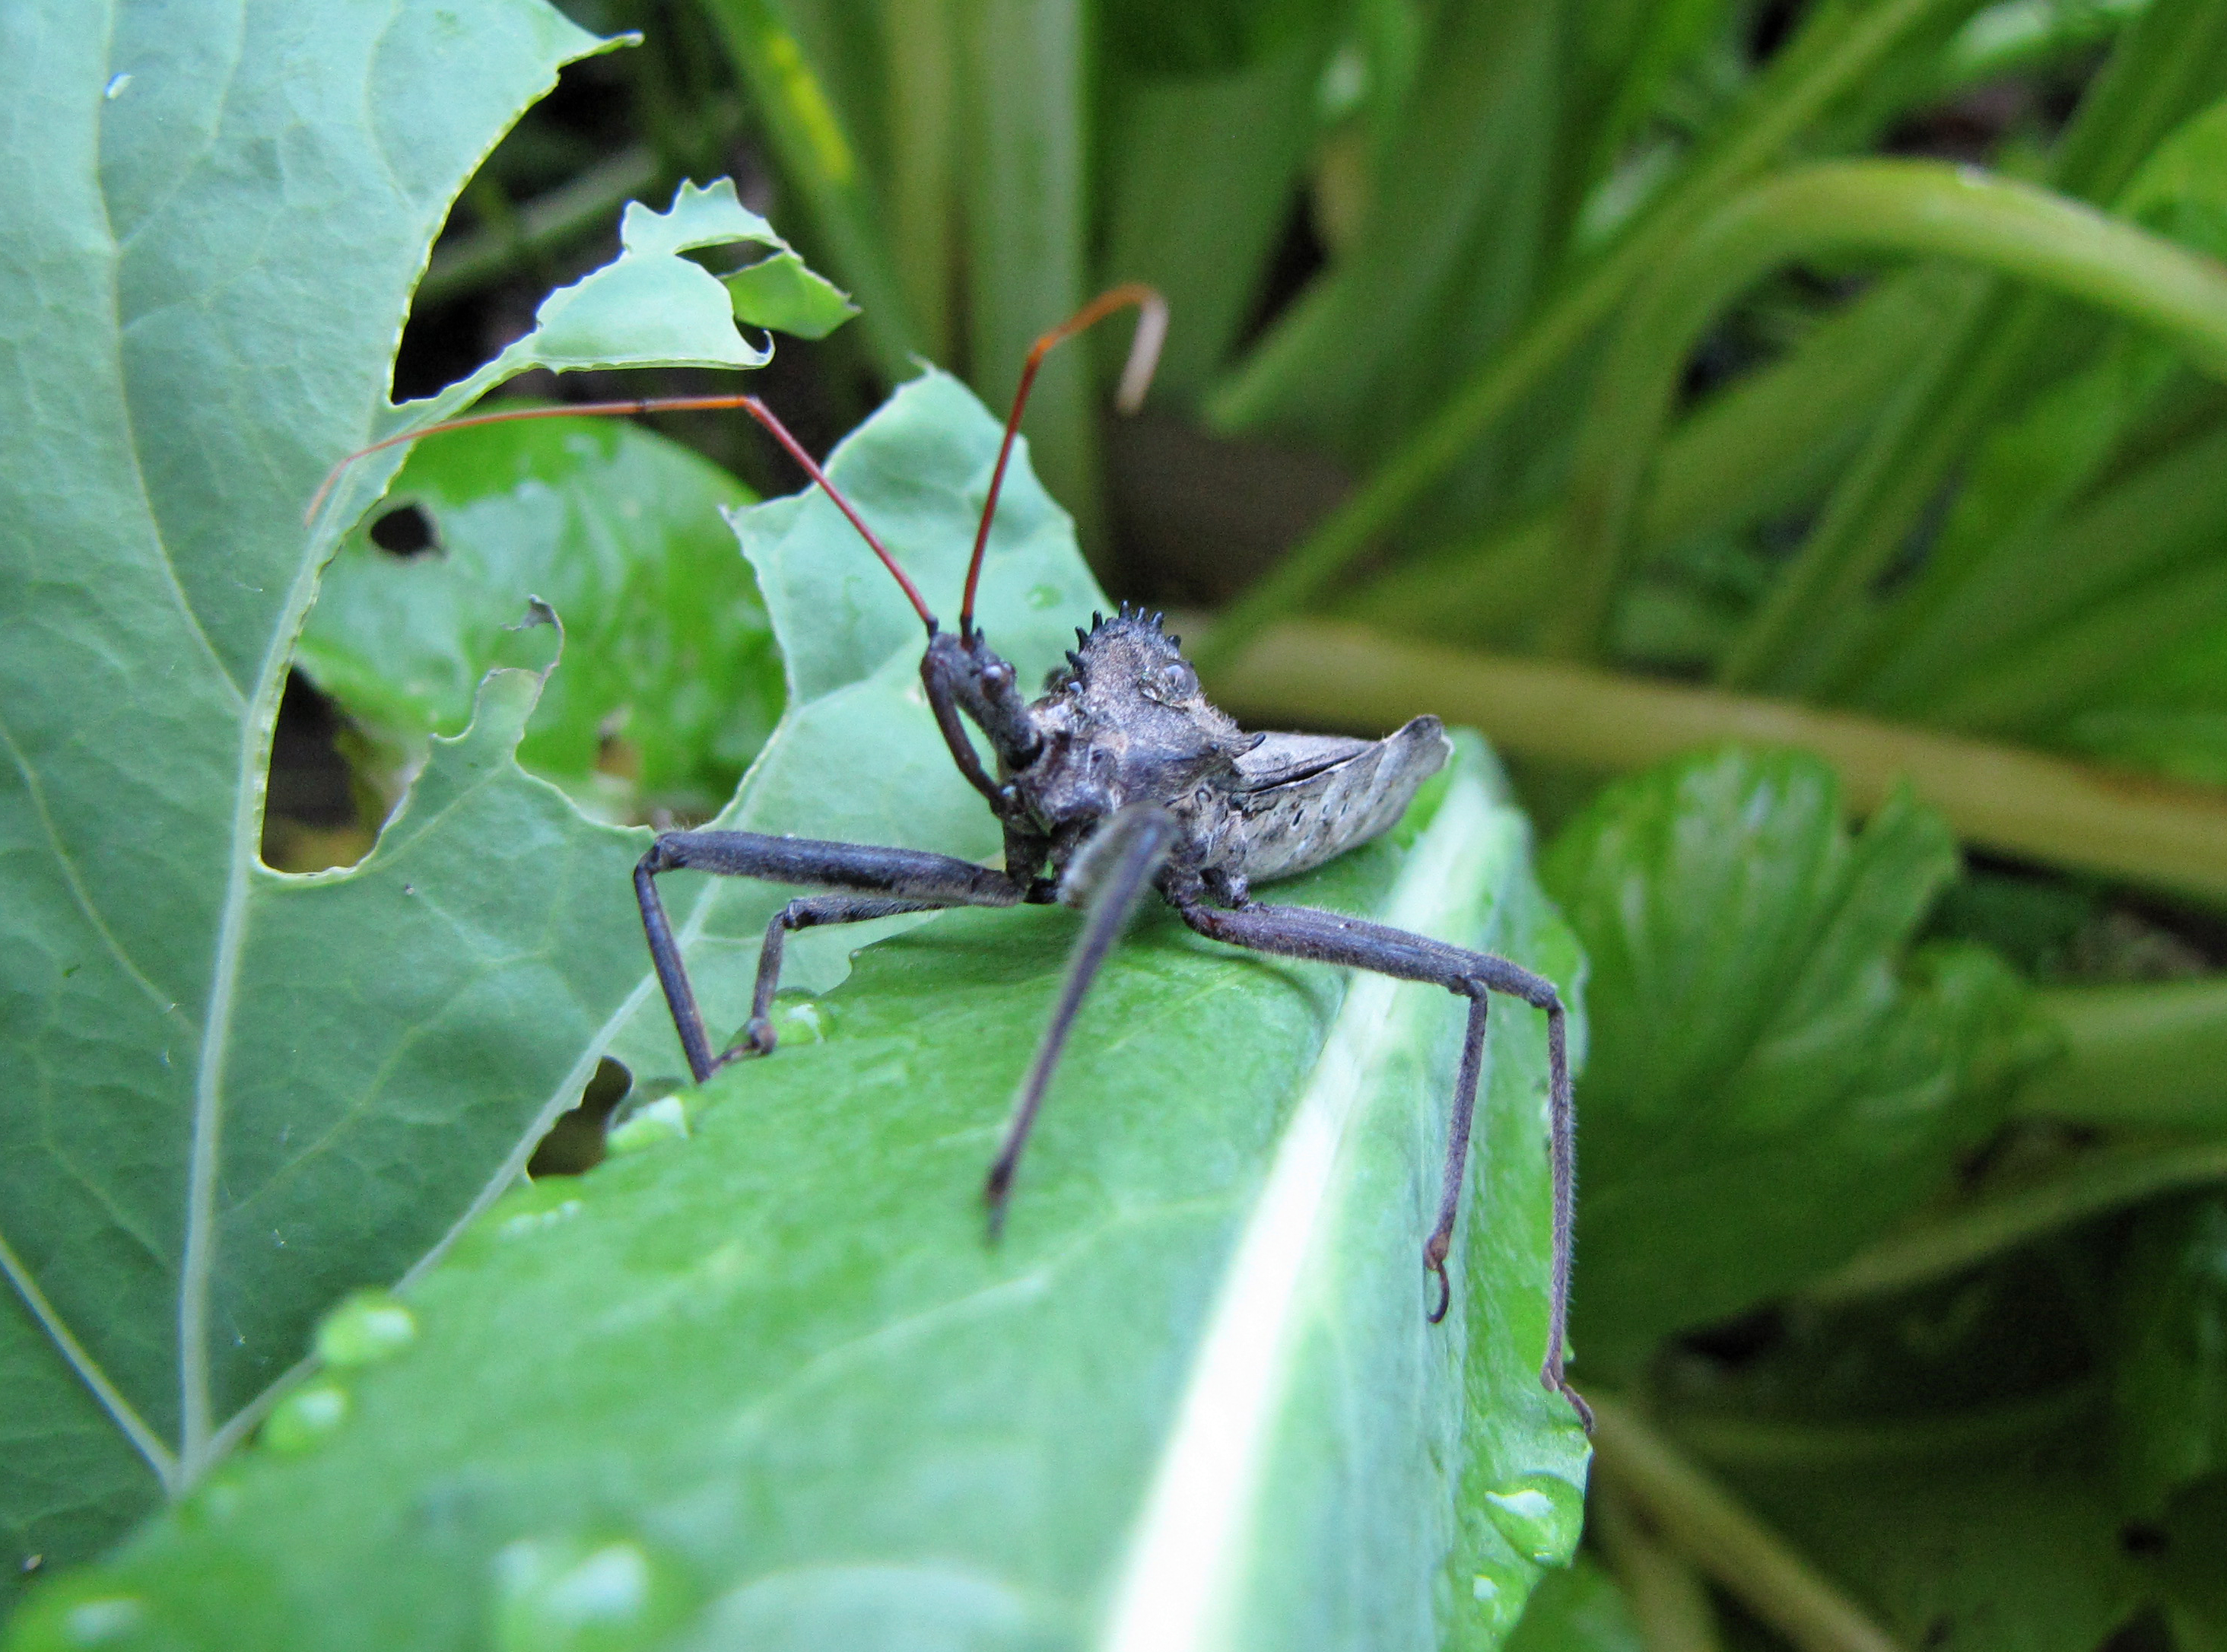
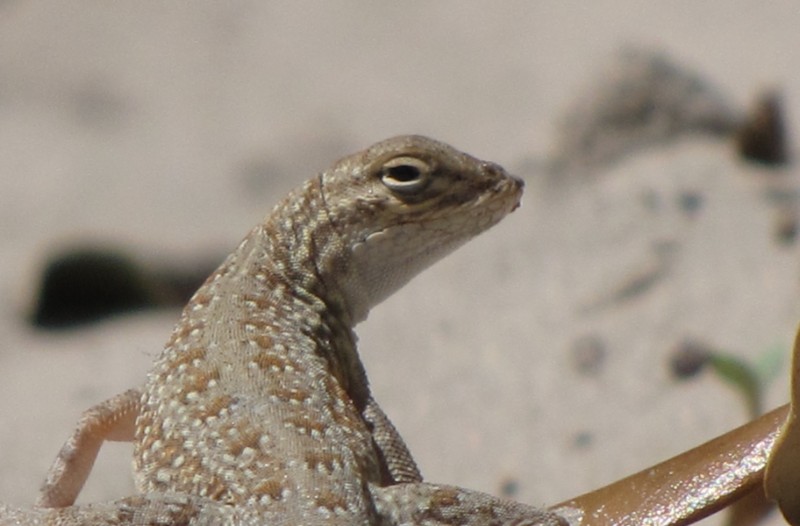
- They are: birds, wasps, dragonflies, lacewings, ladybugs, lizards, frogs, toads, giant wheel bugs, assassin bugs, etc. If you attract these predators to your garden, you’ll have to treat minimally for pests.
-

Giant Wheel Bug in Four String Garden, Excellent Beneficial Predator
To attract them, start a “beneficial predator garden” close to your vegetable garden. This could just be a corner of the lawn you don’t mow, or a beautiful hummingbird garden. The key is to have a dense “jungle” for the predators to hide in, when your garden is bare. When the garden becomes lush, and the pests arrive, simply stop watering the predator garden. The beneficial predators will go to the food source, and solve all your pest problems.
- BT is an organic caterpillar spray that should be sprayed only at night, and on the underside of leaves, to kill caterpillars.
-

Lizards are Extremelly Beneficial in Garden
The most effective pesticide, after healthy soil, is a headlamp [show example]. The headlamp is a vital tool in understanding what is happening in your garden, in building your relationship with the garden. All garden pests are active in your garden at night. Some pests feed only at night. If you have never tried this, exploring your garden at night with a headlamp will be like seeing the garden for the first time. Most caterpillars, grasshoppers, and many other pests hide in the dirt during the day, and the underside of leaves. But they are all out at night, and they are attracted to the light of your headlamp. As you walk through the garden, the pests will come to the tops of plants, and struggle to get into the light for you to see them. In the past, you may have had trouble knowing what is destroying the garden. However, you will immediately know everything going on in your garden with a headlamp at night.

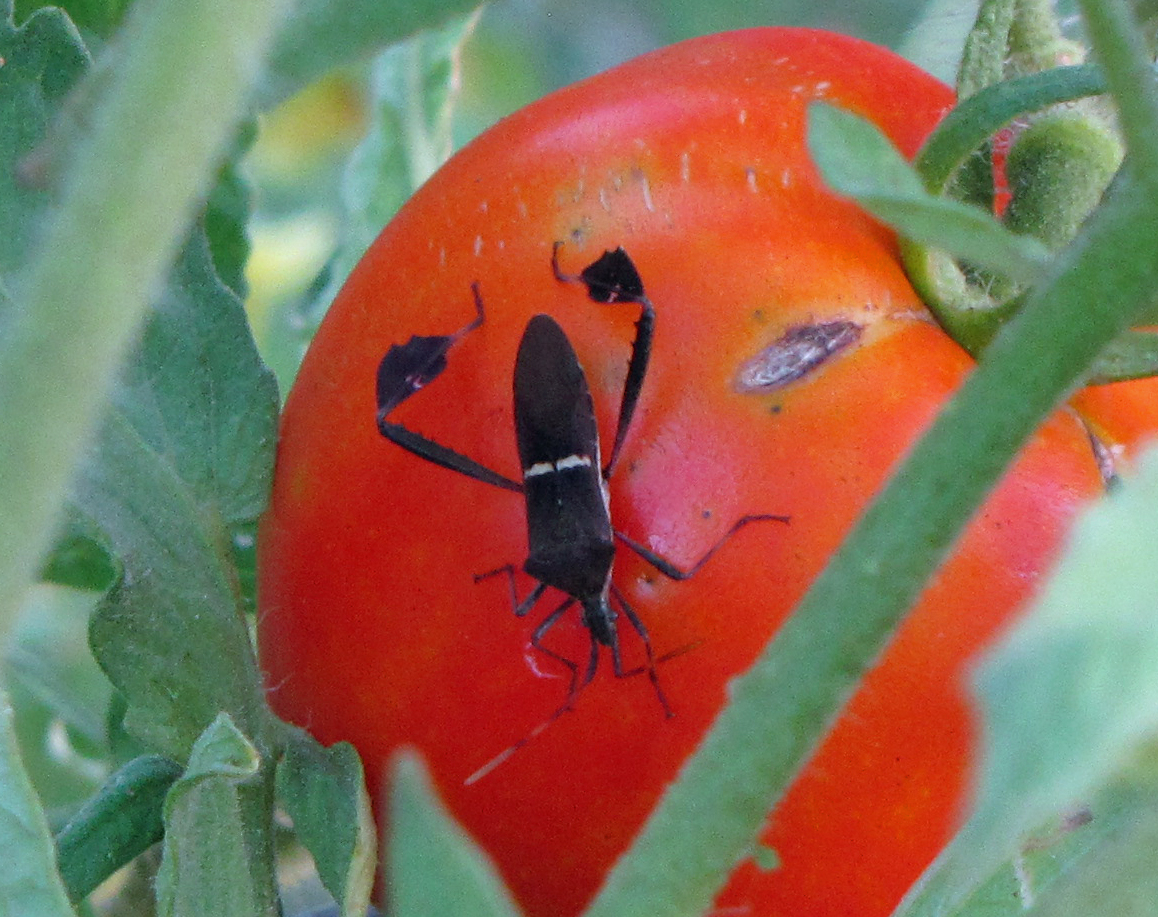
Leaffooted Bug, a nasty pest, easily cured with a headlamp and a pinch
- With a headlamp, you can use the “pinch method” (which means pinching the bugs with your thumb and index finger) to eliminate a lot of pests, quickly and easily. Doing this at night saves a great deal of time, energy, labor, and gives you insights into what is attacking the garden. During the day, it is nearly impossible to pinch grasshoppers, caterpillars and leaf-footed bugs. At night, however, you can pinch more pests in 20 minutes than you could during 8 hours of daylight. The pests will literally come to you. (Give example of leaf-footed bugs.) They sting the tomato and it gets a sun-burned, dry appearance. Leaf-footed bugs have a bacteria on their proboscis that causes the tomato to have spots. To my knowledge, its only enemy is the banana spider. So, the only safe, effective way to remove them is to pinch them. Many predators don’t like them and others can’t catch them because they can fly. We began to notice that leaf-footed bugs were evading us to avoid being squashed during the day. They will crawl to the other side of the plant, or fly to an entirely different row. However, with a head lamp, you can kill nearly all the leaf-footed bugs in 30 minutes a night for one or two nights.
- When your program is in balance (healthy soil, intensive successive companion plants, mulch, beneficial predators), you will not spend very much time pinching bugs. (I have only pinched bugs on 2 nights, 20 minutes each, in the last 4 months; in summer, maybe 20/30 minutes every two weeks) You will still have pests in the garden; however, the beneficial predators will take care of most of them, so your vegetables don’t suffer. Your job as a gardener will be to bring balance during the first part of the infestation, until the predators catch up
- In nature, there is always a steep increase in the population of pests, then a steep increase in predators, then pest population declines. In the garden: fast population rise in pests>garden damage>rise in population of predators>balance. Your role is to be present in the garden during the short time between the rise in pests and the rise in predators. In our garden, this is usually about 15-30 mins per night for 2 nights, for each infestation. Check on the 3rd night and you should see plenty of frogs, toads, and lizards, and during the day there will be wasps, birds, dragonflies, lacewings, and etc., and you won’t have to pinch (I leave the pests for the predators to enjoy). You only need to protect your garden from the pest infestation for two nights as the predator population catches up to the pests to restore balance. If you get a really bad infestation, you may have to do more pinching; however, in a healthy garden, predators will be standing in line to eat pests.
- If you spend a little time and energy making a sanctuary for beneficial predators, you will find they do an enormous amount of work for you, and save you a lot of time, money, and vegetables. An investment into beneficial predators yields an enormous pay-off. And if you are trying to get your children interested in gardening, this is the best way to do it. Kids love watching the natural interaction at work in the garden, especially when a wasp comes down, stings a caterpillar, then flies the caterpillar back to the wasp nest. This fascination with nature builds the child’s relationship to the garden, and gets them more interested in science and nature.
- Gophers = a good dog, a good cat, traps, or gopher snakes. Squirrels=squirrel stew, pellet gun. Cut ants=molasses tea or turpentine in a funnel down the hole; NO chemicals eliminate cut ants, you can only move their mound, so do not leave poison in the ground for years.
In our next class, we will cover “How to Plant a Three Sisters Garden”, and focus more on pests and beneficial predators.
Justin and Kayla,
Congratulations on your phenomenal turnout Saturday! I remember the first one outside of Coastal Bend Health Foods. What a difference a year can make! Unfortunately, I had to leave early in the program. Thanks for posting the notes so I can catch up.
Pat
ps. We are wanting to put survivors names on our Komen 3 Day Walk tee-shirts. Could I have your permission to add your Mother’s name? If so, just send me the correct spelling, first and last if she agrees. Thanks!
________________________________
Thank you so much Pat for everything you are doing to raise money for this great cause–I sent you Mom’s info. By the way, she just had a check-up, and is now five years cancer free! Yay Mom!
I think an increasing number of people want to grow their own food, and want to know how to do it without synthetic chemicals. Hopefully, more venues will open to teaching heritage methods. We are doing another class at Moore than Feed on March 23, focusing on Three Sisters planting and natural pest control, and hope to see you there!
Thank you for the very informative class Saturday. We gathered our materials that day and today planted our garden. Excited to see it grow!
Thank you Karen for sharing your morning with us!
I would love for you to snap a picture of your garden, and then take another picture in about 90 days, when your garden is thick and lush. Send me your before and after pictures, and I will post them to this blog. I think these pictures will be a great inspiration to new gardeners! Happy gardening to you!
For those folks that attended the seminar on Saturday and are trying to source the Juliet variety of tomato plants, I found them at Turners and also at Gills in Corpus on Monday.
I had prior commitments and was unable to attend this workshop, but it looks like it was a great success. Please accept my thanks for putting this resource together. So much great information specific to our area!
You are welcome! We hope to see you at a future gardening class. Also, we will post regular updates on this site with information on heritage gardening. Thanks!