New Gardening Class: “Your Summer Garden”

Edible Squash Blossom

Edible Squash Blossom

Friends, please mark your calendar for Saturday, March 23, from 10:00am to noon, for a new gardening class at Moore than Feed.  This class will focus on “Your Summer Garden”.

This event is free and open to the public.  Seating is available, and refreshments will be served.

If you enjoyed our tomato class, you will love this complete demonstration of how to plant a heritage garden with summer produce. 

Gardeners of all ages and skill levels are welcome.  Even if you have never planted a seed, you will go home with the knowledge and materials to start your own successful garden.  

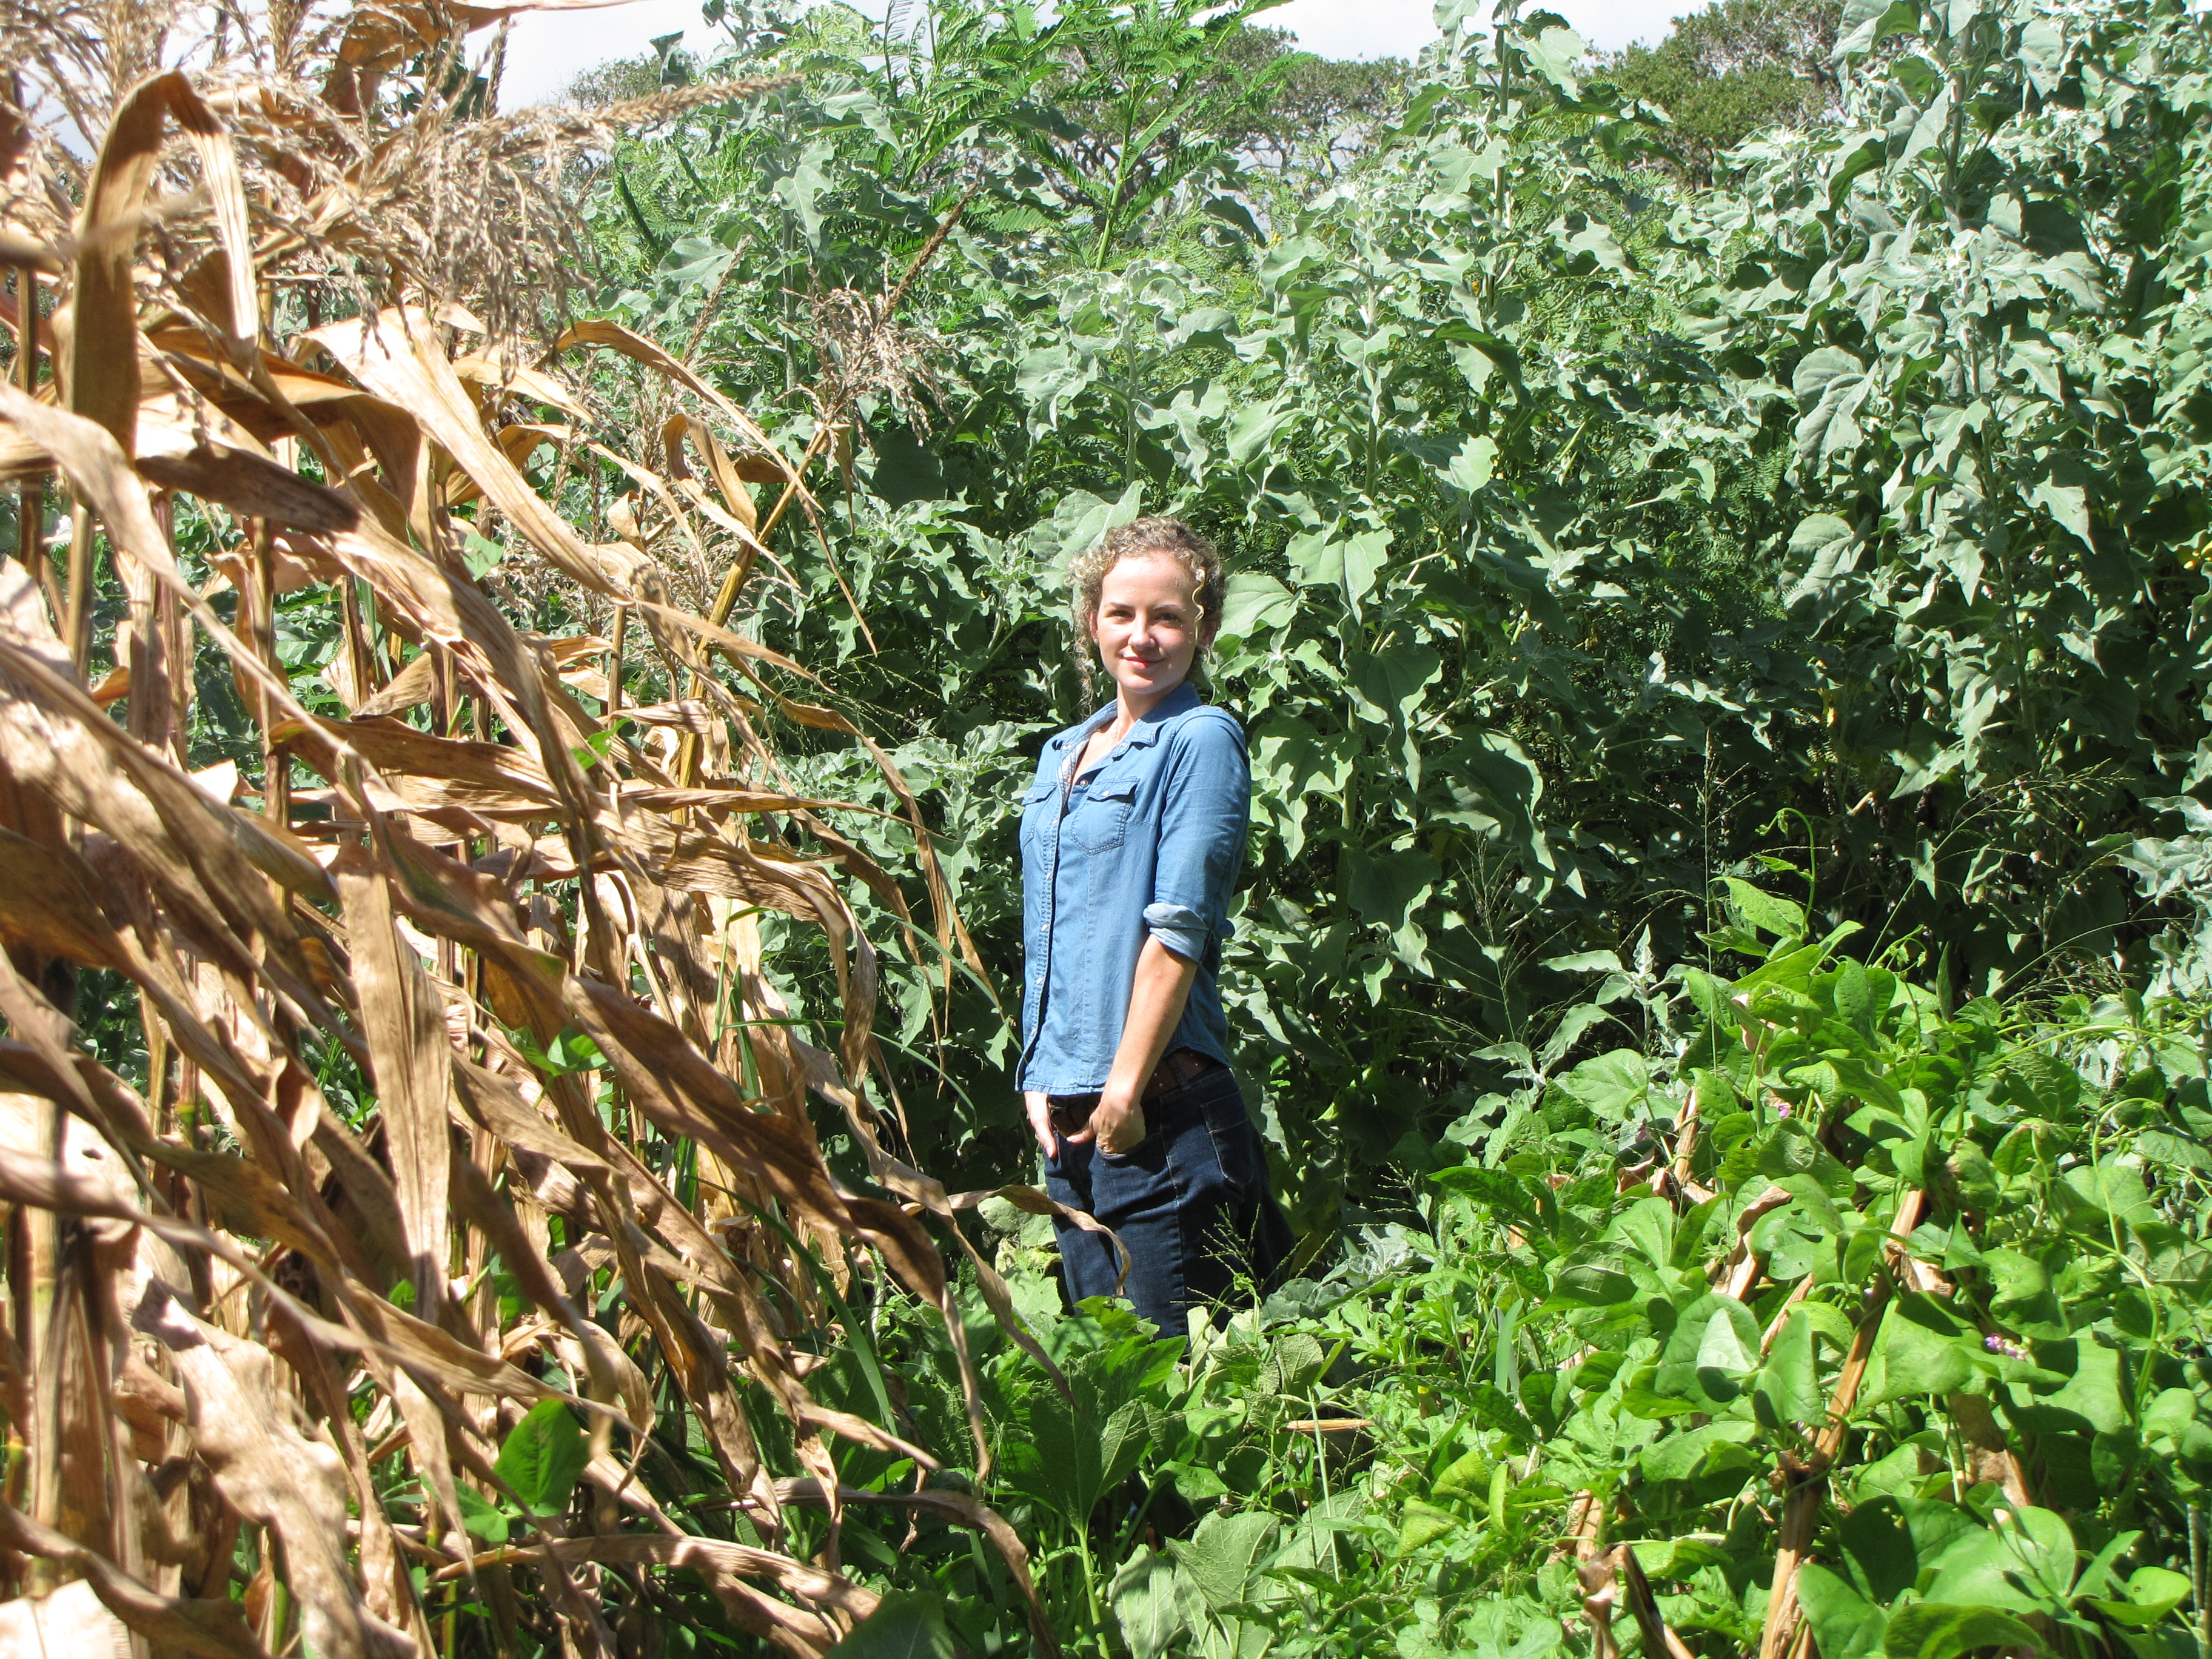
We will share the best kept (and most interesting) secret in gardening, the Three Sisters Companion Method.  We have updated this ancient Indian technique to grow the modern varieties of our favorite vegetables:  sweet corn, summer and winter squash, various beans, watermelons, cucumbers, pumpkins, sweet and savory herbs, and gorgeous wildflowers.  

I used this method to transform our desert wilderness into a highly productive farm.  We invite you to pioneer your own garden space with this technique, and grow more vegetables than you can believe on a very small space, with minimal expense or labor.

We will begin the class with bare dirt, prepare garden beds of different sizes and shapes, plant the seeds, and answer all your questions about growing summer produce in the process.

We will also cover my favorite subject:  natural pest control.  We will show you how to use the good bugs to keep away the bad bugs, and to harness the power of nature to continually cleanse your garden of pests.

“Your Summer Garden” with Justin Butts

Where: Moore than Feed, 902 W. Market Street, Rockport, TX (361) 729-4909

When: Saturday, March 23, from 10:00am to noon

What: Your Summer Garden

Who: All gardeners of all ages!

Purple Bean Flowers on a Corn Stalk Trellis

Purple Bean Flowers on a Corn Stalk Trellis

A Sunflower Hedgerow

A Sunflower Hedgerow

A Sunflower Hedgerow

Wind can be very hard on a garden.  Relentless wind combined with the intense heat of summer can dry out the soil of our gardens and burn the plants to dust.  This combination of wind and heat is one of the greatest challenges to gardeners in Rockport. 

On our farm, we protect our gardens with sunflower hedgerows.  This hedgerow is easy to grow and the plants are native, readily available, and free.  A sunflower hedgerow is a valuable companion to your garden.   

The sunflowers rise in the spring and summer, when gardens most need their protection, to form a dense wind-screen up to twenty feet tall.  The wall is covered with tremendous yellow flowers.  At the end of the season, when the hedgerow is no longer beautiful, it goes away for the winter, and comes back all on its own, thick, lush, and beautiful, the next spring.    

Bee Polinating Sunflower

Bee pollinating Sunflower

The Value of a Hedgerow

  1. A sunflower hedgerow cuts down the wind erosion that can badly dry out a Rockport garden, especially in the heat of summer. 
  2. Hedgerows are a wonderful sanctuary for beneficial predators.  Birds, wasps, frogs, toads, lizards, bees, lacewings, ladybugs, dragonflies, and many other friends of the garden love the flowers and protection of a sunflower hedgerow.  In Rockport, a sunflower hedgerow tends to flower when not much else is in flower, and that keeps beneficial predators close to the garden in the high heat of summer when pests are at their worst.
  3. A hedgerow is a bio-diverse habitat edge created by the gardener.  The hedgerow provides many of the benefits of natural edge effects and focuses them into the garden. 
  4. A hedgerow can significantly reduce the amount of irrigation needed in the garden.  Because the hedgerow protects the garden from wind erosion, the rate of evaporation in garden soil is slowed considerably.  As a consequence, the important top four inches of living soil stays moist and productive, more efficiently feeding and watering plants.
  5. While hedgerows prevent the soil from drying out too quickly, they also protect the soil during periods of flood.  In a long-term drought, the soil becomes very thin and weak.  When a big rain finally comes, it tends to wash away what little good topsoil remains.  However, the deep roots of the hedgerow absorb a lot of water and help prevent the soil in the garden from washing away with the water.
  6. If the sunflowers are thick enough, the hedgerow can become a living fence.  I have found that deer do not try to break through our sunflower hedgerows, but go around them, which makes it much easier to keep them out of the garden.   
  7. A sunflower hedgerow is very easy to establish and maintain.  After first planting our hedgerows by simply throwing wild seeds on the ground, I have never needed to replant or even to water them.  The flowers come back on their own, thicker and healthier every year.  Now, I simply mow the edges to shape the row.
  8. Hedgerows are beautiful.  In our harsh and barren landscape, ravaged by drought, we can always count on our sunflower hedgerows to frame our gardens with their green and golden beauty.

Sunflower

Hedgerows in Europe

The hedgerows of Europe are famous for their beauty and their role in the development of agriculture.  The hedgerow networks were originally established to prevent soil erosion from the pressing Atlantic wind.  The hedgerows proved to be excellent fencing for livestock and facilitated rotational grazing on garden space.  They sheltered hard-working farmers during inclement weather.   

Ultimately, the hedgerows became property boundaries and part of the living history of Europe.  In France, during WWII, the hedgerow fighting was notoriously difficult.  The Germans set up their machine guns in the protection of the dense hedgerows, with clear fields of fire across the gardens, and Allied soldiers could not cut through the hedgerows, or burn them down, and even tanks could not break through them.  In modern times, hedgerows are a major political issue:  500-year-old hedgerows are being torn down to build strip malls and parking lots for fast food chains.

Sunflower3

A Native American Hedgerow

As I built our farm, I knew we needed to find a way to protect our soil from the relentless Gulf wind that wreaks havoc on our gardens.  I had seen how well hedgerows work in European gardens, and wanted to duplicate the effect with a native plant that would be easy to maintain.  Sunflowers are the perfect option.

New Sunflower about to Bloom

New Sunflower about to Bloom

Native American Indians planted sunflowers as a hedgerow for their Three Sisters gardens.  The sunflower is a cousin to the Three Sisters companion planting system.   

I can’t help but stand amazed at the genius of Native American farmers as I harvest the fruit of my summer gardens of corn, tomatoes, beans, squash, and melons.  The driving wind whips the tops of the sunflowers along the hedgerow, and down in the garden there is only a gentle breeze to rustle the corn stalks.  Heritage farming methods work. 

Sunflower Offering Pollen

Sunflower Offering Pollen

Where to Plant a Sunflower Hedgerow

First, determine the direction of prevailing winds between March and October.  In Rockport, standing in your garden, this is pretty easy to do.  Plant the sunflowers in full sun directly in the path of the wind, as wide as the garden, and about ten to twenty feet away from the garden.  The sunflowers will grow very tall.  You should plant the hedgerow close enough to be an effective wind break, but leave enough space to get in and work your garden. 

Hopi Indian Corn on Left, Melons and Squash, Sunflower Hedgerow in Back

Hopi Indian Corn on Left, Melons and Squash, Sunflower Hedgerow in Back

How to Plant a Sunflower Hedge Row

You can plant a sunflower hedgerow by seed in the Fall or Spring. 

In the Fall:  Wild sunflowers go to seed in Rockport around October.  Simply cut the heads from a few established wild sunflowers when the yellow petals fall off, and throw the seed heads on the ground where you want your sunflower hedgerow next spring.  It is best if the seeds make contact with the soil.  You do not need to bury the seeds, or even to water them, just push them into the ground with your heel.  Throw down as many seeds as you like, but it doesn’t take that many seed heads to start your hedgerow.

Kayla Taking Flowers at end of Season to Seed New Sunflower Hedgerow

Kayla Taking Flowers at end of Season to Seed New Sunflower Hedgerow

In the spring, try to find native sunflower seeds, as they will grow much better and faster.  If you use a store-bought seed, find a variety designed for flowers, not “edible sunflower seeds”.  Make sure the seeds have good seed-to-soil contact.  Water this area every few days early in the season to help the sunflowers get established.  Design your sunflower screen to be at least three feet wide for the length of your garden for optimal wind protection. 

Seed Head from Wild Sunflowers

Seed Head from Wild Sunflowers

The following October, knock down all the flowers onto the hedgerow space.  If you used store-bought seeds to start your hedgerow, try to find native sunflower seeds to re-seed the space.  If you don’t want to see the large dead sunflower stems (or trunks), cut all the heads off the flowers and throw them in the space before removing the stems.  Place the stems in your compost pile.  Each year, the sunflowers will come back thicker and healthier as natural selection continually improves your hedgerow. 

Sunflower Turning to Face the Sun

Sunflower Turning to Face the Sun

Notes on Growing Tomatoes

Gardening Class SignFollowing are notes from our class on growing tomatoes.  Hopefully, these notes provide enough detail to help you turn your own space into a beautiful garden.

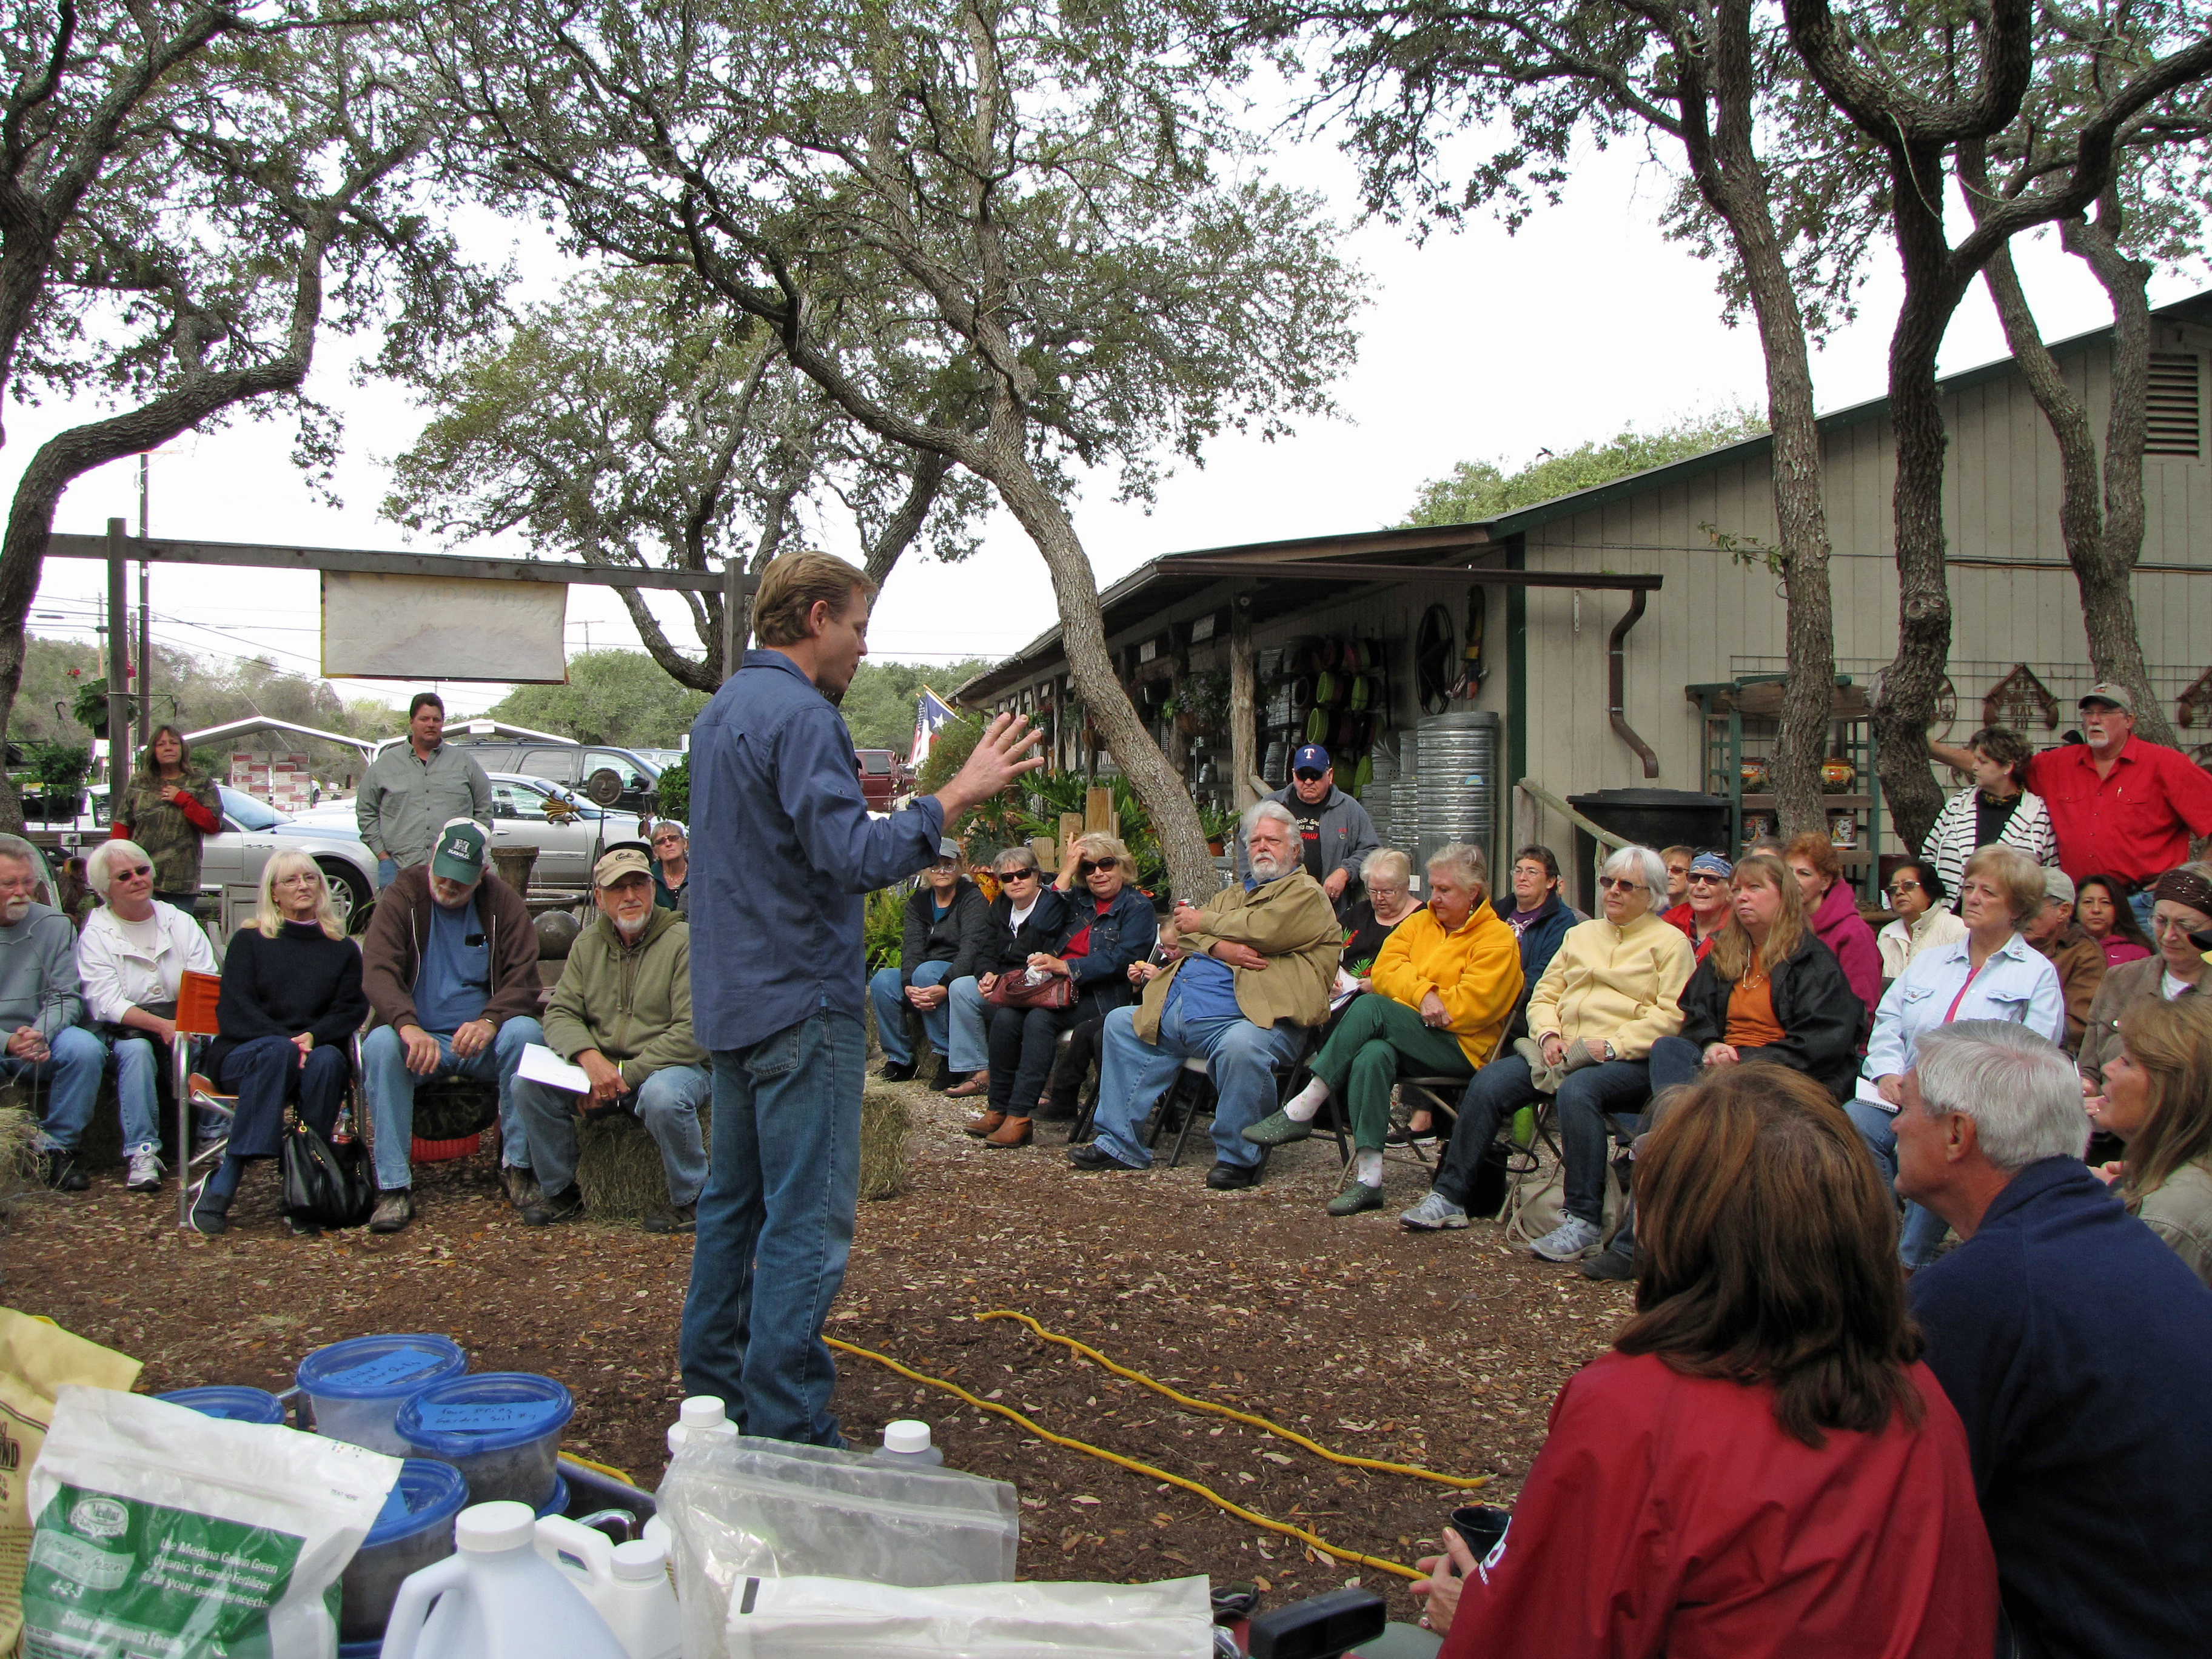
Thank you so much to everyone who attended.  We started out with 20 chairs, but then had a total of 91 folks in attendance!  Thanks for making the hay bales and creative seating work, and for the great engagement and questions.  I believe this enthusiasm only further indicates how many of us want to know more about heritage methods for growing our own food.

Take Before/After Pictures of your Garden!

Gardening Class Pic2I highly encourage you to take pictures of your space before you plant.  Then, take another picture when your garden is full and lush.  For everyone who attended the class, I will post before and after pictures of their garden this summer.  I think it will be a great inspiration for new gardeners to see your success, and it will be so rewarding for you to remember how far your garden has come.

Ask Questions in the “Comments” Section

At the end of this post, there is space for comments.  Please ask all tomato questions there, so we can all see the answers in one space.  Please feel free to share all questions and comments, as many others will benefit from the discussion as well.  You can also subscribe to this blog, and new posts will be e-mailed to you.  We will regularly update the gardening posts this spring with new information.

If you live in Rockport, now is the time to get those tomatoes in the ground.  Happy planting!    

Tomato Gardening Class Notes, February 23

Goal: To grow prolific, delicious, healthy tomatoes with the least amount of work, money, and time.  

  • Prolific:  measurable, quantifiable; 5lbs to 20lbs of tomatoes per plant is normal; our goal is to achieve 50lbs per plant or more
  • Delicious:  sweet, intense flavor that is unique to the garden; color, shape, texture
  • Healthy:  peak of vitamins, minerals, alpha- and beta-carotene, lycopene (the redness of the tomato), antioxidants; no synthetic chemicals; grown in as closed a system as possible (closed system means few or no inputs from outside of the farm)

Principles of our System

  • We employ a system of growing food, based on:  soil health, successive intensive companion planting, natural pest control, mulching, smart irrigation, composting, and fertilizing
  • If you remove one element from the system, the entire program breaks down; likewise, employing only one element of this system into a different program may not show the same results
  • The system is based on inter-connected relationships:  seed to soil, plants to animals, pest to predator, gardener to the garden
  • When the gardener achieves balance in the system, she grows the greatest amount of healthiest produce with the very least work; when harmony of the system is disturbed, the gardener’s job is simply to bring it back to balance (ex, infestation of pests)
  • No synthetic chemicals:  Round-Up (glyphosate), Ortho, Sevin, or any type of Scotts Miracle-Gro products.  These chemicals are extremely inefficient and expensive in a backyard garden, and do much more harm than good.  There are more effective methods that require less time, money, labor, and also produce healthier and better-tasting food.
  • We will share proven and tested methods that were developed in the real-world laboratory of building a farm business; however, I am not an expert.  Thomas Jefferson had been farming 70 years when said he was a “new gardener”, only learning how much he doesn’t know–and he was the greatest farmer in American history.  We try to stay curious, open-minded, constantly looking for new ideas and methods to improve our gardening. 

 Healthy Soil

  • The tomato garden MUST HAVE 8 hours of full sun.
  • The first and continuous focus of the gardener should be on creating healthy soil.  With good soil, gardening is easy and a lot of fun; with poor soil, it is extremely hard, or impossible to grow food.  The gardener must grow her own soil:  this takes time, and is worth it.  (Show samples, native sand, and Four String garden soil)
  • Healthy soil has the optimum amount of vitamins, minerals, and nutrition for the plant, in the ideal availability for the plant to absorb it; efficient feeding.
  • Healthy soil requires less water; watering can be cut by up to 80%.  Healthy soil “holds” the water better in a form easiest for the plants to uptake the water. 
  • The best pesticide is healthy soil. Why? Because healthy plants are very resistant to disease and bug damage. Weak soil -> weak plants-> most bugs. Healthy soil is also the best fertilizer. Ex:  In a 2,000 sq ft  garden we planted in Dec, we have not fertilized it since planting, are now in second season of crops.
  • 90% of the beneficial bacteria and micro-organisms, the “life” of the soil, is found in the top 4 inches.  This top layer MUST be protected at all times through mulch and intensive plantings; it dries out the fastest and receives the most abuse.  Plant roots take nutrients from deep in the soil to the top.
  • When Thomas Jefferson’s daughter wrote him a letter complaining that bugs were eating their crops, he said the problem was the weakened state of their soil, and they needed to get cover crops and manure on the gardens, and the bugs would go away.

Preparing the Soil to Plant Tomatoes

  • We use animals cycling on mature gardens to prepare soil. 
  • Our goal is to translate our program to a backyard garden. Animals = manure, urea, micronutrients, pest control.  Urea (or urine) is extremely high in nitrogen; 2/3rds of the nitrogen and 4/5ths of the phosphorus expelled from an animal is in the urine.  Also, urine is highly soluble, the form easiest for soil and plants to utilize.  (For this reason, we recommend only pastured poultry manure for backyard garden, where the urine is in the manure, rather than cow or horse manure–also commercial cow manure usually comes from feed lots, and you DO NOT want that in your garden.)  Further, when animals are on our gardens, they are feeding on mature crops, the green material and left-over produce; so, they are recycling extremely healthy and chemical-free feed into extremely high-quality fertilizer.
  • Chickens till top 2” to 4″ of soil, the pigs 10″ to 12” deep. This thorough tilling is extremely important to aerate the soil.  You cannot get same effect with a commercial tiller in your backyard garden–you have to dig up the soil, as explained in “Bio-Intensive Dig” in the next section.  Pigs also eat out the root system and turn the roots into pure fertilizer.  Even when placing pigs on a bare garden, they begin to feed on roots and it smells like a freshly mown lawn for about a week.  As much green material as was growing on top of the garden, there is that much in roots beneath the soil.  Chickens eat the green material on the surface and clean up a lot of pest insects. We spray molasses tea on garden after removing animals to breakdown manure, then let it sit 2 wks, then plant next garden. 
  • 90% of nutrition and beneficial bacteria are in the top 4″.  This top living layer of soil must be protected.
  • Our garden soil is entirely made up of:  1) oak leaves broken down into the soil, 2) animal manure, and 3) the trampled green material from plants.  You can make your own soil in the same way; however, instead of putting animals on your garden, pull up all your green material and compost it with oak leaves, and when the compost is ready put it back on the garden.  It will take you a little longer, but you will eventually build extremely rich soil that is completely unique to your garden.

    Bio-Intensive Dig Method, First Trench

    Bio-Intensive Dig Method, First Trench


Second Trench, Throw dirt into First Trench, and so on
  • We recommend the BIO-Intensive Dig Method.  This method breaks up all weeds from the surface and small roots and clumps from the soil.  It allows compost to be mixed deeply into soil.  It tills the soil.  It aerates the soil.  Any new garden bed that can’t be prepared with animals, should be prepared with this method:
    • 1) clear the row as much as possible of brush, grass and debris.  No herbicide is necessary, as the weeds will be dug up.   
    • 2) apply ½” layer of compost (Ladybug Revitalizer); apply a thin ¼ inch layer of “Texas Greensand” by Gardenville
    • 3) Dig first trench and fill buckets.  The folks at Bio-Intensive highly recommend you stand on a board or plywood sheet while working to keep from stepping on soil–that shows how sensitive the soil is.  (Note:  the dirt in the buckets will be left over at the end.  Put this dirt in a pile of oak leaves to start your compost pile.  Then put all your organic household waste in the compost, along with all left-over green material in your garden at the end of the season.)
    • 4) Dig next trench and throw dirt into first trench, then third trench fills second, and so on, to end of garden row
    • 5) DO NOT walk on row after digging.  The soil will be “fluffy” and highly aerated; stepping on it will hurt the structure.
    • 6) Add another ½” layer, or more, Ladybug compost, and another thin layer of Texas Greensand. 
    • You can’t add too much compost, but a half-inch or inch over the finished row is plenty.  The next time you need compost after this planting, you will have made your own!
    • The row is ready for planting.
    • The BIO-Intensive Dig Method only needs to be done on the first new garden, and then maybe every 3 or so years after the first planting.  The second dig will be very easy and fascinating, as you see the difference in the soil you created.

 Companion for Tomatoes

  • Intensive successive companions:  Try to always think “intensive companions” every time you plant anything, so you always plant 2 or 3 mutually beneficial plants at a time.  Every plant in nature grows better if it is grown with the right companion–plus, you will better utilize every square inch of your garden and increase bio-diversity.  The more diversity in the garden, the stronger it is. 
  • The BEST companion for tomatoes is collard greens.  Ideally, you will intensively plant collard transplants with your tomato transplants–or, plant collard seeds 4 weeks prior to tomato transplants.  Plant collards 6 inches off center of the row, 12 inches apart down the row.  The leaves will grow together to form a canopy over the soil, shading and protecting tomatoes.  Tomatoes will vine over the collards.  Collards are a “bug trap”, and will protect tomatoes from many enemies; additionally, the scent of collards confuses or repels many tomato pests.  Plus, you can harvest and eat the collards all through the season.   

    Collards Growing at the Feet of Tomatoes

    Collards Growing at the Feet of Tomatoes

  • Marigolds are an excellent companion; use as many different varieties as you can find, to increase bio-diversity.  The flowers attract beneficial predators and bees.  The roots prevent nematodes; the entire plant emits an odor that repels or confuses predators.  Plant them very thick as a living mulch 6 inches away from base of tomato and all around plant, and they are really beautiful.
  • Hairy vetch is a good companion, but must be planted 90 days before tomato transplants, then cut over row to form mulch.
  • Plant dill and sweet basil on the “sun side” of the tomatoes, frequently through the tomato bed.  Both herbs will grow spindly and tall; let them go to seed.  You can take from the leaves, and the flowers repel and confuse pests, and are beautiful and edible.
  • The “heat curve” in Rockport is extremely steep; we go from frost to burning heat in a very short time.  We must plant some varieties that are very fast to mature (Early Girl, Juliette) and other varieties that produce fruit with high night-time soil temperature (Solar Fire, Juliette) to get the most fruit for the longest time.
  • Tomatoes require moderate heat to produce fruit (daytime temps from 60’s to 100’s).  However, tomatoes DO NOT like hot weather at night.  Night time soil temperature is a major problem for tomatoes in our area.  When the nighttime soil temp rises above 70 degrees, the tomato stops producing fruit.  The vines may live, but they will not make tomatoes.  Thick mulching in June-Sept is critical to producing tomatoes through the summer.

 Tomato Varieties:

  • Use only indeterminate (vining) varieties.  Heirloom varieties are extremely difficult to grow in Rockport, and at very best, produce small yields that are very susceptible to heat and pests.  (After good soil is established, you may try Roma, San Marino, Purple Cherokee, and Homestead, mixed in with recommended varieties.)
  • Early Girl:  50 days to maturity, great producers of good med sized tomatoes
  • Juliette:   best of all; roma grape; produce in 50 days or less and through very high heat; prolific and very delicious tomatoes
  • Solar Fire and Heatmaster:  Produce in very high heat, when night-time soil temp is up to 75 or higher
  • Cherry, Sweet and 100:   These cherry tomatoes produce early, late, prolific, and are best tasting
  • Celebrity and Better Boy:  Most popular, good varieties, Better Boy are larger slicing tomatoes
  • If you plant five plants, try one of each; you will have plenty of tomatoes of all sizes, and will have tomatoes from April (or sooner) through July (or later)
  • With 24″ spacing on a hog panel trellis, as we recommend, you can fit five tomato plants in a 12 to 14 feet row.  That row will also include a lot of collards or marigolds, with a basil or dill for each tomato plant.  Further, you can plant a cucumber at the base of each t-post, and let them vine up with the tomatoes.  Each plant will grow better in this companion group, than if they were all planted on their own or in a mono-culture.

 Planting the Tomatoes

  • To plant the tomato, dig a hole according to size in the center of the row.  Bury about 2/3rds of the tomato plant (trim branches on lower part of stem if necessary).  The deeper the root system, the more prolific the tomato plant will be.
  • Add a handful of crushed oyster shells (calcium) and a handful of wood ash (potassium); use ONLY live oak wood ash that you make—nothing else
    • NOTE:  potassium is essential for the sweetness and flavor of tomatoes; the sugars of the tomato need potassium to activate, and wood ash from live oak trees is the best possible source to create extremely flavorful tomatoes; you WILL taste the difference! 
      Crushed Oyster Shells and Wood Ash (from live oak trees only!) should touch roots

      Crushed Oyster Shells and Wood Ash (from live oak trees only!) should touch roots


    • You can as also add a handful of Gardenville Rocket Fuel on this first garden, which may help native Rockport soil to develop
    • Plant tomatoes with the roots touching soil amendments
    • Fill hole with dirt without packing down too tightly.  Packing the dirt too tightly makes root growth more difficult.
    • Add another handful of crushed oyster shells and wood ash on the soil around the base of the plant
    • Lightly sprinkle stone-ground corn meal on and around plant, to prevent “black spot” and “early blight”
    • Move 24 inches down the row, and plant next tomato (24” spacing with hog fence trellis; 36” with inferior round trellises)

 Tomato Trellises

  • Commercial tomato cages with concentric rings are the most commonly used, but least effective, trellis.  If your plants grow very healthy, as they should, the cages will collapse, or lean, and the wire rings will break.  You will definitely need a stake in the ground to hold up the trellis, and will need to tie strings to some of the vines to hold them up.

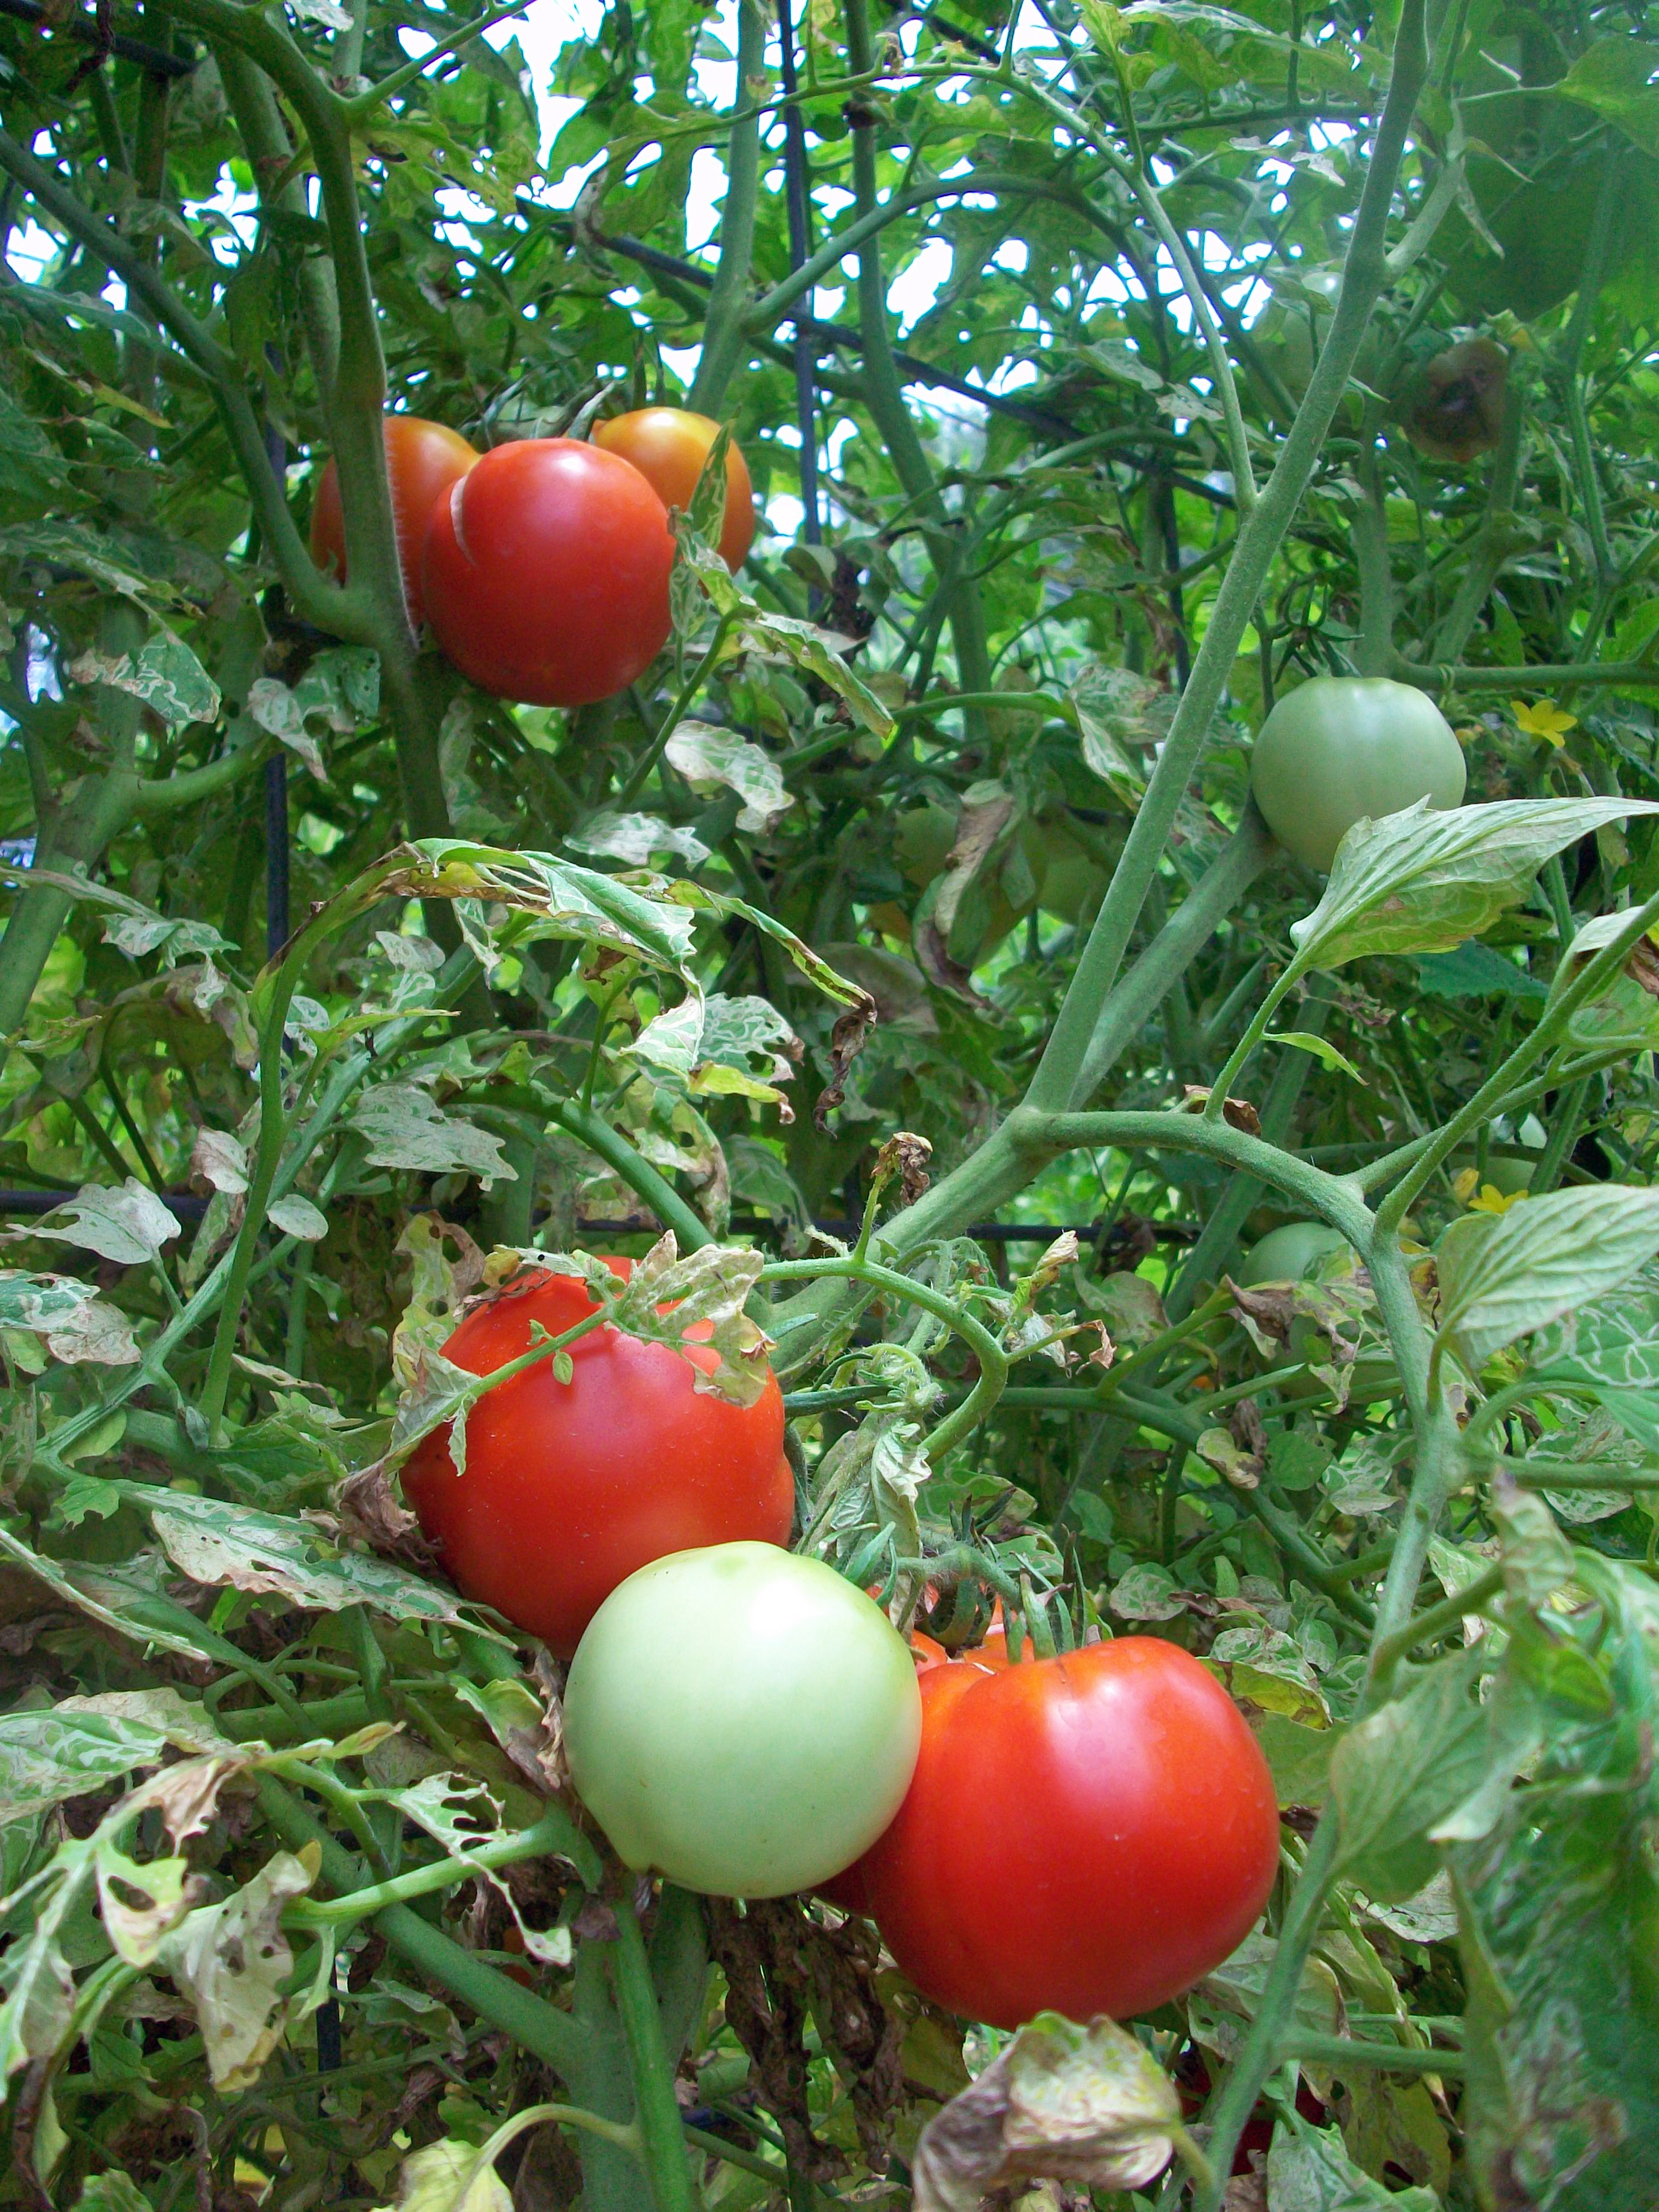
    Early Girl Tomatoes Growing on Trellis of Hog Panel Fencing

    Early Girl Tomatoes Growing on Trellis of Hog Panel Fencing

  • The ideal trellis is hog panels or 4”X4” square fencing tied up to metal t-posts.  Weave the vines in and out of the squares in a fan shape up to the top.  When the vines reach the top, left them grow back down on the shade side (opposite sun side) of the trellis.  Your trellis will give plenty of space for the tomatoes to grow. 
  • As a backyard gardener, I highly recommend you figure out how to make this trellis, or have someone help you.  Once you cut the right length of fence and have the posts, you can use this over and over for 20 years.  It hides easily when you don’t want it.  You can grow tens of thousands of tomatoes on this before it wears out, and they are the easiest to install, take down, and, especially, to harvest from.  
     

Mulching the Garden

  • Adding Live Oak Leaf Mulch

    Adding Live Oak Leaf Mulch

    Mulch is essential to protect the soil; to regulate soil temperature and moisture through insulation; to prevent weeds; to provide a sanctuary and hiding place for beneficial predators; and to provide organic material to eventually mix into the soil.

  • Live oak leaves are the BEST possible mulch for our gardens, and the ONLY type of mulch that I recommend.  Live oak leaves are the secret weapon for a Rockport gardener. 
  1. The rumor about there being an acid or chemical in our oak leaves is false. 
  2. We have HEAVILY mulched our gardens with live oak leaves for years with magnificent results.
  3. In fact, our compost it 60% oak leaves; leaves are the bedding for our chickens; and much of our wonderful garden soil is oak leaves that have broken down into the soil.
  • The best mulch is always the most native.  There are tremendous piles available everywhere, for free.  Red cedar mulch, pine mulch, anything not from a native tree is undesirable, as it “shocks” the garden with a foreign presence that is alien to the natural cycle.  At best, this foreign mulch simply doesn’t hurt the soil.  But once breaking down in the soil, it is a foreign agent that our natural ecology does not like.   
  • Never leave the soil uncovered; mulch as soon as tomatoes are planted.
  • How much mulch, and when to add mulch? Thickness depends on the heat; the hotter it gets, the thicker the mulch needs to be. Too thick? Never. If your transplant is one inch tall, put 1” mulch and let a couple of green leaves stick out for photosynthesis. Keep adding mulch as the plant grows until you have 10 to 12 inches of mulch at the base of the plants. The only problem the mulch may cause is difficulty walking in between rows, but this is not too difficult and you will not mind while you are picking incredible tomatoes from your plants in the hottest weather.

 Watering the Garden

  • Drip Tape with Connection

    Drip Tape with Connection

    Drip irrigation beneath a mulch bed is the ideal watering method.  (show sample)

  • You can order the product from 1-800-SAY-RAIN. This is commercial drip line, NOT soaker hoses.  The drip irrigation line goes under the mulch exactly where you want the water, down the center of collards/tomatoes row.
  • Water plants infrequently and deep (lower than the lowest level of root). Wait until the soil is almost dry, but not completely dried out, to water again.  This allows the roots to “reach” down into the soil to find water, which causes the plant to grow.  The stronger the tomato root system, the more tomatoes will be produced.  
  • The soil will dry from the top down, especially in the relentless wind of Rockport.  With correct mulching and intensive planting, you will typically water 1 time per week in April/May, 2 times per week in June/July, August may require 3 times per week.  NOTE:  after first planting the tomato transplant, you may have to water more frequently, until the plant is established, because the roots are in the shallow soil that dries out faster.
  • Running Drip Tape Irrigation is Fast and Easy

    Running Drip Tape Irrigation is Fast and Easy

    A “sunflower hedge row” or some other type of wind break may be helpful for the garden, to keep it from drying out so quickly, but only if it does not shade the garden. 

  • Water in the evening, or at night.  Plants dedicate more energy into growing in the morning, and up-taking water in the evening.  Watering in the evening allows for maximum water absorption, minimizes loss of water through evaporation, and helps cool the soil for the important night-time soil temperature, which must stay below 70 degrees.  You should only have to water for a couple hours to achieve maximum effectiveness, then you are probably wasting water.
  • As your soil health improves, you will see a corresponding decrease in water needs in the garden.  In year five of your garden, you will be stunned at how little water you need. 
  • To know when to water, find a place in the row, and dig your finger down about 6″ to 8″ into the soil, and check soil moisture.  If soil is wet or soggy, let it dry out more.  If the soil is dry, water the garden.
  • Also, you can let the plants tell you when to water.  Watch the leaves–when they begin to sag, water the garden.  Don’t let the plant wilt, just notice the leaves.  You will be able to tell pretty quickly what sagging leaves look like.  Within 20 minutes of watering, the leaves will begin to perk up and turn a darker shade of green.  Check the soil with your finger when the leaves sag, and you will quickly be able to figure out the relationship between soil moisture and the plants in your garden. Letting the garden tell you when to water is a wonderful part of your relationship to the garden, and your role in maintaining balance. 

 Fertilizer

  • Notes: nematodes = poor soil. Crushed oyster shells = calcium, which prevents blossom end rot. Wood ash, from live oak trees ONLY = potassium, which creates sweetness in flavor.   Fertilizer = liquid seaweed + fish emulsion + molasses, and a good recipe is Garrett Juice.
  • 30 days after planting, lightly side dress with pastured poultry manure (2 handfuls/plant). 
  • Lady Bug fertilizer, spray leaves until dripping, every two weeks
  • Garrett Juice, sprayed until leaves are dripping, every two weeks

Tomatoes in Containers

  • Tomatoes can be difficult to grow in containers in Rockport.  Tomatoes require a night-time soil temperature between 55 to 70 degrees to set fruit.  Containers, even ceramic pots, heat up and cool down very quickly, compared to soil.  By the month of May, heat fluctuations are hard on the root system, and the night temperature is usually 70 degrees or more, prohibiting the plant from setting fruit.
  • Also, the relentless wind of Rockport tends to dry out the soil in pots very quickly.  The wind and heat, beginning in April, can dry out pots continually, no matter how many times per day they are watered.  Pots can’t be mulched the way a garden bed can, so it is very hard to stop this drying out effect.
  • One way to get the most out of tomatoes in containers is to bury them in the soil, up to the lip of the pot, when temperatures heat up in April.  The soil of the ground will insulate the pot.  Then, heavily mulch the plant with live oak leaves, up to 10-12 inches.  By doing this, your container tomato will have the advantage of heating up and growing very quickly early in the season, and then stay cool at night later in the season.
  • Companion plant marigolds around the tomato in the container, just as in our class.  Thickly planted oregano is also a good companion for tomatoes in pots.
  • If you live in apartment, or for some other reason, are not able to bury your plants in the soil, you may have luck with the “Patio” variety of tomato.  In containers, some of the determinate, or “bush”, varieties, will produce good results.  Determinate tomatoes produce only a fixed amount of tomatoes, then stop producing.  The Patio variety will produce all of its tomatoes in about 60 to 80 days, so you can get all your tomatoes in before it gets too hot for them to set fruit.  When the night tempurate hits 70 degrees, you can remove the tomato from the pot, and replace it with peppers or okra.

Natural Pest Control

  • Most of our pest control comes from beneficial predators.
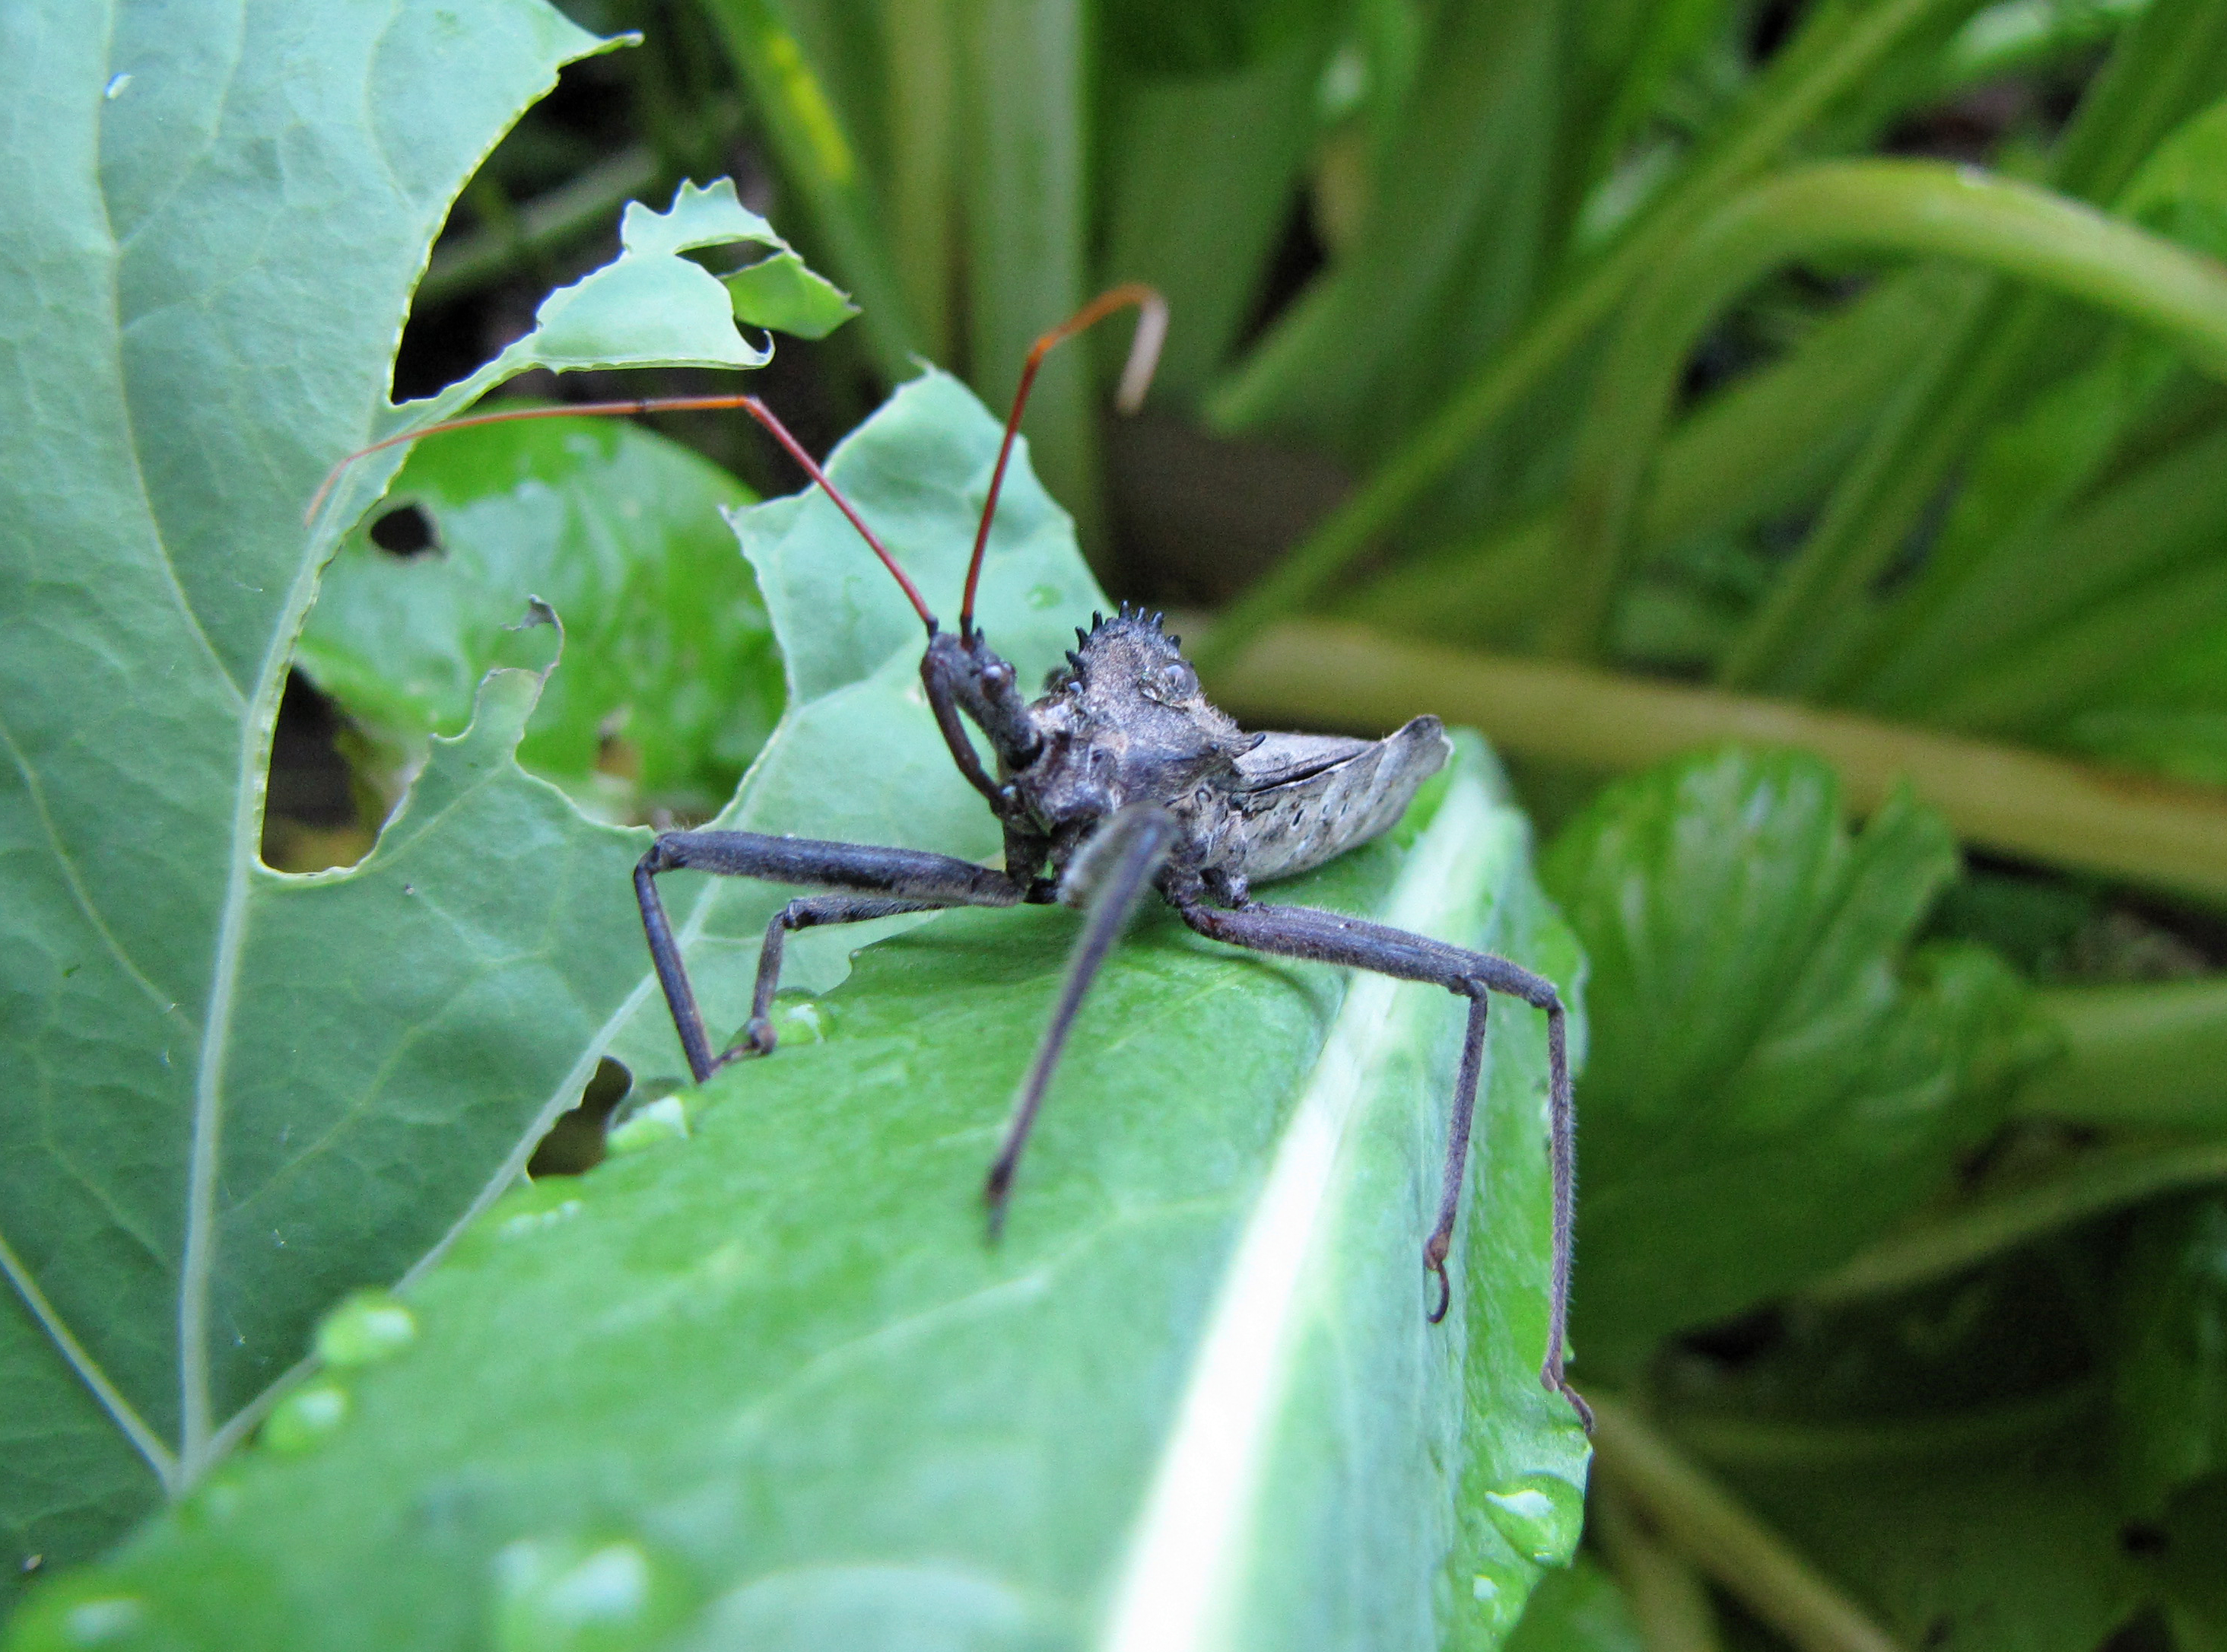
  • They are:  birds, wasps, dragonflies, lacewings, ladybugs, lizards, frogs, toads, giant wheel bugs, assassin bugs, etc.  If you attract these predators to your garden, you’ll have to treat minimally for pests.
  • Giant Wheel Bug in Four String Garden, Excellent Beneficial Predator

    Giant Wheel Bug in Four String Garden, Excellent Beneficial Predator

    To attract them, start a “beneficial predator garden” close to your vegetable garden.  This could just be a corner of the lawn you don’t mow, or a beautiful hummingbird garden.  The key is to have a dense “jungle” for the predators to hide in, when your garden is bare.  When the garden becomes lush, and the pests arrive, simply stop watering the predator garden.  The beneficial predators will go to the food source, and solve all your pest problems.

  • BT is an organic caterpillar spray that should be sprayed only at night, and on the underside of leaves, to kill caterpillars.
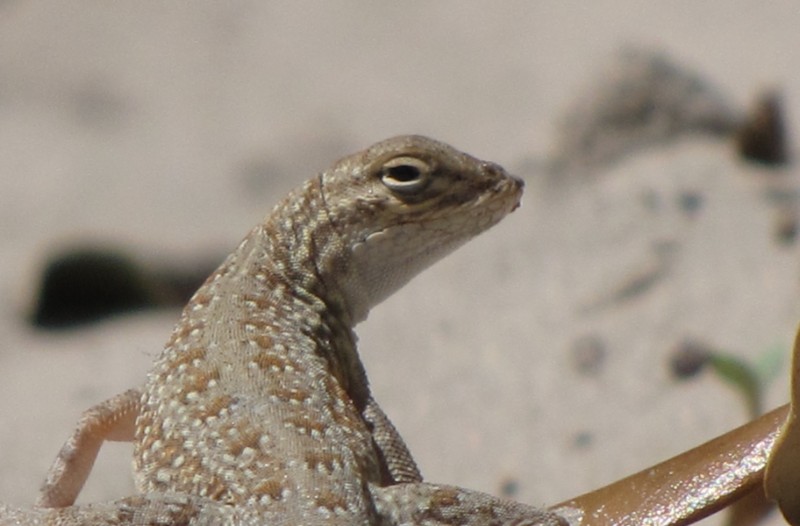
  • Lizards are Extremelly Beneficial in Garden

    Lizards are Extremelly Beneficial in Garden

    The most effective pesticide, after healthy soil, is a headlamp [show example].   The headlamp is a vital tool in understanding what is happening in your garden, in building your relationship with the garden.  All garden pests are active in your garden at night.  Some pests feed only at night.  If you have never tried this, exploring your garden at night with a headlamp will be like seeing the garden for the first time.  Most caterpillars, grasshoppers, and many other pests hide in the dirt during the day, and the underside of leaves.   But they are all out at night, and they are attracted to the light of your headlamp.  As you walk through the garden, the pests will come to the tops of plants, and struggle to get into the light for you to see them.  In the past, you may have had trouble knowing what is destroying the garden.  However, you will immediately know everything going on in your garden with a headlamp at night. 

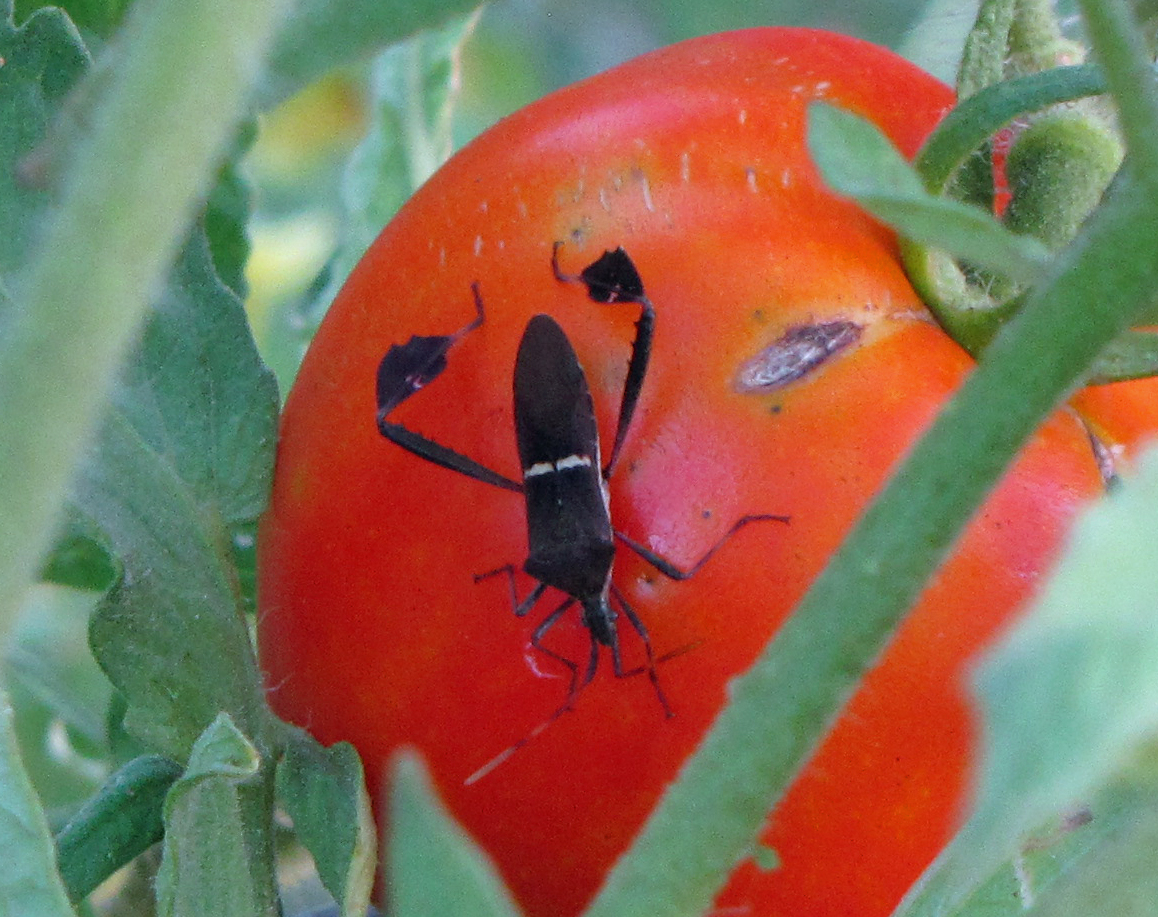
    Leaffooted Bug, a nasty pest, easily cured with a headlamp and a pinch

    Leaffooted Bug, a nasty pest, easily cured with a headlamp and a pinch

  • With a headlamp, you can use the “pinch method” (which means pinching the bugs with your thumb and index finger) to eliminate a lot of pests, quickly and easily.  Doing this at night saves a great deal of time, energy, labor, and gives you insights into what is attacking the garden.  During the day, it is nearly impossible to pinch grasshoppers, caterpillars and leaf-footed bugs.  At night, however, you can pinch more pests in 20 minutes than you could during 8 hours of daylight.  The pests will literally come to you.  (Give example of leaf-footed bugs.) They sting the tomato and it gets a sun-burned, dry appearance.  Leaf-footed bugs have a bacteria on their proboscis that causes the tomato to have spots. To my knowledge, its only enemy is the banana spider.  So, the only safe, effective way to remove them is to pinch them. Many predators don’t like them and others can’t catch them because they can fly. We began to notice that leaf-footed bugs were evading us to avoid being squashed during the day. They will crawl to the other side of the plant, or fly to an entirely different row.  However, with a head lamp, you can kill nearly all the leaf-footed bugs in 30 minutes a night for one or two nights.
  • When your program is in balance (healthy soil, intensive successive companion plants, mulch, beneficial predators), you will not spend very much time pinching bugs. (I have only pinched bugs on 2 nights, 20 minutes each, in the last 4 months; in summer, maybe 20/30 minutes every two weeks)  You will still have pests in the garden; however, the beneficial predators will take care of most of them, so your vegetables don’t suffer.  Your job as a gardener will be to bring balance during the first part of the infestation, until the predators catch up 
  • In nature, there is always a steep increase in the population of pests, then a steep increase in predators, then pest population declines.  In the garden:   fast population rise in pests>garden damage>rise in population of predators>balance.  Your role is to be present in the garden during the short time between the rise in pests and the rise in predators.  In our garden, this is usually  about 15-30 mins per night for 2 nights, for each infestation.  Check on the 3rd night and you should see plenty of frogs, toads, and lizards, and during the day there will be wasps, birds, dragonflies, lacewings, and etc., and you won’t have to pinch (I leave the pests for the predators to enjoy).  You only need to protect your garden from the pest infestation for two nights as the predator population catches up to the pests to restore balance.  If you get a really bad infestation, you may have to do more pinching; however, in a healthy garden, predators will be standing in line to eat pests. 
  • If you spend a little time and energy making a sanctuary for beneficial predators, you will find they do an enormous amount of work for you, and save you a lot of time, money, and vegetables.  An investment into beneficial predators yields an enormous pay-off.  And if you are trying to get your children interested in gardening, this is the best way to do it.  Kids love watching the natural interaction at work in the garden, especially when a wasp comes down, stings a caterpillar, then flies the caterpillar back to the wasp nest.  This fascination with nature builds the child’s relationship to the garden, and gets them more interested in science and nature.
  • Gophers = a good dog, a good cat, traps, or gopher snakes.  Squirrels=squirrel stew, pellet gun.  Cut ants=molasses tea or turpentine in a funnel down the hole; NO chemicals eliminate cut ants, you can only move their mound, so do not leave poison in the ground for years.

In our next class, we will cover “How to Plant a Three Sisters Garden”, and focus more on pests and beneficial predators.


Gardening Class this Saturday

Kayla Harvesting Tomatoes

Kayla Harvesting Tomatoes

Friends, join us this Saturday, February 23, from 10:00am to noon, for a gardening class at Moore than Feed.  The class will focus on “How to Grow Tomatoes in Rockport”.

This event is free and open to the public.  Seating is available, and refreshments will be offered by Melvin Moore and his team. 

Gardeners of all ages and skill levels are welcome.  Even if you have never planted a seed, you will leave this class with the knowledge and materials required to go home and start your own garden.

There are reasons why some tomatoes taste so much better than others, why it can be difficult to grow tomatoes in pots, and why pests tend to destroy some gardens, and leave others alone.  We will cover these topics, and more, to help you grow delicious, healthy, and prolific tomatoes.

We will begin the class with bare Rockport dirt, and end the class with tomatoes successfully planted, and answer all your questions about growing tomatoes in the process. 

We will cover the following topics:  preparing the soil; companion planting with tomatoes; choosing varieties; stakes and trellises; fertilizing; soil amendments; mulching; fighting pests; and managing heat stress.

Spring Gardening Class with Justin Butts

Where: Moore than Feed, 902 W. Market Street, Rockport, TX (361) 729-4909

When: Saturday, February 23, from 10:00am to noon

What: How to Grow Amazing Tomatoes

Who: All gardeners of all ages!

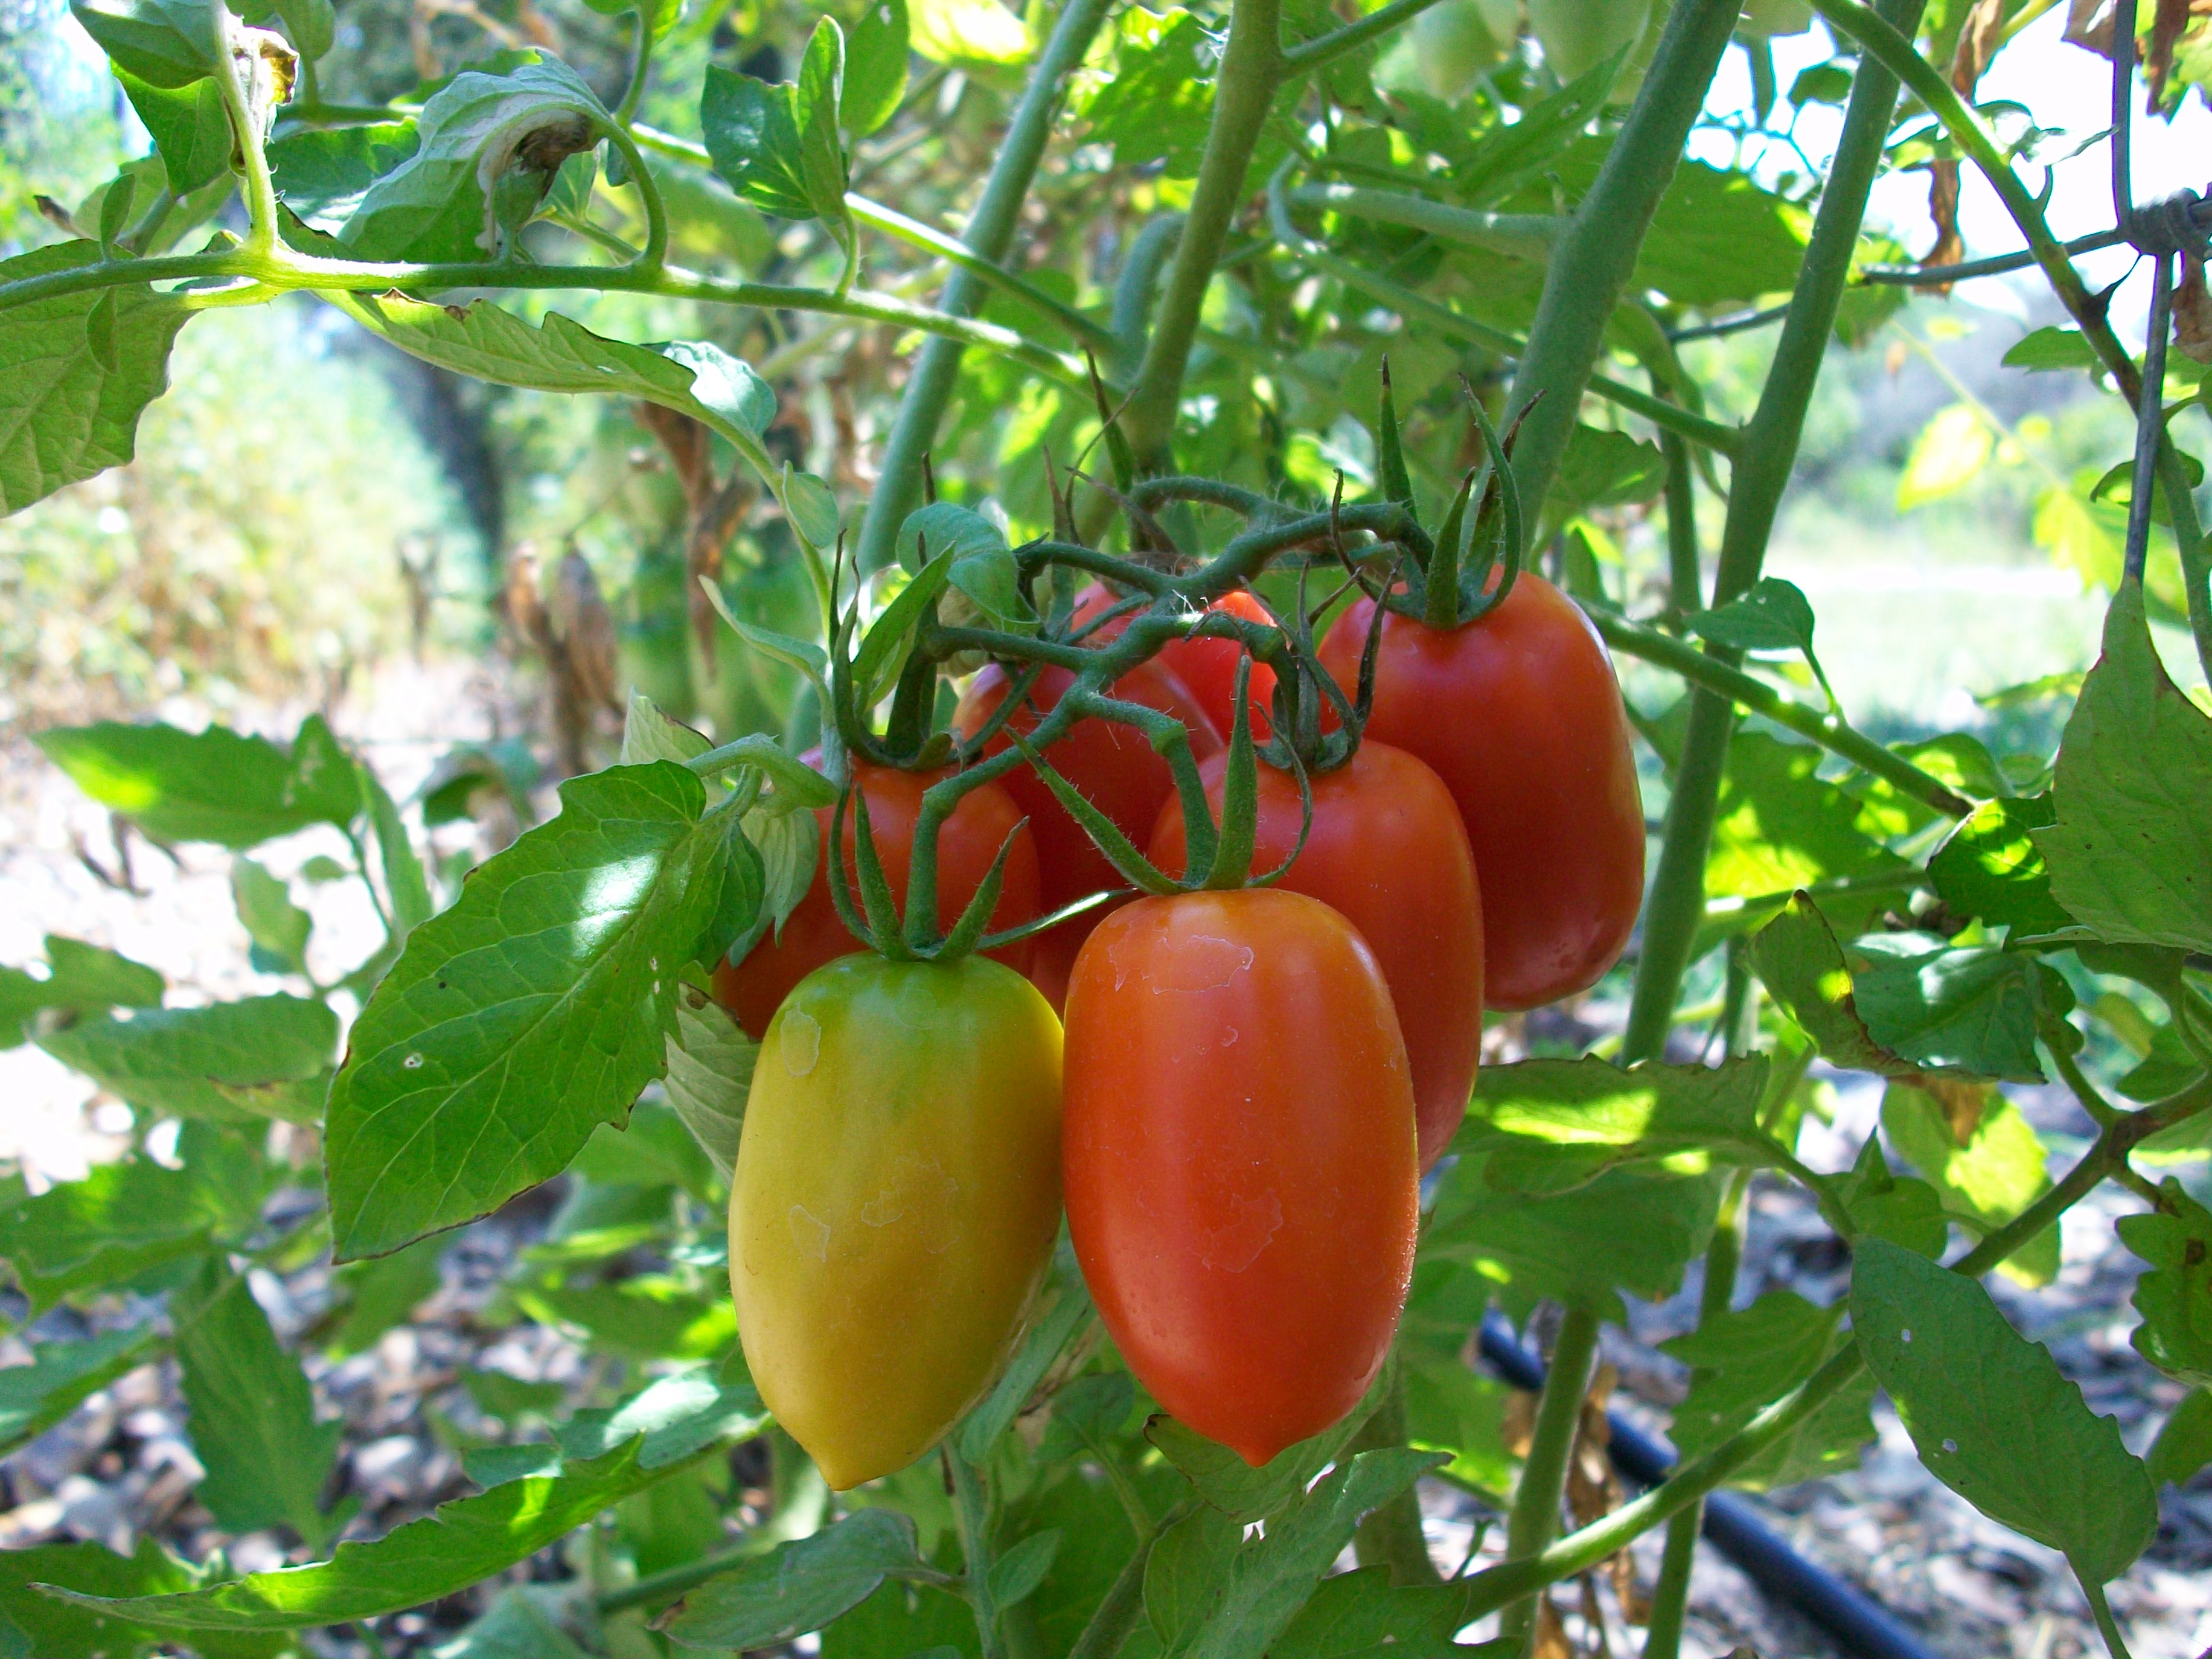
Roma Grape Tomatoes, Four String Farm

Roma Grape Tomatoes, Four String Farm

The Path of the Sun

When selecting the site for your garden, it is essential to choose a space that receives at least eight hours or more of direct sunlight every day.  However, finding enough sun is not always so easy.

Trees, the house, garage, and other structures can shade out a vegetable garden and cause it to become weak, or possibly to fail.

It is best to be flexible when choosing a sunny location for the garden, and it helps to know the path of the sun.

The Changing Lanes of the Sun

The path of the sun changes throughout the year.  At any given point in the northern hemisphere, at the spring equinox, the sun rises exactly in the east, and sets exactly in the west.  Then, through the summer, the path of the sun moves a full 23.5 degrees north of its position at equinox.  There are more hours of sunlight in the summer, and the sun is also in a different place in the sky, relative to the garden.

From the peak of summer through the fall, the path of the sun moves back to the line of the fall equinox.  Then, the sun moves south for another 23.5 degrees for winter.  Finally, the sun returns to its line at the spring equinox.

The Path of the Sun, Photo Courtesy Cornell University

The Path of the Sun, Photo Courtesy Cornell University

There is a full 47 degrees of change in the path of the sun each year.  This change in the sun’s path can create shade at certain times of the year, where at other times the area is in full sun.

Insufficient Sunlight Makes Weak Gardens

A common problem among struggling backyard gardens is availability of sunlight.  Five hours of direct sun in the middle of the day, and dappled shade for rest of the day, is probably not enough for a really good vegetable garden.  Sufficient direct sunlight is especially important in a hot-weather climate.  Heat is not the same as light.  The intensifying heat of summer can badly stress a garden that does not receive enough direct sunlight.

If a garden does not get enough direct sunlight:  1) the plants tend to be weak, slow to mature, and prone to disease and insect damage; and 2) the plants may grow to full size, but produce very little fruit.  The gardener in this situation may treat the pest problem and add fertilizer to the weak plants, without realizing these are only symptoms of a sunlight problem.  A sunny space in one season may be shaded in another.

Get the Full Eight Hours

Make sure your garden stays in the path of the sun for at least eight hours per day.

If your only choice is to garden in shade, use shade tolerant plants; many herbs grow well in shade.  If your garden enjoys full sun during the summer, but is shaded during the cooler months,  try planting a cover crop at the end of your summer harvest and let the garden regenerate itself during its off-season.

The Edge Effect

The most productive land is always found where two habitats meet.  This is called the edge effect. 

The three basic habitats are field, forest, and water.  The border where the field and forest intersect is the most bio-diverse and active part of the whole forest, or the whole field.  The intersection where a lake meets the land is the most active and species-rich area of both habitats.   

Developing the Edge of Forest and Field for Gardens

Developing the Edge of Forest and Field for Gardens

Light penetrates the edge of a forest and stimulates growth of an increasing variety of plants, which leads to greater insect concentration and diversity, which increases bird activity.  Many forms of insect and animal life travel back and forth across the edge for food and shelter; some species live only at the edge.  In a lake, the vast majority of the fish live close to the shore.  The land touching the water is equally dense with diverse life.  This friction along the edge continually stimulates greater bio-diversity and soil health. 

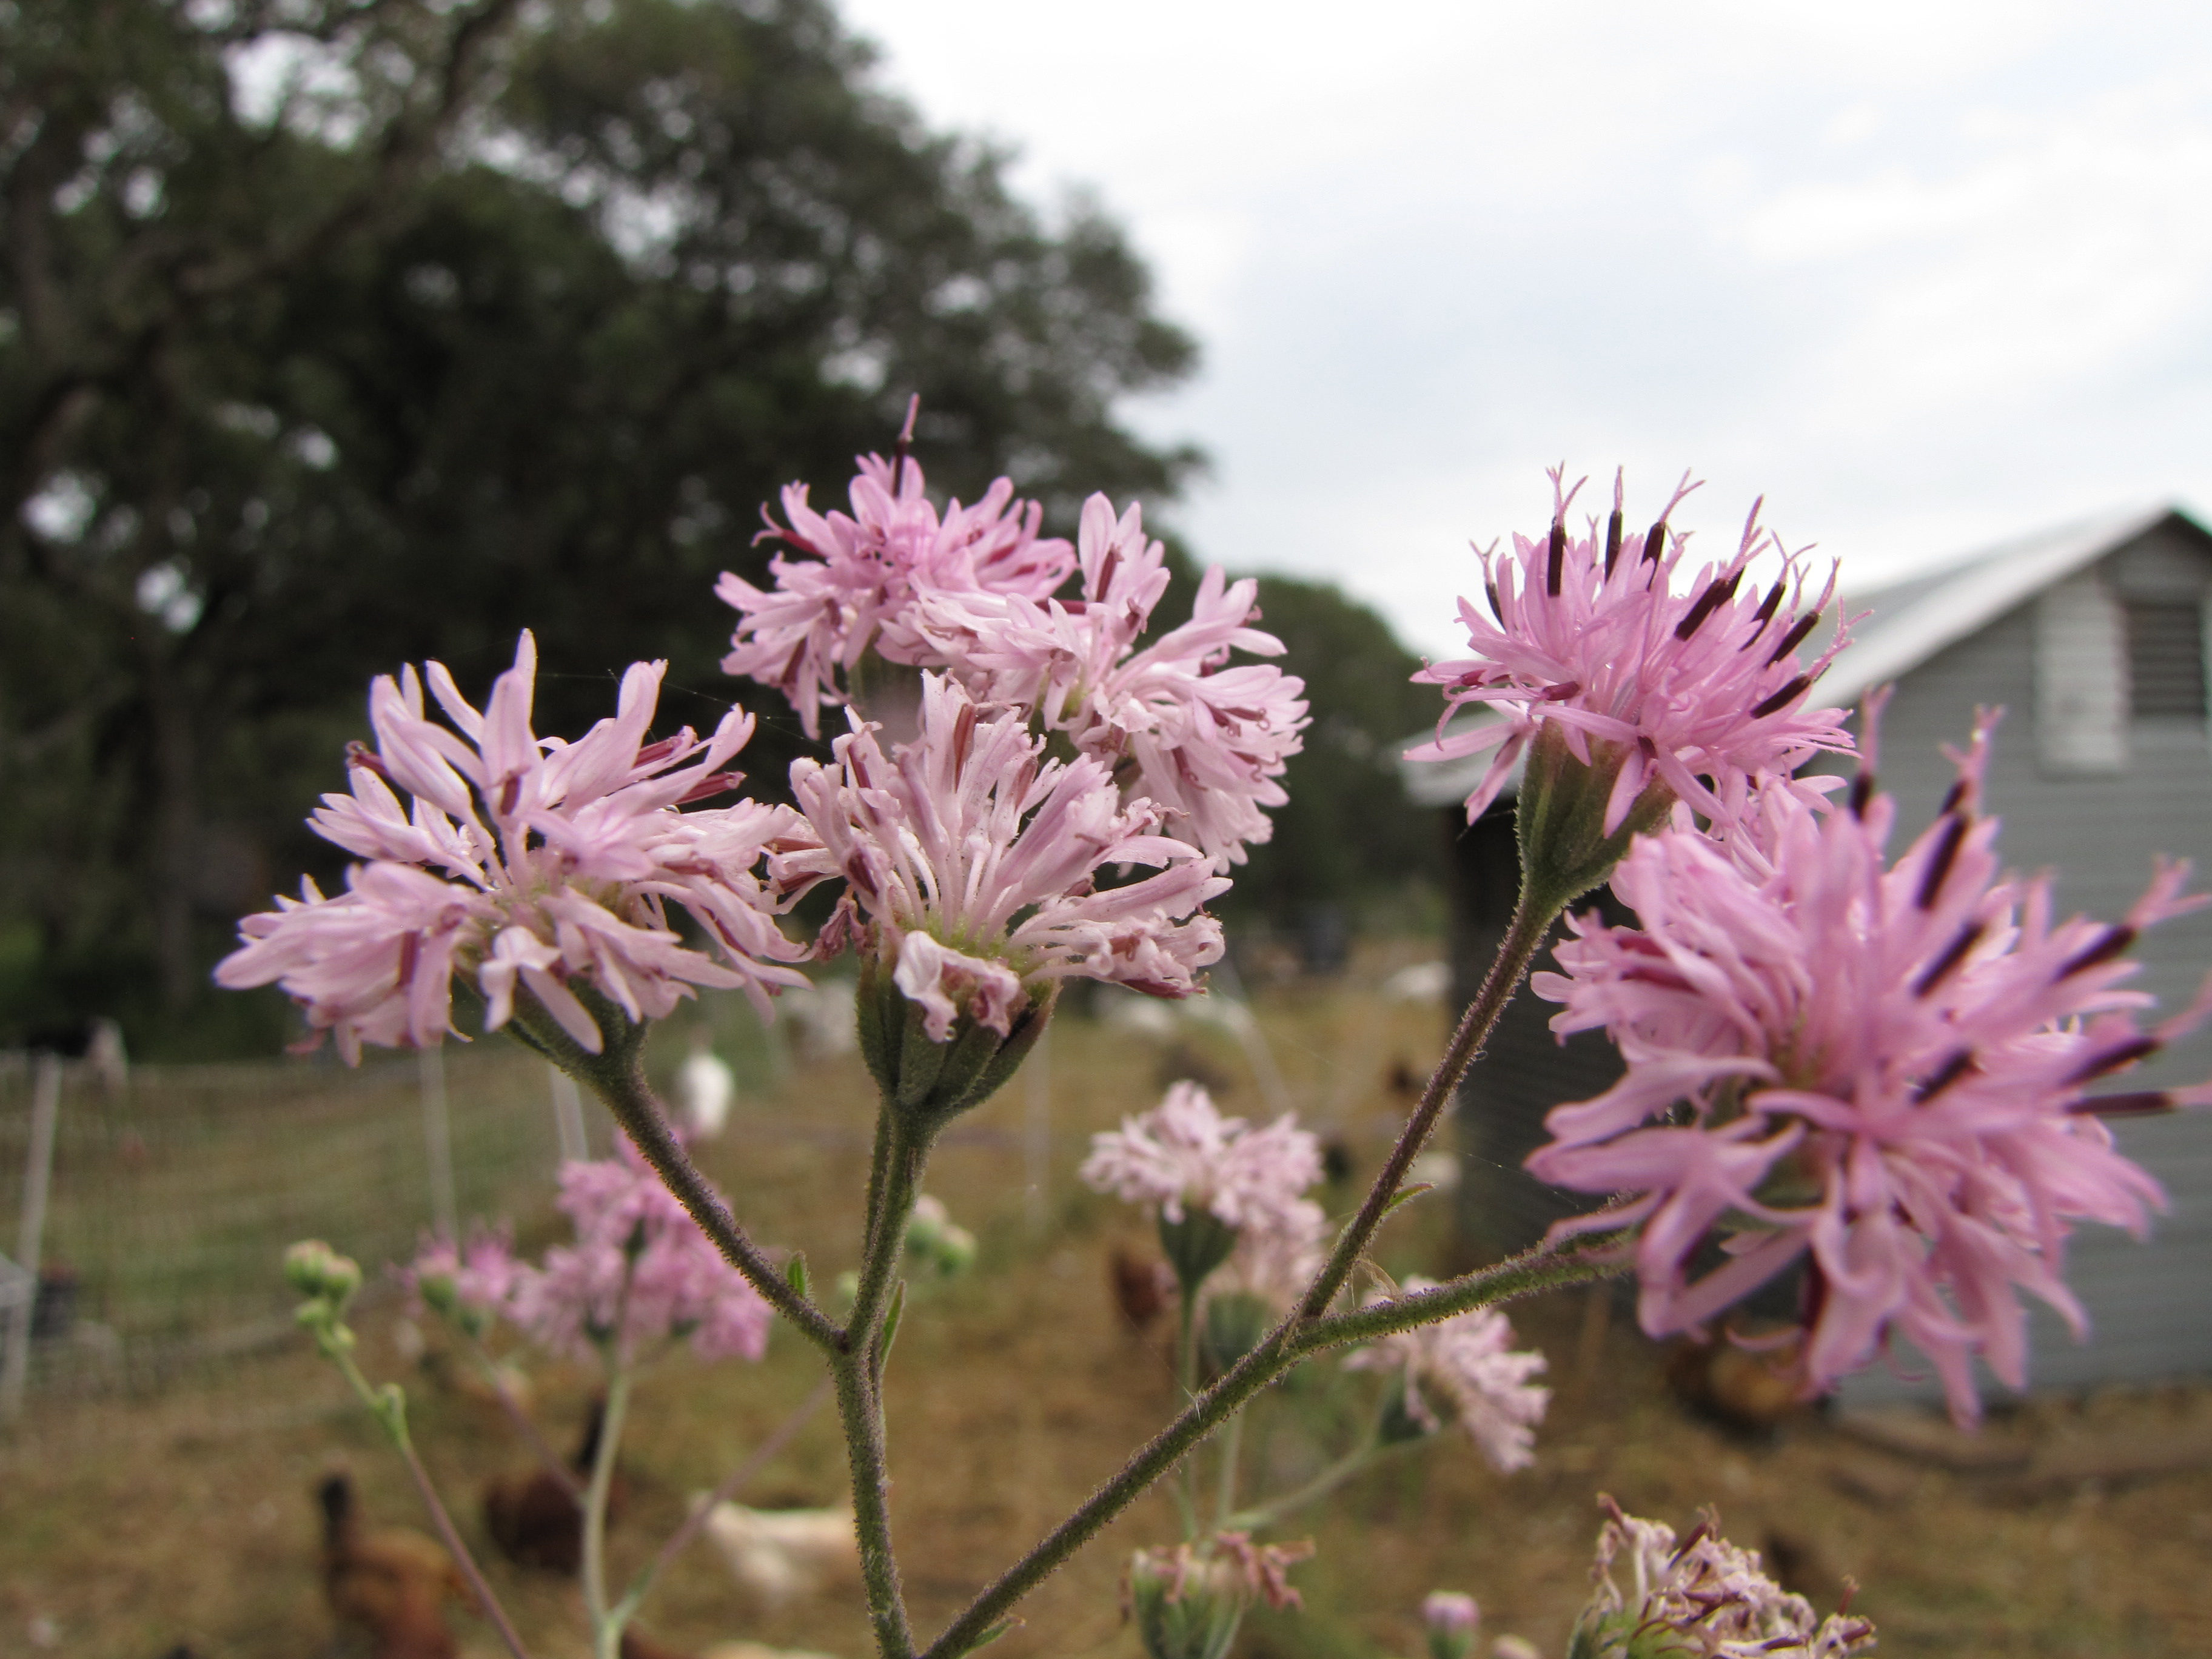
Natural Diversity of Edge Areas, Henhouse in Background

Natural Diversity of Edge Areas, Henhouse in Background

Understanding edge effects is critical to sustainable farming.  Our farm is located in a harsh and barren land; poor soil, brutal climate, salty groundwater, highly destructive pests, and permanent drought conditions.  I had to select our garden space very carefully to give the farm the best chance to survive.  Clear-cutting with a dozer and chemically treating the land was simply not going to work, financially or ecologically.    

Our gardens are tucked into the habitat edges of our property.  Our farm is not a grid of rectangular plots planted in segregated monocultures.  Our gardens flow with the natural contours of the land where they benefit from, and contribute to, the richest soil and greatest bio-diversity.  The greater the diversity of a garden, or farm, the stronger and more productive it becomes.

Native American Indians planted gardens this way.  They did not have the industrial equipment to clear-cut forests, or the chemicals to treat the inevitable problems of clear-cutting.  (When they needed to remove trees, Indians used a method called girdling, which I will tell more about later.)  Indians focused their labor and resources on the highly productive edges, where their gardens received the greatest returns.  Instead of constantly fighting nature, they harnessed the raw power of nature and channeled it into the garden. 

Edge Habitat with Chickens Preparing the Soil

Edge Habitat with Chickens Preparing the Soil

Our gardens do not hurt the natural environment of our farm; they help it immensely.  Our plantings and rotational grazing closely mimic the natural cycle that occurs at the edges, with slightly modified flora and fauna.  The space around our gardens has exploded with life since I first began to develop them, despite the severe drought of the last five years.  All parties have benefitted from our partnership. 

Someday, when we stop farming this land, our gardens will continue to flourish with wildlife as they revert to the true natural condition.  Our farming will have actually improved the environment.  In the meantime, our methods make us more financially successful as farmers, as opposed to using the conventional chemical methods, which, I am convinced, would have caused our fast failure.  Leaving the land better than we found it is an emotional dividend that I can’t quantify.   

Our Gardens are Framed by Trees to Protect Birds and Beneficial Predators

Our Gardens are Framed by Trees to Protect Birds and Beneficial Predators

Soil in a State of Nature

In a state of nature, out on the grasslands, ruminants, such as bison, graze in tight and continually roaming herds.  They eat down the grass and return it to the soil as fertilizer.  They do not eat all the grass, but leave a generous stubble primed to regenerate.  The action of their hooves aerates the soil.  Flocks of birds follow the ruminants and pick the bugs and seeds from their manure.  The birds return the seeds to the soil soaked in powerful fertilizer.

The herds graze with the greening of the grass, north in summer, southward in winter, and the birds follow on their hairy backs.  This continual action–the snipping and fertilizing and aeration of soil–causes the grass to grow dense and thick and lush.  This density of grass creates a living mulch over the soil to regulate moisture and soil temperature, and to protect the soil.

Every so often, lightning sparks the prairie, and all the grassland that needs a replenishment of minerals receives it through fire.  When the grass is at optimum health, it does not catch fire.  The lightning then serves to enrich the rain with nitrogen to further stimulate growth.

The prairie itself is not a monoculture of a single grass.  It is a poly-culture of many types of grasses, weeds, and flowers that share the space in a companion partnership.  The soil beneath the poly-culture is teeming with thousands of beneficial microbes and bacteria.  These microbes are the very life of the soil.

This progression of ruminants and birds and grass and fire, over thousands of years, creates extremely healthy soil.  This soil turned the Great Plains of America into the richest farmland in the world.

The Floor of the Jungle

In a state of nature, in the jungle, trees and brush grow thick and lush.  Monkeys feed in the canopy of trees and drop their manure to the jungle floor.  Down in the shadows, every manner of herbivore and carnivore cycle themselves through the intestines of one another, and are deposited as fertilizer among the detritus.  The jungle floor is crawling with a decomposing compost of the refuse of animals, leaf litter, fallen trees, hot blood, and digested teeth and bones.

The moist soil beneath this composting mulch holds enormous energy.  Every cubic inch of soil is filled with millions of microbes that transform the compost into food for the plants.  The wet weight of green bears continually down and is swallowed by the living microbes and given back to the trees to be carried up to the monkeys to be dropped again.

This progression of plants and animals and compost and microbes, over thousands of years, creates soil so healthy, it nearly vibrates in your hands.

The Delicate Soil

It takes nature thousands of years to develop this soil, but man can destroy it in a very short time—a generation, even in a few years.

The ecosystem of the Great Plains formed over millennia.  However, the southern edge of the Plains was devastated during the great cattle drives of the 1880’s.  In less than 20 years, the overgrazing of the cattle herds stripped the grass from the soil, and it never recovered.  The soil grew thin, dry, and weak, and the healthy bacteria and microbes in the soil vanished.  The cattle coming up from Mexico brought their mesquite beans with them in their bellies, and this opportunistic invader, the mesquite tree, spread north along the cattle trails like an infection through an open wound.

Illustration Courtesy University of Austin

Illustration Courtesy University of Austin

Within a generation, a giant swath of Texas became a desert of thorns that once had been thick grass and endless herds of bison.  The old-time settlers of the day wrote about this with piercing sadness:  how when they discovered the virgin country, they could ride for hundreds of miles through grass that grew to the withers of their horses, and now the whole landscape was covered in mesquite and cactus.  In less than a generation, an ecosystem was transformed, not by machinery, but by an over-concentration of cows.

Photo Courtesy Kansas State Historical Society

Photo Courtesy Kansas State Historical Society

Industrial farming equipment created another surge of soil destruction on the Great Plains in the 1920’s and 1930’s.  This disaster is known as the Dust Bowl.  The dust was actually soil, the unprotected soil of a thousand farms, that was picked up by the wind and carried away.  The farmers had taken everything they could from the soil, and did not protect it, mulch it, cover crop it, or give anything back, and the soil quit them.  Nearly 100 years later, the farmers are still trying to get this soil back.

I saw a forest in Africa that had been strip-mined.  A thousand years of building that forest into an extraordinary ecosystem had been wiped away in a few short years by mining companies.  In its place was a bare stony desert that held the heat of Africa like a white-hot fire, and everything that walked across it was burned.

The local African government, with help from the mining companies, had begun to restore the forest in 1970.  Forty-one years later, with the heroic work of thousands of people, and millions of dollars, the jungle had only barely begun to return.  At the tops of the trees, monkeys howled, and threw their fertilizer down to a thin forest floor covered with pine needles, but the forest floor was cool and dark.  The soil was slowly regenerating.

From their view at the top of this tiny forest, the monkeys looked across a vast field of white-hot rock, active quarries, and industrial mining equipment.  There was still much work to be done to return this forest to a state of nature.

Monkey in Haller Park, Kenya, being reclaimed to forest from mining quarry

Monkey in Haller Park, Kenya, being reclaimed to forest from mining quarry

Building the Soil in a Backyard Garden

I never thought very much about soil health, until I started a farm.  I didn’t realize how hard it is to create soil, or the value of good soil, and how easy it is to destroy.  Now, the focus of my daily work, one way or another, is building healthy soil.

My goal in the next several posts is to discover the ideal method of preparing the soil for a backyard garden.  I will show how we build soil health on our farm and the principles of nature that dictate our process.  My hope is to demonstrate to a new gardener not only the best method to build healthy soil, but also the reasons why.

Moonlighting Sonata #2

I played nights in a grunge band, three privates from 2nd Ranger Battalion, nothing in common but music and machine guns, and it was the best band I ever played in.

We continually missed gigs because of deployments, and our security clearance did not allow us to call the bar owners to cancel, and this gave us a bad reputation on Pioneer Square, but there was nothing we could do about it.

We missed the good shows, at Larry’s Rhythm and Blues, the women with scraggly hair and flannel shirts, the guys trying hard to look filthy; and at the Underground, the basement stage, with the lights so low you could not see the crowd until the mosh pit surged onto the stage.

The best show we played was a block party at a squad leader’s house in Tacoma.  Most of Bravo company showed up, a hundred Airborne Rangers in a suburban home full of beer kegs, and it was a guaranteed train wreck, and we provided the soundtrack.  The tip jar passed steadily through the crowd, a Kevlar helmet with camo netting and go-fasters, and we made $932 in tens and fives and ones.

As the music and alcohol warmed the night–before the police showed up to shut the place down, clearing the last of the Rangers from the bedrooms and neighboring lawns, me and the guitar player throwing amplifiers into the back of a pick-up truck in the red and blue flashing lights—before all of that, the drummer and guitar player stepped from the stage to watch my solo.

I played Moonlight Sonata on the electric bass, tapped out like the keys of a piano on the fret board, six golden minutes of adagio sostenuto.  The tension built achingly beneath the surface, the bass notes rattling the windows, the subtle intense climax, the long slow denouement, the final two chords lingering in the kitchen and living room, and every single note was beautiful.

At some point during the song the crowd slowed, stilled, quieted on the porch, in the badly lit back yard, everyone in the house quiet, perfectly still, shoulder to shoulder in a moment of pure beauty.

When I finished, I looked up at the silent faces looking at me, my brothers, and after a pause someone yelled, “That sucked!  Play some Primus!”  I hit the long slow slide into My Name is Mud, and slapped the percussive tempo, and the bone-cracking mosh pit recommenced.

Back at work, in the belly of a C-130, standing in the blue-lit dark with my parachute and my pack and my gun, waiting in line to jump into another rain-soaked night, the vibration of the airplane merged with the vibration of bass notes, and the flowing chords poured out of the opening doors, and outside the doors the high notes of the sonata rang in my head like bells above the whine of the propellers.

Moonlighting Sonata #4

Intensive Successive Companions

Kale, Radish, Carrots, Parsnips, Dill, and Cilantro

Kale, Radish, Carrots, Parsnips, Dill, and Cilantro

We use a strategy called “intensive successive companions” to design the plantings in our gardens. 

This method enables the gardener to achieve the maximum production of the widest variety of produce from the smallest possible space, with the least amount of work, and the least amount of inputs to the garden.  Every square inch of three-dimensional garden space is utilized; and not just space, but growing time. 

With “intensive successive companions”, one person, working alone, can grow an astounding volume of vegetables, herbs, and fruit, on a modest space.  And the garden can stay in cultivation throughout the year delivering continual waves of fresh produce.

The Opposite of a Monoculture

“Intensive successive companion planting” is a gardening strategy.  The opposite of this strategy is planting in a monoculture.  In a monoculture, the goal is to sterilize the field, or garden space, and grow only one selected crop in each segregated area.  Generally, monoculture farms and gardens require chemical herbicides, fertilizers, and pesticides to make them work.  This unsustainable strategy defines large-scale corporate farming.

Kale, Radish,Cilantro, Collards, Mustard, Cabbage, Lettuces, and Queen Anne's Lace

Kale, Radish,Cilantro, Collards, Mustard, Cabbage, Lettuces, and Queen Anne’s Lace

Intensive successive companion planting harnesses the power of nature and channels it into the garden.  This method continually improves the health and bio-diversity of the soil.  These gardens require less water; over time, the gardener can cut irrigation by fifty to eighty percent.

Beneficial predators love these lush gardens.  They hunt continually among the plants and cleanse the garden of pests.  Intensive successive companion planting is the key reason we never have to use chemical pesticides in our gardens.  Chemicals only hurt a healthy garden.  

Breaking down Each Component

For new gardeners, this method can seem complicated at first.  However, once you break down each component, and see how it works in the garden, the method becomes completely clear.  Here is a broad description of the components, with more to follow in future posts.

Various Lettuces and Spinach, Intensively planted

Various Lettuces and Spinach, Intensively planted

Intensive Planting

Intensive planting is a very close spacing of plants, closer than typically recommended in planting guides.  The leaves of the plants grow together and overlap, which makes a “canopy” over the garden.  This canopy creates a “micro-climate” beneath the foliage, which maximizes irrigation, dew, and natural insulation.  The canopy shades or chokes out weeds and provides protection for beneficial predators, to allow them to hunt continually in the garden, a critically important aspect of chemical-free gardening.

Successive Planting

Successive planting allows for plant production in waves, or stages.  A simple succession is to plant the same vegetable two weeks apart, so that it does not all ripen at once, but over a longer period.  Another aspect of successive planting, also called relay planting, is to plant a seed or transplant where a mature plant was just harvested, so that as space is made in the garden, new plants are introduced, to maintain a continual production.

Successive planting is also accomplished by planting various different plants at the same time in the same space, in such a way that each plant grows at a different rate and height and width.  As one plant matures and is harvested or cut back, the next plant matures, and so on, to maximize the three-dimensional space of the garden.     

Kayla picking beans and sweet corn from a summer garden

Kayla picking beans and sweet corn from a summer garden

Companion Planting

Companion planting is planting two or more plants together, who benefit from the presence of the other.  Every plant—every vegetable, herb, fruit, and flower—grows better when planted in the right combination with other plants.  The combinations serve many functions:  some plants fertilize each other as they grow, some protect others from pests or disease, or provide shade or structure or support.  Companion planting dramatically increases biodiversity in the soil.  Companion planting attracts the widest variety and greatest numbers of beneficial predators to the garden.

The best example of companion planting is “the three sisters“, which is corns, beans, and squash, grown in the Native American method.  Each of these vegetables grows better when planted with the others, rather than segregated.  Not only that, by companion planting these vegetables, gardeners can grow three to five times more produce on the same garden space.  With good companion planting, yields of every single garden crop can be improved.

Hairy Vetch: A Cover Crop

Kayla opening 50lb bag of Hairy Vetch

Kayla opening 50lb bag of Hairy Vetch

Kayla planted this  garden with hairy vetch on New Year’s Day.  It took her about ten minutes to plant this space with a nice cover crop.  Her ten minutes of planting will reap a lot of rewards in this garden.

Hairy vetch is a cover crop.  Cover crops are designed to:

  • improve soil fertility through nitrogen fixation (also called “green manure”)
  • provide a “living mulch” to other plants;
  • control weeds;
  • provide nutritious, protein-rich animal fodder;
  • attract beneficial predators; and
  • increase the bio-diversity of the soil.

    Bando loves to be in the picture

    Bando loves to be in the picture

In Rockport, hairy vetch is best planted between November and February.  Vetch is winter hardy, and a freeze will not kill it.  Up north, they plant vetch in August or September, before the first killing frost, and the vetch winters under a thick blanket of snow, and resumes growing in the spring when the snow is gone. 

It takes about 90 days for vetch to fully mature, and create beautiful purple blooms.  When the vetch is ready, you can cut it down for a garden full of thick mulch, and then plant vegetables in it.  By using vetch, no herbicides, soil preparation, or mulching is needed to plant vegetables.  Or, the vetch can be plowed under.  Or, animals (chickens and pigs especially) can be grazed on the vetch, to eat it to the ground.  Grazing animals on a vetch patch is one of the best things a gardener can do to improve soil health. 

Additionally, other plants can be combined with vetch.  Vetch can be used as a companion planting with tomatoes or a Three Sisters garden.  Gardeners often mix winter rye with vetch, as a premium cover crop that also makes excellent animal fodder.   

Vetch Seeds after 7 Days

Vetch Seeds after 7 Days

Nitrogen Fixation

Vetch takes nitrogen from the atmosphere, carries it down to the plant’s roots, and “fixes” it to bacteria in the soil.  The nitrogen is then available to the next crop planted in that soil.  This is called the “green manure” effect.  I slept through every science class from 1st grade through college, but this dynamic fascinates me.  Vetch adds between 90 and 200 pounds of nitrogen per acre.  That is an enormous amount of fertilizer created simply by growing a plant.

Modern large-scale farms use “chemical nitrogen fixation”, also called “industrial nitrogen fixation”, to add nitrogen.  In other words, they use synthetic chemicals to fix nitrogen.  This is how big corporate farms (and many small-scale farmers and backyard gardeners) fertilize their crops.

Before these chemicals were invented–basically all of human history prior to World War II–farmers used “biological nitrogen fixation”, or cover crops, to fix nitrogen into the soil.  

Thomas Jefferson, in his Farm Book and letters, writes extensively about the benefits of cover crops.  In a letter to George Washington, dated June 19, 1796, Jefferson writes, “…but true winter vetch is what we want extremely…”  Jefferson routinely rotated  vetch or clover in his gardens, plowing them under in the spring, or grazing animals on the mature crop.

Before chemicals, all farmers used cover crops and manure.   Today, it is rare to find a farm that uses cover crops and manure to grow vegetables.        

Other Benefits of Vetch

In addition to its benefits as green manure, vetch also prevents weeds by choking them out and serving as a living mulch.  Because vetch is about 20% protein, which is extremely protein-rich for a plant, it makes excellent animal fodder.  Vetch also makes a good home for beneficial predators, and keeps them patrolling the garden between vegetable plantings.  Bees love the purple blooms.

Hand Broadcast in Sweeping Motion

Hand Broadcast in Sweeping Motion

How to Plant

Vetch can be hand broadcast, which simply means to throw it across the garden.  Start in one corner and work your way across, evenly spreading the seeds.  You can cover a full acre with about 25 to 35 pounds of vetch seeds.  If you are planting a smaller area, estimate the pounds of seeds you will need for that space.  Place the seeds you will plant in a pot or bag, and carry that with you as you plant the garden.  You can use the declining volume of seeds in your pot to determine how much to cast, and thus make sure you achieve an even and adequate covering.  Save the remaining seeds in a cool place until the next planting.

7 days after planting

7 days after planting

The seeds require good seed-to-soil contact to ensure germination and root development.  Notice the seed in this picture sends a shoot up, and a root into the soil.  You should till up your garden space prior to planting, rather than broadcasting seeds into a field full of weeds or grass.  Water the vetch planting once or twice per week after broadcasting, until the plants are established.  Hairy vetch is drought tolerant, but needs some moisture to get started.   

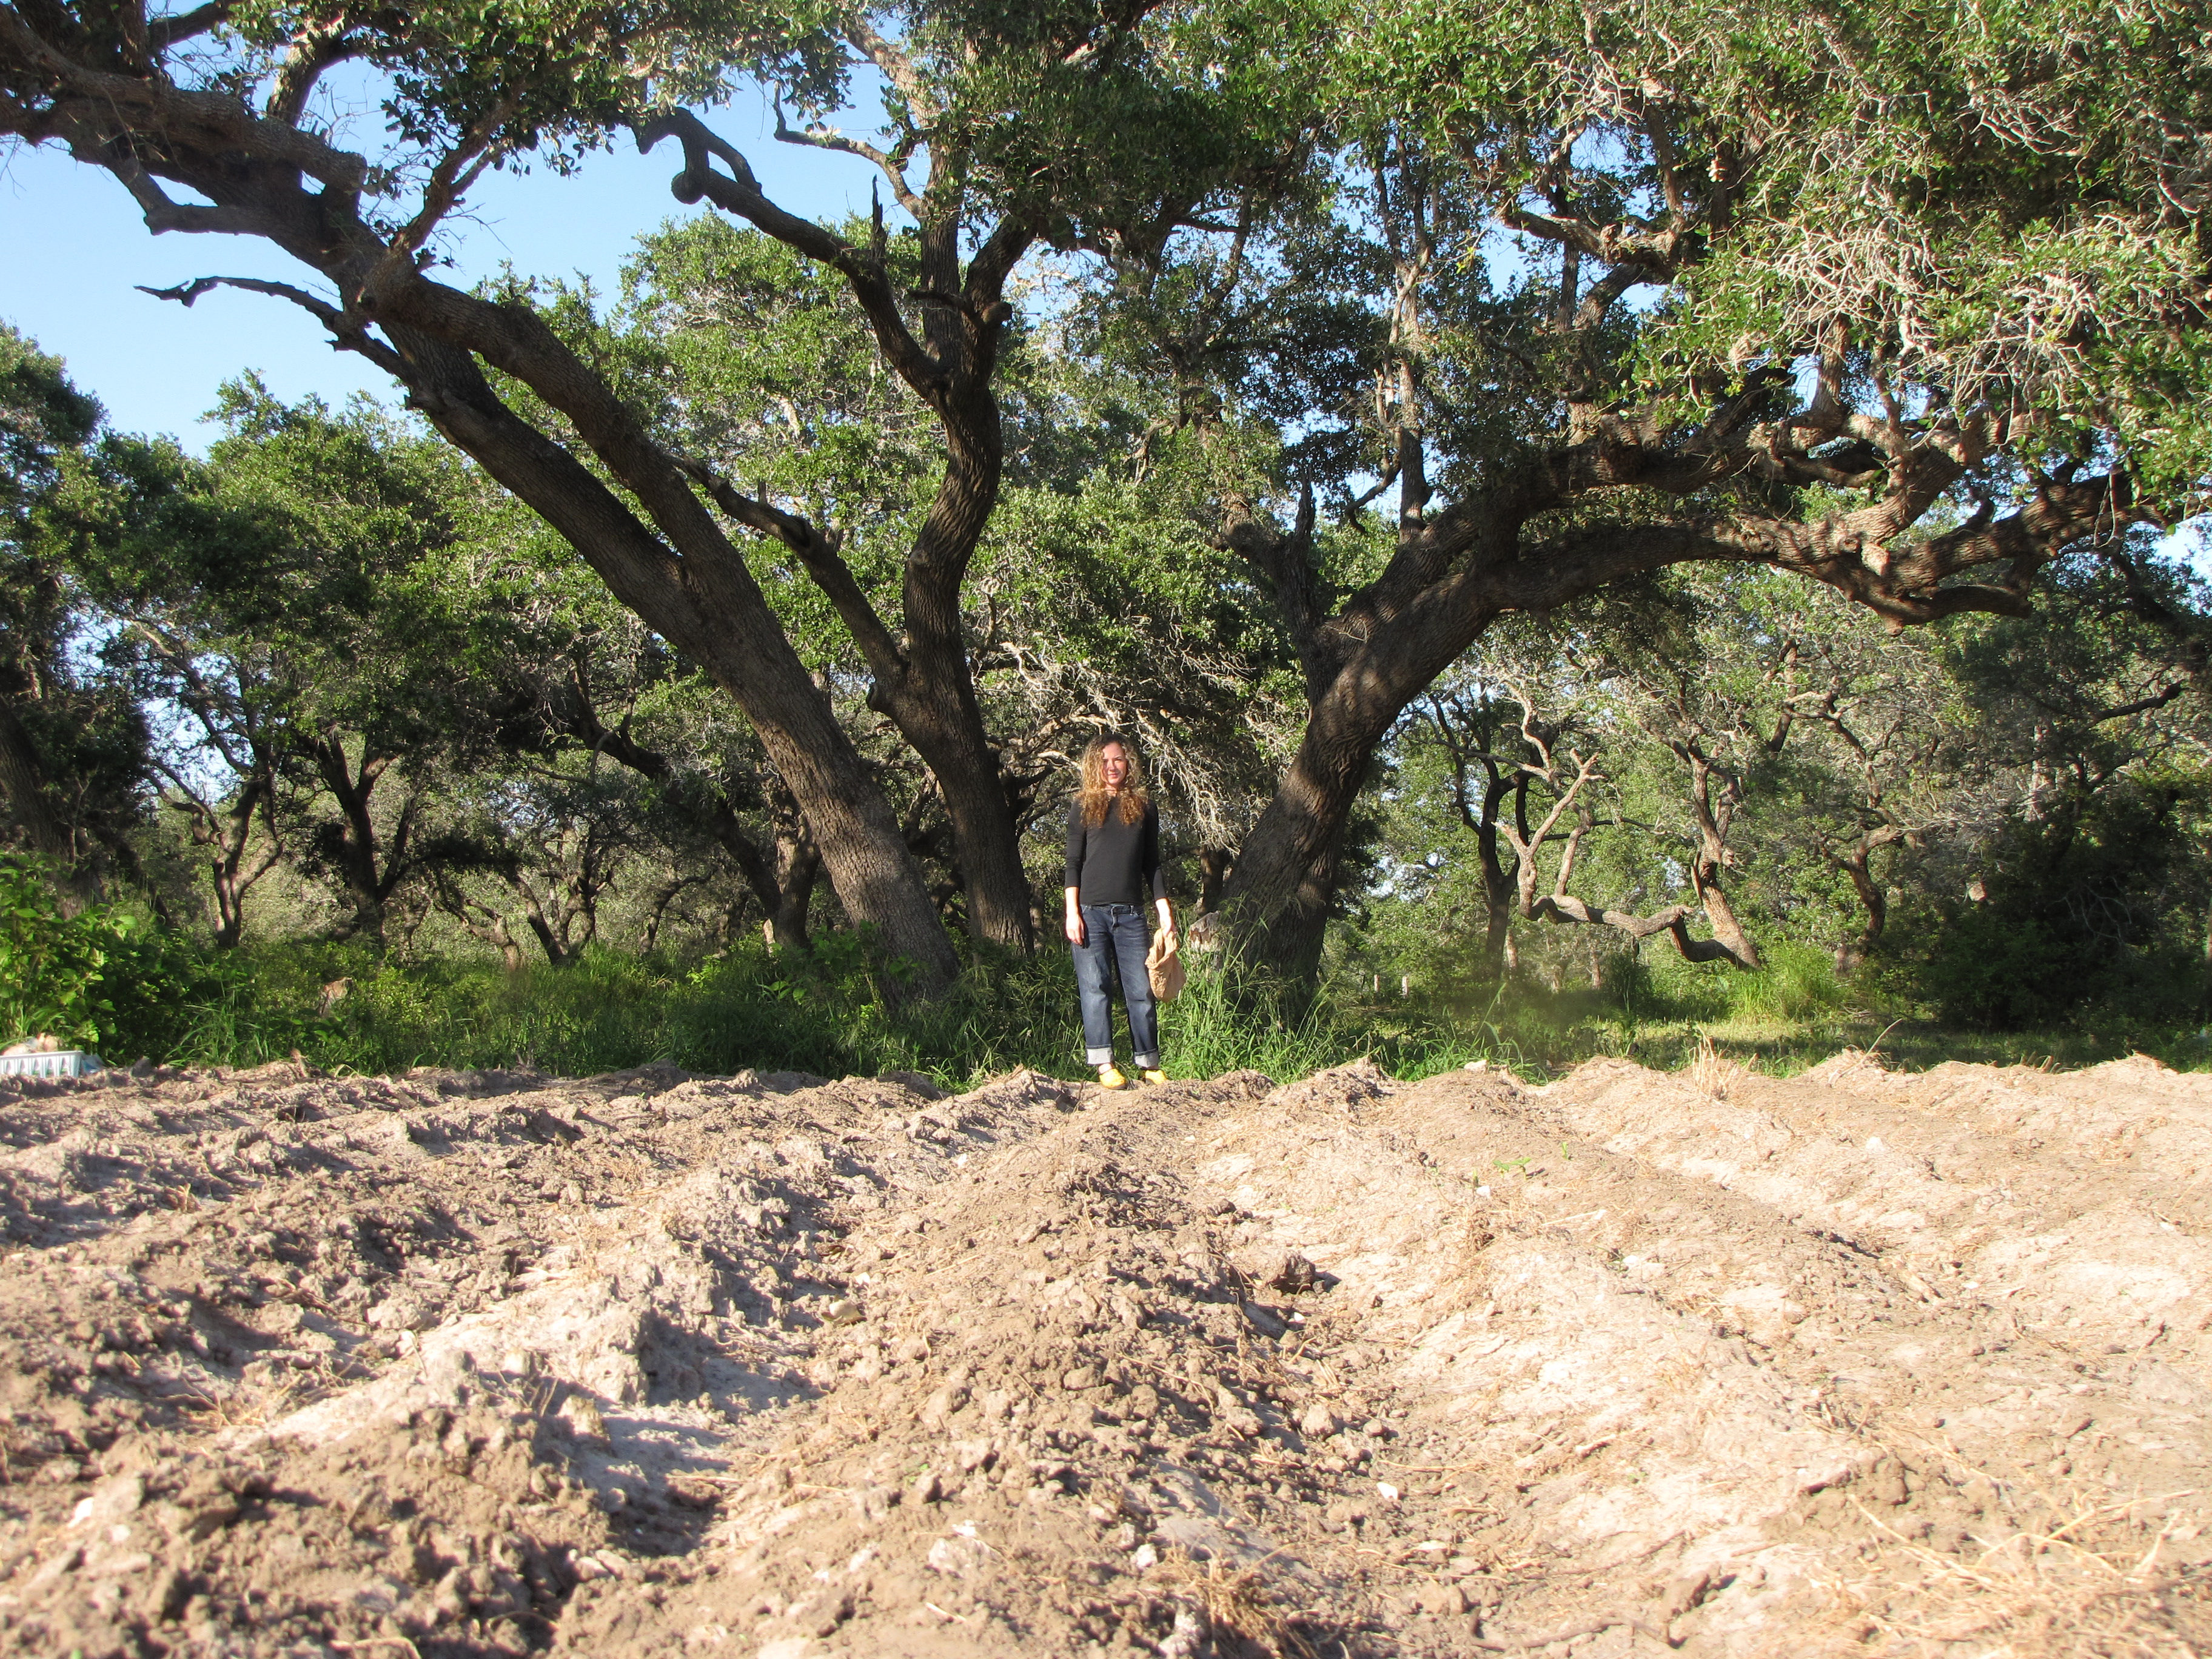
Three Gardens Behind, Four in Front

Three Gardens Behind Kayla

A Cover Crop View

We had just moved chickens off of this 2,000 square foot garden, before Kayla went out to plant it with vetch.  The chickens had eaten down all the remnants of corn, beans, squash, cucumbers, melons, herbs, and wildflowers, to leave a completely bare space.  Then we quickly formed the rows you see behind Kayla.  We will plant Three Sisters in these rows once the vetch grows thick. 

We will give an update on this garden, and post pictures, to show how the vetch develops, and to see what kind of return we get from Kayla’s ten minutes of planting on New Year’s Day.

Finished Planting in Ten Minutes

Finished Planting in Ten Minutes