I have the sweetest childhood memories of my grandmother standing over her cast-iron skillet in her 80s-era pink chemise. I knew it was the weekend because the smell of pancakes flooded the kitchen.
My grandmother’s fluffy pancakes were piled high and ready for a generous slathering of butter and dusting of granulated sugar. She never put syrup on her pancakes. They didn’t have syrup growing up in her Great Depression-era childhood home, so she never acquired a taste for it.
This tradition of pancakes on Saturday morning holds such nostalgia for me that I’ve insisted on carrying it on with my babies. Saturdays, we huddle together in the kitchen and take turns adding flour and baking soda, whisking, stirring, laughing.
I hope the girls, when they are older, have similar feelings about our pancakes on the weekends and visions of me standing over a skillet Saturday morning. Now, if I could only find a fuchsia nylon moo moo.
SourdoughPancakes
Prep time: 15 minutes
Cook time: 10 minutes
Inactive prep time: 8 hours
Ingredients:
1 cup sourdough starter
2 cups all-purpose flour
2 cups water
1/4 cup sugar
2 tsp baking powder
1 1/2 tsp baking soda
1/4 cup butter
2 eggs
2 tsp vanilla extract
Directions:
Combine starter, flour, and water in a large bowl until well combined. Cover with a tea towel and let ferment overnight.
The following morning, combine regarding ingredients and mix until just combined.
Preheat a cast iron skillet or griddle over medium low heat. Add 1/2-1 tbsp butter once hot.
Add 1/3 cup batter to preheated skillet and cook until bubbles form and the surface loses its sheen, about 3-4 minutes.
Flip pancake and cook on the other side for an additional 2-3 minutes.
Continue preparing pancakes until all batter is used. Serve with butter and warm maple syrup or your favorite topping.
Waffle variation: Prepare batter as instructed in steps 1-3. Apply non-stick spray to a waffle maker and preheat to desired setting. Add enough batter to completely cover the waffle maker. Cook waffles according to your waffle maker directions, or until desired doneness has been reached.
The dog days of summer are coming to an end. In our little corner of the world, that means the temperature drops a few degrees from hotter-than-Hades misery to sweat-in-the-shade unbearable. The last of the summer vegetables are barely holding on. And after this long year, so are we.
But there is a silver lining to those puffy white August clouds. Fall is around the corner and so is our resolve to enjoy the rest of 2020, despite its many, M-A-N-Y pitfalls! This decadent dark chocolate zucchini bread is the perfect intersection of summer and fall–and of looking back with relief that it’s over and ahead with a hopeful resiliency.
Why This One’s Better (And Better For You)
Let me be plain: this Dark Chocolate Zucchini Bread is the business. Higher in antioxidants and lower in fat and sugar than your garden variety loaf, you can relish this melt-in-your-mouth goodness without remorse. Splurge on organic zucchini or better yet, squash from your chemical-conscious farmer down the lane, since you’ll be using the skin (and no one needs that pesticide nonsense when we’ve got COVID to worry about). Greek yogurt adds moisture and flavor without the fat. Olive oil is a heart-healthier alternative to vegetable oil. This bread uses a reduced amount of brown sugar, which adds a richness to the crumb.
Pleasant eating, my lovelies! Hugs and love, Kayla
Dark Chocolate Zucchini Bread
Makes 1 loaf
Prep time: 7 minutes
Cooking time: 45 minutes
Ingredients:
2 medium zucchinis
¾ cup brown sugar
¼ cup olive oil
¼ cup plain yogurt
2 eggs
1 tsp vanilla
1 cup all-purpose flour
½ cup dark cocoa/cacao powder
½ tsp salt
½ tsp baking powder
½ tsp baking soda
1 cup dark chocolate chips (at least 60% cacao)
Directions:
Preheat oven to 350°F. Spray a loaf pan (8” x 4” x 2”) with non-stick cooking spray.
Remove ends of zucchini and grate over a colander. Using the back of a large spoon or spatula, press zucchini against the colander to remove excess fluid.
Transfer grated zucchini into a clean bowl. Add in brown sugar, olive oil, yogurt, eggs and vanilla, mixing until combined.
In a separate bowl, combine dry ingredients.
Mix wet and dry ingredients until just combined. Fold in ½ cup chocolate chips.
Transfer batter to prepared loaf pan. Top with reserved chocolate chips.
Bake for 45 minutes, until a toothpick inserted into the center of the loaf comes out clean.
This week, we knew that many of our Farm Share customers would be traveling and it would be difficult for them to eat all the fresh greens we have been harvesting lately. To accommodate the holiday travel schedule, we made some dishes that would also travel.
Nasturtium Leaves and Flowers with Country Terrine
My favorite dish this week was the nasturtium leaves and flowers with country terrine. Country terrine is a pate made from pork liver, pork roast, onion, garlic, spices, cream, and high-quality brandy. Every ingredient in this dish was grown or raised on our farm (except the brandy!).
The terrine is served in small dollops on the nasturtium leaves and topped with a nasturtium flower. These flavors are incredible together. The nasturtium leaf brings a bold fresh flavor and the flower tastes almost of fruit. The mixture of these flavors with the unique taste of the terrine is just exquisite.
To keep the flowers fresh, I dug up the roots of the plant and stored them with the soil in a zip lock bag. You can moisten the soil and put the flowers in the refrigerator and they will stay fresh for days. The blooms will open again when they come into the light. We also included edible radish flowers for a slightly different flavor.
Organic Fuji Apple Tart
We delivered the organic Fuji apple tart to be finished at home. Kayla prepares the raw dough for each of the tarts, then wraps the dough in butcher paper. She pours the apple filling into mason jars. Each customer is given directions on how to roll out the dough, form the tart, and bake it. That way, our customers can enjoy their tarts hot and fresh out of the oven.
The filling for this tart is a pure taste of freshly-picked apples. It is tempting to want to add a lot of brown sugar and cinnamon, but Kayla lets the flavor the apples shine through. The sweetness of the filling balances perfectly with the sweetness of the crust.
Challah
Challah
Challah is a wonderful bread often served at Jewish holidays. Kayla braids the dough into a beautiful loaf and bakes it to golden brown perfection. We thought challah would be nice toasted and topped with country terrine, if any is left when the nasturtium leaves run out.
The King of Pork Chops
We gave each customer a package of our thick-cut pastured pork chops. I can’t decide whether I love these chops better on the grill, or in one of Kayla’s crock pot masterpieces. These chops were particularly large; some of the packages would go for nearly $50 if we sold them retail.
But these chops are worth it. The nasturtium leaves with terrine are a wonderful taste, but they are more of an hors d’oeuvre. These pork chops are the main course, and then some.
Really Good (and Healthy) Breakfast Sausage
We had an idea that a nice brunch would be fitting at some point over the Christmas weekend. We put a pound of ground pork into the Farm Share, along with a recipe for Jimmy Dean breakfast sausage. We took the recipe straight from the Jimmy Dean website, but we eliminated the massive amount of MSG’s they put into their sausage.
This breakfast sausage is not a guilty pleasure, but part of a healthy breakfast. The sausage, along with pastured eggs and toasted challah, is exactly how we started our Christmas morning at the farm.
Chocolate Chip Walnut Cookies
I should call these birthday cookies, because Kayla makes them for my birthday, at my request, instead of cake. I don’t know how she makes these cookies so good. I tell the children that she dips the tip of her little finger into the batter to make them so sweet, and that they all must learn how to do this.
Produce
Additionally, we had a good selection of produce in the farm share this week. Our customers had a choice of some or all of the following: broccoli; kolh rabi; Siberian or curly leaf kale; green leaf mizuna; Prima Rosa chard; Chinese or All Season or Early Dutch cabbage; broccoli greens; pak choi; yams; sweet onions; garlic; Laurentian rutabegas; Shogoin or Purple-Top turnips; and heirloom radishes. We even had a small amount of zucchini and eggplant to add to some of the boxes.
We included some recipe ideas for a soup or crockpot, to help make the most of the produce and protein in the share. There should be plenty for one or many delicious and hearty holiday meals.
Why We Love our Customers
We are so blessed to partner with such wonderful people. Our Farm Share friends are faithful, loyal customers. They have been there for us during flood, drought, heat, cold, good harvests, and bad. They take care of us in big ways, like paying for their share up front each month; and in little ways, like returning mason jars and egg cartons for us to recycle. Our customers keep us going.
Farm Share friends, we want you to have a good Christmas because you have made it possible for us to have a good Christmas. We have plenty of presents under the tree for the little ones, and YOU made that possible. We have had some lean years building our farm, but this is a really great year, and we are so glad to share it with you.
Thank you so much, friends. We wish you a blessed holiday, good eating, and a very Merry Christmas!
For our colonial pumpkin pie recipe, we used lovely Galeux D’Eysines heirloom pumpkins, but these are rare and hard to find. For your pie, use any small to medium-sized pumpkin, or a large acorn, buttercup, or red turban squash from the farmers’ market.
This recipe first appeared in the THE BEND MAGAZINE. Please check out this beautiful magazine for other recipes and more.
Preheat oven to 350°F. Combine spices and brown sugar in a small bowl. Place pumpkin on a rimmed, aluminum foil-lined cookie sheet. Place half of the apples in the bottom of the pumpkin and top with 1/2 cup raisins, 1/2 cup pecans, and half of the butter. Top fruit and nut mixture with half of the sugar-spice mixture.
Using the remaining ingredients, repeat the process forming a second layer inside the pumpkin. Cover pumpkin with aluminum foil and transfer to the preheated oven. Bake for three hours, or until pumpkin flesh is fork tender and filling is bubbling. Serve with Vanilla Bean Sauce.
Vanilla Bean Sauce:
In a medium saucepan, combine cream, sugar, salt, (optional liquor), and butter over medium-low heat. Using a paring knife, cut down the length of the vanilla bean and scrape its contents into the cream mixture. Whisk sauce until bubbling and a creamy consistency is reached. Serve warm by spooning sauce over each serving of pumpkin pie.
(This photo was featured in The Bend Magazine and was taken by photographer Rachel Durrent. Please see below for more info about Rachel and The Bend Magazine)
Kayla Butts will lead a food class for kids, called “KIDS CAN COOK!”, this Saturday, Aug 2, from 2:00pm to 3:00pm. The class will be held at Coastal Bend Health Foods, 111 N. Austin Street, Rockport, TX 78382. Call 361-729-4443 for more information.
Kayla will teach the kids food safety basics and show them some tasty, healthy, and fun recipes to fill their lunch boxes just in time for the new school year. Parents are welcome to stay for the class and watch their kids at work.
Kayla is a registered dietitian, a multi-tasking mom, and a very clever home chef. You can click on The Bend Magazine to see more about her recipes and for the beautiful photography of our friend Rachel Durrent.
Kayla will teach the kids creative ways to prepare highly nutritious meals. When the food is fun, and the children prepare it themselves, they are much more likely to eat well!
CLICK HERE to register for the class. When you get to the link, please go to the bottom of the page and fill in your information. Please register in advance for this class to make sure there are enough materials on hand. The cost is $10 per child.
What: “KIDS CAN COOK!” with Kayla Butts
When: Saturday, August 2, from 2:00pm to 3:00pm
Where: Coastal Bend Health Foods, 111 N. Austin Street, Rockport, TX 78382. CLICK HERE to register for the class (go to the bottom of the form and fill in your info)
Who: Kids from ages six and up and their parents who love healthy fun food!
What is the deal with calories and fat in store-bought granola? Granola has a reputation for being healthy. But when you stand in the aisle of the store reading the nutrition label, you find most commercial granola is surprisingly high in calories, carbs, sugar, and fat. And the taste usually does not justify the calories.
Kayla frequently eats granola mixed with yogurt for lunch, and has granola with fresh fruit as a snack. She experimented with numerous homemade granola recipes. This recipe, adapted from Nigella Lawson, is her favorite.
Why this recipe works: This homemade granola is really delicious, and it is easy and fast to prepare. It has half the fat of most of the store-bought granola (even the “low-fat” versions), thanks to using applesauce as the sweetener. Also, it has twice the fiber and more protein than the others, thanks to the wheat germ.
You can find the ingredients for this recipe at Coastal Bend Health Foods, and Kimmi can offer her own wonderful suggestions about homemade granola, as well.
Ingredients
5 cups old-fashioned oats
1 cup wheat germ
1/4 tsp salt
2 cup add-ins such as coconut, dried fruit, nuts, or seeds
1/4 cup maple syrup
1/3 cup honey
3/4 cup unsweetened applesauce or other fruit puree
Mix oats, wheat germ, nuts and/or seeds (as desired), and salt in a large bowl. Simmer apple sauce, maple syrup, honey and water in a small sauce pan over low heat. Pour wet mixture into combined dry ingredients. Squeeze the mixture with your hands to form small, bite-sized clumps. Spread evenly on two greased baking sheets.
Bake for 45 minutes, stirring every 15 minutes, or until golden brown and fragrant. Add in dried fruit, as desired.
Prep Time: 3 minutes. Cooking time: 12 to 14 minutes.
I once saw a French chef make a hamburger by pushing a filet mignon of Kobe beef through a meat grinder. He sautéed the burger in a pan, served it on a Kaiser roll, and topped it with truffle sauce! The chef said it would be the best burger of my life, but at $100 per plate, I will never know.
You and I don’t need to do all that. We can have the best burger of our lives for around $4 total. The French chef got one thing right: the beginning of a perfect burger is the actual burger. If you use high quality ingredients, you don’t need to dress up the burger very much. The cooking process itself brings out the flavor.
We use ground pork for our burgers, because we have plenty of pork, and because it is so incredibly good. We have spent years working to get the perfect balance of protein and fat in our ground pork, to obtain maximum flavor and juiciness, while keeping our pork extraordinarily healthy. You can also mix grass-fed ground beef with pastured ground pork, at a ratio of one to one, for an equally delicious burger with a slightly different flavor.
Why this recipe is incredible: Using this recipe and these ingredients, you can enjoy the best burger of your life within 20 minutes of warming up the pan. This also may be the healthiest burger you ever enjoy. And you can make this burger at home for less than you would pay for it in any restaurant.
One other note: The coup de grace of this burger is our unique substitution for truffle sauce. The most intense and wonderful flavor of the burger is actually left in the pan after you remove the burger. Simply de-glaze the pan with a good red wine, cook out the alcohol, and then drizzle the glaze on the burger. The glaze adds an amazing flavor.
Ingredients (serves 2 half-pound burgers):
one pound pastured ground pork
4 tablespoons Worchestershire sauce
several dashes of hot sauce
a pinch of sea salt and pepper
(optional: good red wine for a thick deglazing sauce)
To prepare: Divide a pound of pastured ground pork in half, roll each half into a ball, and flatten each ball into a patty. Do not overwork the pork, which can toughen it, just press into flat patties. For best results, the patty should be just thick enough to cook all the way through as it crisps in the pan.
Pour a generous tablespoon of Worcestershire over each patty, several dashes of hot sauce, and a good pinch of sea salt and pepper. Place the dressed side down in a pan over medium heat. While the patties are cooking, splash more Worcestershire and hot sauce on the patties, and another pinch of salt and pepper.
Sautee the patties over medium heat until they crisp on bottom, about five to seven minutes, then turn them over in the pan. Continue to saute until the patties are cooked through and slightly crisped on the other side, another five to seven minutes. Remove from pan and let rest on a plate for five minutes before serving.
Deglaze the pan with about one cup of good red wine immediately after removing the burgers. Cook over medium heat while stirring continually for about one to three minutes, until all of the alcohol cooks out. Pour the thick sauce you have made into a bowl and give it a taste–it will be intense and wonderful–then pour as much as you would like directly over the burger. Serve.
We serve our burgers on our homemade bread, and top them with our own pickles, grilled onions and mushrooms, and a little English Coleman’s mustard.
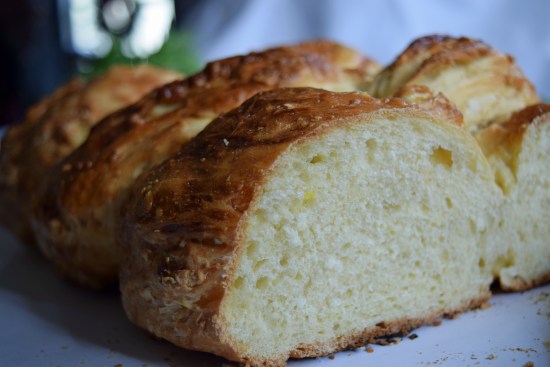
This chicken stock recipe is simple, flexible, and easy to put together. For ingredients, we use the remains of our roast chicken, all the bones, the neck and back, and a variety of vegetables and herbs from our garden. The finished stock is wonderful.
The Secret Weapon
Stock is only as good as its ingredients, and pastured chicken makes excellent stock. However, the secret of the very best stock is chicken feet.
Most people recoil from the idea of throwing gnarly old chicken feet into their stock, and I used to feel the same way. For the longest time, after processing chickens, I saved the chicken feet as a treat for our farm dog. Bando loves chicken feet.
However, several of our customers began to request the feet of their chicken to use for stock. I knew these folks to be really good cooks, so I tried it myself. Now the dog gets no chicken feet, and the stock gets all the feet. Sometimes we make stock out of only chicken feet, and it is excellent.
Left-Over Produce
Making your own stock allows you to control the flavors. We met a wonderful chef in Mombasa who took all the vegetables and herbs in the kitchen that were past their prime and added them to her amazing stock. She said the wider variety of vegetables she added, the more complex the taste of the stock.
The ingredients in our stock recipe are merely a guideline; please feel free to experiment with your stock based on the ingredients you have at hand. We have added every type of left-over veggies and herbs to our stock, from corn on the cob (cob and all) to carrots, and anything else that grows in our gardens. After we strain the veggies from the stock, we place them in the compost bin. But first, we distill from them every last bit of flavor and nutrition.
The Right Concentration of Stock
Your finished stock should be considered “stock concentrate”, and may require a little thinning with water. Grocery store stock, what most of us are used to, is pretty thin. Your homemade stock will be much more robust and intense—one cup of your stock will be worth about three cups or more of grocery store stock.
Thin your stock with water to your desired level of intensity; maybe one cup stock plus two cups water. We use the sight method (clarity of the stock in a jar) and the taste method (sampling with a spoon). Try to not eat all the stock during your sampling, as I learned the hard way.
Ingredients:
Skin and bones left over from a roast pastured chicken
2 chicken feet
2 medium-sized onions, peeled and quartered
4 whole garlic cloves, peeled
3 whole carrots, peeled
4 celery stalks, cut in half
Various veggies bordering on ruin (we used corn, sweet potatoes, and squash)
2 whole bay leaves
Herb bouquet we used thyme, parsley, and dill; sage and tarragon also pair well with poultry
Peppercorns
Salt
To prepare: Place ingredients in a crock pot and submerge completely in water. Cook on the low setting of your electric crock pot with the lid on for 8 hours. Or, place ingredients in a cast iron pot, submerge completely in water, and cook in oven with the lid on for 8 hours at 200 degrees. You may have to add a cup or two of water due to evaporation while cooking.
Many chicken stock recipes call for removing the thin layer of fat that congeals at the top of the stock after it cools. If you use a grocery store chicken, you should remove the fat. With this recipe, however, there will be a very small amount of fat (if any) because the chicken is pastured. If any fat congeals, it is the good healthy fat you want in your diet. We stir this into the stock and it is great for flavor and health.
Aftter stock cools, strain vegetables, chicken bones and feet, and herbs, and pour liquid into an airtight container (we like mason jars). Thin with water to desired level of concentration. Freeze for up to 2 months, or use immediately. If you freeze the stock in jars, leave a little head space so the stock can expand as it freezes.
Nutritional Information
We are not able to provide accurate nutritional information because there are so many variables in this recipe. The amount and type of produce, herbs, and chicken parts will vary widely, and also the final concentration of stock will vary according to taste.
Good chicken stock is as healthy as its ingredients. When we make stock from the chicken and vegetables and herbs we grow on our farm, we know there are only good things in it, and we feel free to use as much of it as we like.
By using chicken feet, your stock will be much richer in collagen, calcium, glucosamine chondroiten, and other essential minerals. The health benefits of adding chicken feet to the stock are as great as the taste benefits.
More about Chicken Stock:
A good stock adds richness, depth, and flavor to the dish. However, a mediocre stock can diminish, rather than enhance, your dish. If you are going to the trouble to prepare an excellent meal, it’s worth it to have a good stock on hand.
The supposed benefit of grocery store chicken stock is that it is easy and inexpensive. The negatives of grocery store stock are the taste and health properties. You will never find a stock in the store as good as what you make in your own kitchen.
To that end, the stock you make in your kitchen will definitely be cheaper than grocery store stock, because you are using items already at hand. Even better, you can use chicken parts and produce that would otherwise be thrown out, and get a lot of value from them first. And it takes about the same amount of time to prepare your own stock as it does to wheel the cart down the grocery store aisle and reach for a container of stock (not counting the overnight simmering—but hey, the crock pot didn’t have anything better to do).
Good chicken feet can be hard to find. The best way to get a good supply of feet is to call your local farmer and reserve them. Ethnic grocery stores or markets sometimes carry them.
When you get the feet, you can throw them into the stock exactly as they are. You do not need to remove the outer skin from the feet, or cut off the toe nails. One of our wonderful customers told me she clips the nails of the chicken feet, so they appear more aesthetic in the cook pot. But there is no need to pedicure your chicken feet, just throw them in the pot and put on the lid.
Prep Time: 5 minutes. Cooking Time: 25 to 30 minutes.
The perfect pork chop begins long before you fire up the grill. Fortunately, your local farmer will do most of the work for you. Once you get this chop into your kitchen, cooking it to perfection is gloriously simple.
For this recipe, we recommend using a pork chop from a heritage breed porker raised in a pastured program. The chop should be dry aged and thick cut. For details about what goes into this chop, click here.
You do not need to marinate a good pastured chop, and we do not recommend a sauce or dressing with this recipe. This chop will be very moist and tender, and the natural flavor is so good that a dressing or marinade will more likely diminish, rather than help, the taste.
Ingredients:
pastured pork chop (cut 1 ½ inches thick)
extra virgin olive oil
salt and pepper to taste
To prepare: Follow your normal procedure to pre-heat your gas or charcoal grill. Clean the grill grate. On the grill, turn at least one burner to high heat. For a charcoal grill, place the coals under the grill on one side of the pit.
Let the pork chops stand at room temperature for 30 minutes. Brush the pork chops liberally on both sides with extra-virgin olive oil. Salt and pepper the chops to taste when ready to place on the grill.
Place the pork chops on the grill over direct heat with the grill lid open for up to, but no more than, 2 minutes on each side. The direct heat sears the chops, locks in the juices, and starts the internal cooking process. The grill temperature should rise to 600 or 700 degrees during this period. Ideally, the fire will flame up around the chops as the olive oil burns off and sears the chops.
Move the chops to indirect heat and close the grill lid. Let the pork chop continue to cook for another 20 minutes. The grill temperature should be maintained at around 400 degrees during this time. When a meat thermometer inserted into the chop shows 140 degrees, remove from grill. Let the chop stand at room temperature for at least 5 minutes. Serve.
Pork Chop over Direct Heat, lid open, 2 mins per side
Pork Chop over indirect heat, lid closed, for 20 mins
Nutritional Information
Serving size (4 oz, or about 1/2 of our thick-cut chops):
Calories: 220 kcal
Fat: 12 g
Saturated Fat: 4 g
Cholesterol: 80 mg
Protein: 28 grams
Pastured pork is an excellent source of protein, thiamin, niacin, selenium, vitamin B6, and phosphorus.
More about Pork Chops
Cooking the chops over very high direct heat is meant to sear the chops and start the internal cooking process. The olive oil helps the chops brown. Do not worry if the fire flames up around the chops for a few seconds.
Do not skip the important step of resting the chop after cooking. The resting process allows the internal juices to redistribute, and makes very tender juicy chops.
We like to grill vegetables with our chops: squash, corn, eggplant, tomatoes, anything coming out of our garden in the spring and summer. However, this pork chop recipe is friendly to just about any side you place next to it.
Eggplant is an excellent side dish at any grilling event. This simple recipe preps and cooks very quickly. All you need is a grill and some really good eggplant.
We serve this dish as a healthy replacement to a starchy side. And this eggplant recipe is the perfect base for an amazing baba ganoush. We grill a few extra eggplants, just to make sure there is plenty left for the baba ganoush!
Getting Good Eggplant
We companion plant our eggplants with root vegetables. The carrots, beets, turnips, and radishes grow into a vibrant living mulch for the eggplant.
And the root vegetables help inform the eggplant with a subtle rich flavor. We side dress the garden rows with a custom-blended fertilizer just as the eggplants begin to set fruit, to help intensify this flavor.
With really good eggplant, a simple grilling is all that’s needed to bring out the wonderful natural flavor.
Ingredients:
2 medium eggplants
extra virgin olive oil
salt and pepper to taste
To prepare: Follow your normal procedure to preheat your gas or charcoal grill. Clean the grill grate. On the grill, turn at least one burner to high heat. For a charcoal grill, place the coals under the grill on one side of the pit.
Cut the eggplant in half length-wise. Generously brush all surfaces of eggplant with extra-virgin olive oil. Salt and pepper to taste. (Note: Do not salt until you are ready to place on the grill.)
Place the eggplant over high heat with the grill lid closed for about one minute on each side—until there are good grill marks and the outside surfaces are seared. Move the eggplant to indirect heat for another 15 to 20 minutes. The eggplant will decrease in size by up to 20% as the moisture cooks out. Remove from grill and serve immediately.
Nutritional Information (per serving)
Calories: 185 kcal
Protein: 2.78 grams
Fat: 13.9 grams
Carbohydrates: 15.62 grams
Fiber: 9.3 grams
Eggplant is high in antioxidants called anthocyanins and phenolic acids. Anthocyanins are powerful antioxidants that have been found to be protective of neural cell membranes. Phenols have been found to be antimutagenic (cancer preventing) and can reduce LDL cholesterol.
More about grilled eggplant: The seeds of an eggplant contain alkaloids which can cause a bitter taste. Older, larger eggplants have more seeds, and can be potentially more bitter. But do not try to remove the seeds; the bitter taste is in the moisture of the eggplant. To make sure there is no bitter taste, simply cook the eggplant until the moisture has evaporated. Your eggplant will decrease in size by up to 20% as the moisture evaporates.
Some recipes recommend eliminating the bitter taste by cutting the eggplant, placing it in a colander over a plate, salting it well, and letting it sit for about 20 minutes. The salt expels the moisture onto the plate. We do not recommend sweating an eggplant in this method, not only to save time, but also because the grill will expel the moisture for you without completely drying out the eggplant, or getting it too salty.
Eggplant is wonderful in the garden. It is fairly easy to grow, and is a low energy consumption plant. The leaves and stems are good for compost. As part of our heritage farming techniques, we put animals into the garden as soon as the harvest ends, and the eggplant leaves and stems (and the fruit still on the plants) sustain our animals as they cleanse the soil and fertilize the garden.